Asus P5W User Manual - Page 185
Cross-RAID Configuration: Creating a RAID 10 set - dh bios setup
 |
View all Asus P5W manuals
Add to My Manuals
Save this manual to your list of manuals |
Page 185 highlights
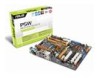
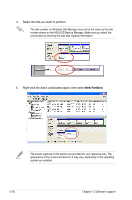
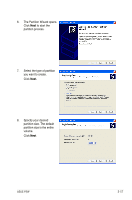
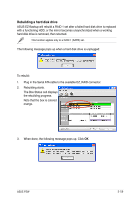
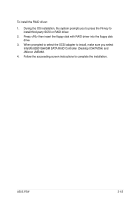
5.4.5 Cross-RAID Configuration: Creating a RAID 10 set with ASUS EZ-Backup and Intel ICH7R® A RAID 10 set requires four HDDs. The onboard RAID controller on the Intel® ICH7R Southbridge, however, controlls only three Serial ATA connectors. To build a RAID 10 set, you need to cross-configure Intel® ICH7R with Silicon Image®, which controls the EZ_RAID connectors for the EZ-Backup feature. Refer to the succeeding sections to build a RAID 10 set. Hardware setup 1. Install one Serial ATA HDD on the motherboard connector labeled EZ_RAID1. 2. Install three Serial HDDs on the motherboard connectors labled SATA1, SATA3, and SATA4. EZ Backup jumper setting and BIOS configuration For information on EZ-Backup jumper setting and BIOS configuration, see section "5.4.4 Silicon Image RAID configuration." 1. After installing the Serial ATA hard disks, set the jumper setting to the default RAID 1 mode. 2. Turn the system on, and enter the BIOS setup during POST. Go to Advanced menu > DH Feature page. Set the EZ Backup RAID Mode Change item to Enabled (if the jumper setting has been changed). 3. Press to save and exit. The system will restart. ASUS P5W 5-61
-
 1
1 -
2
-
3
-
4
-
5
-
6
-
7
-
8
-
9
-
10
-
11
-
12
-
13
-
14
-
15
-
16
-
17
-
18
-
19
-
20
-
21
-
22
-
23
-
24
-
25
-
26
-
27
-
28
-
29
-
30
-
31
-
32
-
33
-
34
-
35
-
36
-
37
-
38
-
39
-
40
-
41
-
42
-
43
-
44
-
45
-
46
-
47
-
48
-
49
-
50
-
51
-
52
-
53
-
54
-
55
-
56
-
57
-
58
-
59
-
60
-
61
-
62
-
63
-
64
-
65
-
66
-
67
-
68
-
69
-
70
-
71
-
72
-
73
-
74
-
75
-
76
-
77
-
78
-
79
-
80
-
81
-
82
-
83
-
84
-
85
-
86
-
87
-
88
-
89
-
90
-
91
-
92
-
93
-
94
-
95
-
96
-
97
-
98
-
99
-
100
-
101
-
102
-
103
-
104
-
105
-
106
-
107
-
108
-
109
-
110
-
111
-
112
-
113
-
114
-
115
-
116
-
117
-
118
-
119
-
120
-
121
-
122
-
123
-
124
-
125
-
126
-
127
-
128
-
129
-
130
-
131
-
132
-
133
-
134
-
135
-
136
-
137
-
138
-
139
-
140
-
141
-
142
-
143
-
144
-
145
-
146
-
147
-
148
-
149
-
150
-
151
-
152
-
153
-
154
-
155
-
156
-
157
-
158
-
159
-
160
-
161
-
162
-
163
-
164
-
165
-
166
-
167
-
168
-
169
-
170
-
171
-
172
-
173
-
174
-
175
-
176
-
177
-
178
-
179
-
 180
180 -
 181
181 -
 182
182 -
 183
183 -
 184
184 -
 185
185 -
 186
186 -
 187
187 -
 188
188 -
 189
189 -
 190
190 -
191
-
192
-
193
-
194
-
195
-
196
-
197
-
198
-
199
-
200
-
201
-
202
-
203
-
204
-
205
-
206
-
207
-
208
-
209
-
210
 |
 |
