Belkin F6D3000 F6D3000 Manual - Page 22
Setting up Wireless Network Profiles
 |
View all Belkin F6D3000 manuals
Add to My Manuals
Save this manual to your list of manuals |
Page 22 highlights
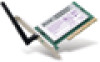
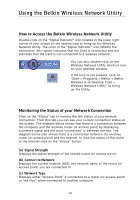
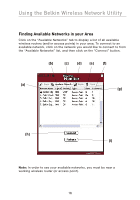
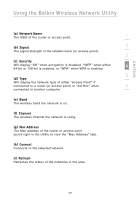
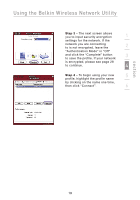
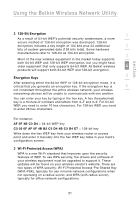
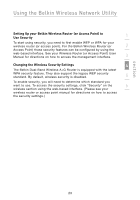
Using the Belkin Wireless Network Utility Setting up Wireless Network Profiles Using Profiles allows you to save configurations for different wireless networks, for instance at home or at work without having to reconfigure your connection each time you connect. This allows you to quickly change from one profile to another profile without having to remember the particular settings of a certain network. Step 1 - To create a new wireless network profile, click on the "Profiles" tab. Click "Add" to open the new profile screen. Type in a name for the profile. You should pick something easy to remember like "Work" for your work network or "Home" for your home network. Click "Next" to continue. Step 2 - The next screen you will see (a) allows you to type in the name of the network you will be connecting to, the (b) type of network it is, and optionally, (c) you can set the data rate for that network. After making the selections, click "Next" to continue. (a) Network Name The exact name of the network you will be connecting to. The "Network Name" is the same as the network SSID. (b) Network Type Select either "Access Point", if it is a network with a wireless router (or access point), or "Peer-to-Peer" if this is a direct connection to another computer. (c) Transfer Rate "Automatic" is the suggested "Transfer Rate" unless there is a specific need to change this setting. 18
-
 1
1 -
2
-
3
-
4
-
5
-
6
-
7
-
8
-
9
-
10
-
11
-
12
-
13
-
14
-
15
-
16
-
 17
17 -
 18
18 -
 19
19 -
 20
20 -
 21
21 -
 22
22 -
 23
23 -
 24
24 -
 25
25 -
 26
26 -
 27
27 -
28
-
29
-
30
-
31
-
32
-
33
-
34
-
35
-
36
-
37
-
38
-
39
-
40
-
41
-
42
-
43
-
44
-
45
-
46
-
47
-
48
-
49
 |
 |