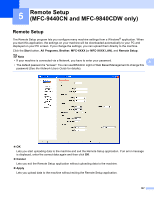
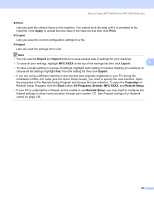
Brother International 9840CDW Software Users Manual - English - Page 112
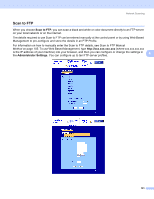
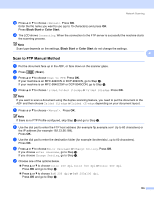
Scan to FTP Manual Method
 |
UPC - 012502618744
View all Brother International 9840CDW manuals
Add to My Manuals
Save this manual to your list of manuals |
Page 112 highlights
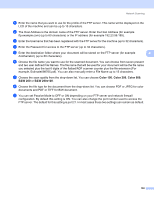
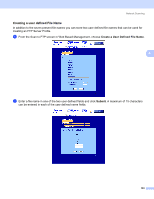
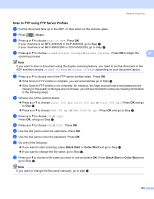
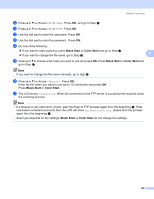
Network Scanning m Press a or b to choose . Press OK. Enter the file name you want to use (up to 15 characters) and press OK. Press Black Start or Color Start. n The LCD shows Connecting. When the connection to the FTP server is successful the machine starts the scanning process. Note Scan type depends on the settings, Black Start or Color Start do not change the settings. Scan to FTP Manual Method 4 4 a Put the document face up in the ADF, or face down on the scanner glass. b Press (Scan). c Press a or b to choose Scan to FTP. Press OK. If your machine is an MFC-9440CN or DCP-9040CN, go to Step e. If your machine is an MFC-9840CDW or DCP-9045CDN, go to Step d. d Press a or b to choose 1sided, 2sided (L)edge or 2sided (S)edge. Press OK. Note If you want to scan a document using the duplex scanning feature, you need to put the document in the ADF and then choose 2sided (L)edge or 2sided (S)edge depending on your document layout. e Press a or b to choose . Press OK. Note If there is no FTP Profile configured, skip Step e and go to Step f. f Use the dial pad to enter the FTP host address (for example ftp.example.com' Up to 60 characters) or the IP address (for example 192.23.56.189). Press OK. g Use the dial pad to enter the destination folder (for example /brother/abc/, up to 60 characters). Press OK. h Press a or b to choose Enter Username or Change Setting. Press OK. If you choose Enter Username, go to Step l. If you choose Change Setting, go to Step i. i Choose one of the options below. „ Press a or b to choose Color 150 dpi, Color 300 dpi or Color 600 dpi. Press OK and go to Step j. „ Press a or b to choose B&W 200 dpi or B&W 200x100 dpi. Press OK and go to Step k. 105
-
 1
1 -
2
-
3
-
4
-
5
-
6
-
7
-
8
-
9
-
10
-
11
-
12
-
13
-
14
-
15
-
16
-
17
-
18
-
19
-
20
-
21
-
22
-
23
-
24
-
25
-
26
-
27
-
28
-
29
-
30
-
31
-
32
-
33
-
34
-
35
-
36
-
37
-
38
-
39
-
40
-
41
-
42
-
43
-
44
-
45
-
46
-
47
-
48
-
49
-
50
-
51
-
52
-
53
-
54
-
55
-
56
-
57
-
58
-
59
-
60
-
61
-
62
-
63
-
64
-
65
-
66
-
67
-
68
-
69
-
70
-
71
-
72
-
73
-
74
-
75
-
76
-
77
-
78
-
79
-
80
-
81
-
82
-
83
-
84
-
85
-
86
-
87
-
88
-
89
-
90
-
91
-
92
-
93
-
94
-
95
-
96
-
97
-
98
-
99
-
100
-
101
-
102
-
103
-
104
-
105
-
106
-
 107
107 -
 108
108 -
 109
109 -
 110
110 -
 111
111 -
 112
112 -
 113
113 -
 114
114 -
 115
115 -
 116
116 -
 117
117 -
118
-
119
-
120
-
121
-
122
-
123
-
124
-
125
-
126
-
127
-
128
-
129
-
130
-
131
-
132
-
133
-
134
-
135
-
136
-
137
-
138
-
139
-
140
-
141
-
142
-
143
-
144
-
145
-
146
-
147
-
148
-
149
-
150
-
151
-
152
-
153
-
154
-
155
-
156
-
157
-
158
-
159
-
160
-
161
-
162
-
163
-
164
-
165
-
166
-
167
-
168
-
169
-
170
-
171
-
172
-
173
-
174
-
175
-
176
-
177
-
178
-
179
-
180
-
181
-
182
-
183
-
184
-
185
-
186
-
187
-
188
-
189
-
190
-
191
-
192
-
193
-
194
-
195
-
196
-
197
-
198
-
199
-
200
-
201
-
202
-
203
-
204
-
205
-
206
-
207
-
208
-
209
-
210
-
211
-
212
-
213
-
214
-
215
-
216
-
217
 |
 |
