Brother International 9840CDW Software Users Manual - English - Page 177
Scan to E-mail
 |
UPC - 012502618744
View all Brother International 9840CDW manuals
Add to My Manuals
Save this manual to your list of manuals |
Page 177 highlights
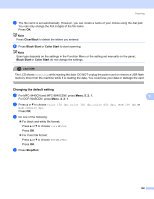
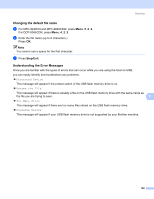
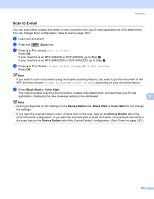
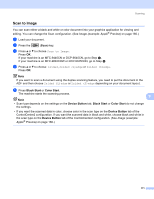
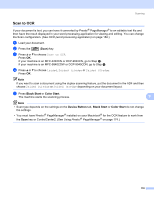
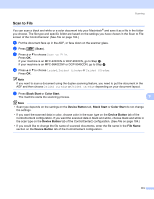
Scanning Scan to E-mail 9 You can scan either a black and white or color document into your E-mail application as a file attachment. You can change Scan configuration. (See E-mail on page 183.) a Load your document. b Press the (Scan) key. c Press a or b to choose Scan to E-mail. Press OK. If your machine is an MFC-9440CN or DCP-9040CN, go to Step e. If your machine is an MFC-9840CDW or DCP-9045CDN, go to Step d. d Press a or b to choose 1sided, 2sided (L)edge or 2sided (S)edge. Press OK. Note If you want to scan a document using the duplex scanning feature, you need to put the document in the ADF and then choose 2sided (L)edge or 2sided (S)edge depending on your document layout. e Press Black Start or Color Start. The machine starts scanning the document, creates a file attachment, and launches your E-mail application, displaying the new message waiting to be addressed. 9 Note • Scan type depends on the settings on the Device Button tab, Black Start or Color Start do not change the settings. • If you want the scanned data in color, choose color in the scan type on the Device Button tab of the ControlCenter2 configuration. If you want the scanned data in black and white, choose black and white in the scan type on the Device Button tab of the ControlCenter2 configuration. (See E-mail on page 183.) 170
-
 1
1 -
2
-
3
-
4
-
5
-
6
-
7
-
8
-
9
-
10
-
11
-
12
-
13
-
14
-
15
-
16
-
17
-
18
-
19
-
20
-
21
-
22
-
23
-
24
-
25
-
26
-
27
-
28
-
29
-
30
-
31
-
32
-
33
-
34
-
35
-
36
-
37
-
38
-
39
-
40
-
41
-
42
-
43
-
44
-
45
-
46
-
47
-
48
-
49
-
50
-
51
-
52
-
53
-
54
-
55
-
56
-
57
-
58
-
59
-
60
-
61
-
62
-
63
-
64
-
65
-
66
-
67
-
68
-
69
-
70
-
71
-
72
-
73
-
74
-
75
-
76
-
77
-
78
-
79
-
80
-
81
-
82
-
83
-
84
-
85
-
86
-
87
-
88
-
89
-
90
-
91
-
92
-
93
-
94
-
95
-
96
-
97
-
98
-
99
-
100
-
101
-
102
-
103
-
104
-
105
-
106
-
107
-
108
-
109
-
110
-
111
-
112
-
113
-
114
-
115
-
116
-
117
-
118
-
119
-
120
-
121
-
122
-
123
-
124
-
125
-
126
-
127
-
128
-
129
-
130
-
131
-
132
-
133
-
134
-
135
-
136
-
137
-
138
-
139
-
140
-
141
-
142
-
143
-
144
-
145
-
146
-
147
-
148
-
149
-
150
-
151
-
152
-
153
-
154
-
155
-
156
-
157
-
158
-
159
-
160
-
161
-
162
-
163
-
164
-
165
-
166
-
167
-
168
-
169
-
170
-
171
-
 172
172 -
 173
173 -
 174
174 -
 175
175 -
 176
176 -
 177
177 -
 178
178 -
 179
179 -
 180
180 -
 181
181 -
 182
182 -
183
-
184
-
185
-
186
-
187
-
188
-
189
-
190
-
191
-
192
-
193
-
194
-
195
-
196
-
197
-
198
-
199
-
200
-
201
-
202
-
203
-
204
-
205
-
206
-
207
-
208
-
209
-
210
-
211
-
212
-
213
-
214
-
215
-
216
-
217
 |
 |
