Brother International MFC 8670DN Quick Setup Guide - English - Page 24
For Network Interface Cable Users (For Windows® 98/98SE/Me/NT/2000 Professional/XP/XP Professional
 |
UPC - 012502620686
View all Brother International MFC 8670DN manuals
Add to My Manuals
Save this manual to your list of manuals |
Page 24 highlights
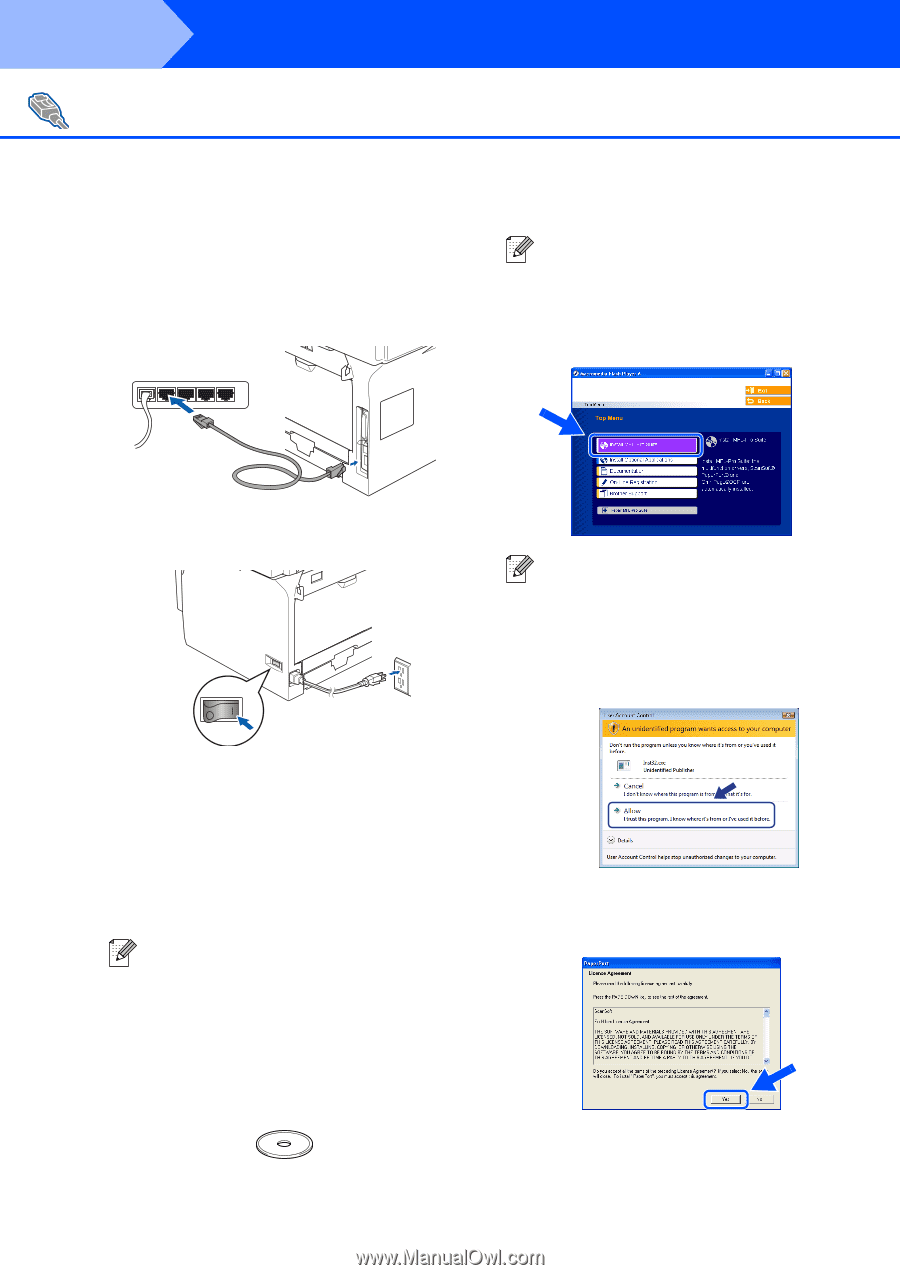
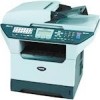
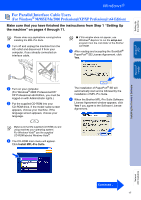
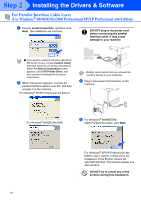
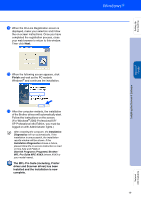
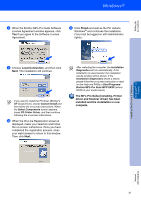
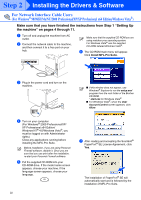
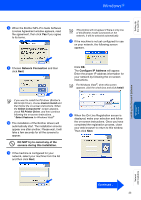
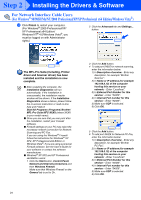
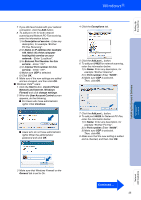
Step 2 Installing the Drivers & Software For Network Interface Cable Users (For Windows® 98/98SE/Me/NT/2000 Professional/XP/XP Professional x64 Edition/Windows Vista®) Make sure that you have finished the instructions from Step 1 "Setting Up the machine" on pages 4 through 11. 1 Turn off and unplug the machine from AC outlet. 2 Connect the network cable to the machine, and then connect it to a free port on your hub. Make sure that the supplied CD-ROM you are using matches your operating system. For Windows Vista® use the supplied CD-ROM labeled Windows Vista®. 6 The CD-ROM main menu will appear. Click Install MFL-Pro Suite. 3 Plug in the power cord and turn on the machine. ■ If this window does not appear, use Windows® Explorer to run the setup.exe* program from the root folder of the Brother CD-ROM. * start.exe for Windows Vista® ■ For Windows Vista®, when the User Account Control screen appears, click Allow. 4 Turn on your computer. (For Windows® 2000 Professional/XP/ XP Professional x64 Edition/ Windows NT® 4.0/Windows Vista®, you must be logged on with Administrator rights.) Close any applications running before installing the MFC-Pro Suite. Before installation, if you are using Personal Firewall software, disable it. Once you are sure that you can print after the installation, re-start your Personal Firewall software. 5 Put the supplied CD-ROM into your CD-ROM drive. If the model name screen appears, choose your machine. If the language screen appears, choose your language. 22 7 After reading and accepting the ScanSoft® PaperPort® SE License Agreement, click Yes. The installation of PaperPort® SE will automatically start and is followed by the installation of MFL-Pro Suite.
-
 1
1 -
2
-
3
-
4
-
5
-
6
-
7
-
8
-
9
-
10
-
11
-
12
-
13
-
14
-
15
-
16
-
17
-
18
-
 19
19 -
 20
20 -
 21
21 -
 22
22 -
 23
23 -
 24
24 -
 25
25 -
 26
26 -
 27
27 -
 28
28 -
 29
29 -
30
-
31
-
32
-
33
-
34
-
35
-
36
-
37
-
38
-
39
-
40
-
41
-
42
-
43
-
44
-
45
-
46
-
47
-
48
 |
 |