Brother International MFC 9420CN Quick Setup Guide - English - Page 25
The MFL-Pro Suite, Network Printer, Network Connection - printer drivers
 |
UPC - 012502614074
View all Brother International MFC 9420CN manuals
Add to My Manuals
Save this manual to your list of manuals |
Page 25 highlights
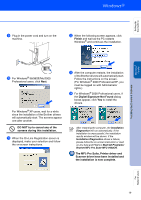
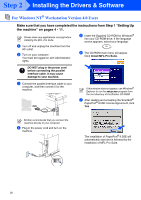
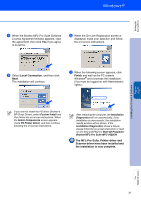
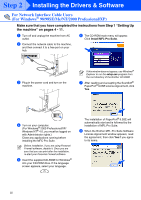
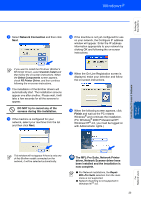
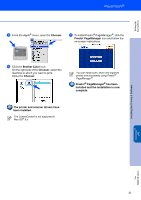
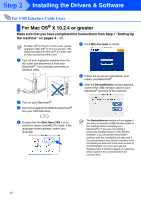
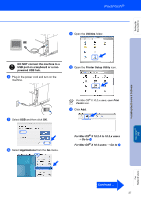
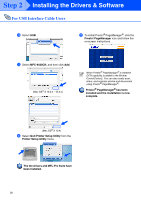
Setting Up the machine 9 Select Network Connection and then click Next. B If the machine is not yet configured for use on your network, the Configure IP address window will appear. Enter the IP address information appropriate to your network by clicking OK and following the on-screen instructions. If you want to install the PS driver (Brother's BR-Script Driver), select Custom Install and then follow the on-screen instructions. When the Select Components screen appears, check PS Printer Driver, and then continue following the on-screen instructions. 0 The installation of the Brother drivers will automatically start. The installation screens appear one after another. Please wait, it will take a few seconds for all the screens to appear. DO NOT try to cancel any of the screens during this installation. A If the machine is configured for your network, select your machine from the list and then click Next. C When the On-Line Registration screen is displayed, make your selection and follow the on-screen instructions. D When the following screen appears, click Finish and wait as the PC restarts Windows® and continues the installation. (For Windows® 2000 Professional/XP/ Windows NT® 4.0, you must be logged on with Administrator rights.) Installing the Drivers & Software Windows® Network For Network Users This window will not appear if there is only one of this Brother model connected on the network, it will be selected automatically. The MFL-Pro Suite, Network Printer driver, Network Scanner driver have been installed and the installation is now complete. ■ For Network installations, the Repair MFL-Pro Suite selection from the main menu is not supported. ■ Network Scanning is not supported in Windows NT® 4.0. 23
-
 1
1 -
2
-
3
-
4
-
5
-
6
-
7
-
8
-
9
-
10
-
11
-
12
-
13
-
14
-
15
-
16
-
17
-
18
-
19
-
 20
20 -
 21
21 -
 22
22 -
 23
23 -
 24
24 -
 25
25 -
 26
26 -
 27
27 -
 28
28 -
 29
29 -
 30
30 -
31
-
32
-
33
-
34
-
35
-
36
-
37
-
38
-
39
-
40
 |
 |