Brother International MFC 9420CN Quick Setup Guide - English - Page 7
Remove the protective parts of the Fusing Unit - windows 8
 |
UPC - 012502614074
View all Brother International MFC 9420CN manuals
Add to My Manuals
Save this manual to your list of manuals |
Page 7 highlights
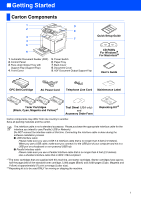
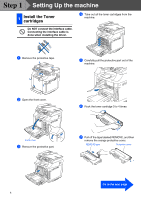
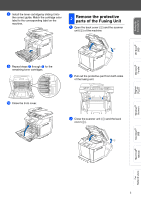
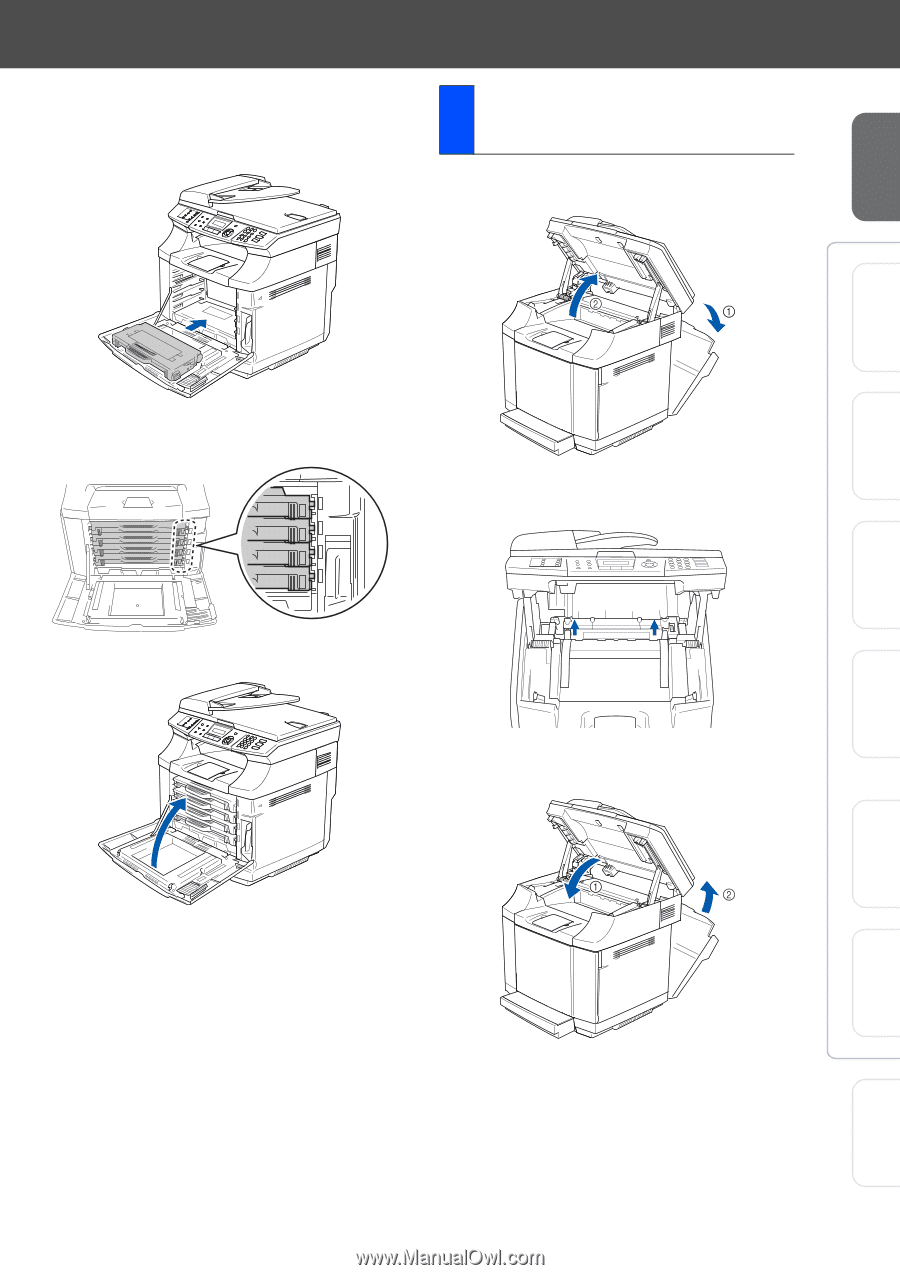
Setting Up the machine Windows® USB Windows® Parallel 8 Install the toner cartridge by sliding it into the correct guide. Match the cartridge color label to the corresponding label on the machine. 2 Remove the protective parts of the Fusing Unit 1 Open the back cover (1) and the scanner unit (2) of the machine. 9 Repeat steps 6 through 8 for the remaining toner cartridges. K K Y Y M M C C 0 Close the front cover. 2 Pull out the protective part from both sides of the fusing unit. 3 Close the scanner unit (1) and the back cover (2). Windows NT® 4.0 Parallel Windows® Network Macintosh® USB Macintosh® Network For Network Users 5
-
 1
1 -
 2
2 -
 3
3 -
 4
4 -
 5
5 -
 6
6 -
 7
7 -
 8
8 -
 9
9 -
 10
10 -
 11
11 -
 12
12 -
13
-
14
-
15
-
16
-
17
-
18
-
19
-
20
-
21
-
22
-
23
-
24
-
25
-
26
-
27
-
28
-
29
-
30
-
31
-
32
-
33
-
34
-
35
-
36
-
37
-
38
-
39
-
40
 |
 |
5
Setting Up
the machine
Windows
®
USB
Windows
®
Parallel
Windows
NT
®
4.0
Parallel
Macintosh
®
USB
Macintosh
®
Network
Windows
®
Network
For
Network Users
8
Install the toner cartridge by sliding it into
the correct guide. Match the cartridge color
label to the corresponding label on the
machine.
9
Repeat steps
6
through
8
for the
remaining toner cartridges.
0
Close the front cover.
1
Open the back cover (
1
) and the scanner
unit (
2
) of the machine.
2
Pull out the protective part from both sides
of the fusing unit.
3
Close the scanner unit (
1
) and the back
cover (
2
).
K
Y
M
C
K
Y
M
C
2
Remove the protective
parts of the Fusing Unit