Brother International MFC-J4410DW Software Users Manual - English - Page 207
Start, to OCR, Save as Shortcut, Options, Set with Touch Panel, f
 |
View all Brother International MFC-J4410DW manuals
Add to My Manuals
Save this manual to your list of manuals |
Page 207 highlights
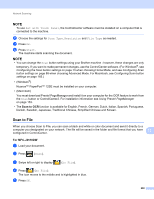
Network Scanning l Press Start. The machine starts scanning the document. NOTE You can change the Scan button settings using your Brother machine - however, these changes are only temporary. If you want to make permanent changes, use the ControlCenter software. (For Windows®, see Configuring the Scan button settings on page 73 when choosing Home Mode, and see Configuring Scan button settings on page 88 when choosing Advanced Mode. For Macintosh, see Configuring Scan button settings on page 165.) Scan to OCR 13 When you choose Scan to OCR, your document will be scanned and sent directly to the computer you designated on your network. The ControlCenter software will launch the Nuance™ PaperPort™ 12SE software or Presto! PageManager and convert your document into text that can be viewed and edited from a word processing application on the designated computer. For MFC-J4510DW 13 a Load your document. b Press (Scan). c Swipe left or right to display (to OCR). d Press (to OCR). The icon moves to the middle and is highlighted in blue. e Press OK. f Swipe up or down, or press a or b to display the computer you want to send to. 13 g Press the computer name. If the LCD prompts you to enter a PIN number, enter the 4-digit PIN number for the computer on the LCD. Press OK. Do one of the following: If you want to use the default settings, go to l. If you want to change the default settings, go to h. NOTE If you want to save the computer as a shortcut, press Save as Shortcut. h Press Options. i Press Set with Touch Panel. Press On. 199
-
 1
1 -
2
-
3
-
4
-
5
-
6
-
7
-
8
-
9
-
10
-
11
-
12
-
13
-
14
-
15
-
16
-
17
-
18
-
19
-
20
-
21
-
22
-
23
-
24
-
25
-
26
-
27
-
28
-
29
-
30
-
31
-
32
-
33
-
34
-
35
-
36
-
37
-
38
-
39
-
40
-
41
-
42
-
43
-
44
-
45
-
46
-
47
-
48
-
49
-
50
-
51
-
52
-
53
-
54
-
55
-
56
-
57
-
58
-
59
-
60
-
61
-
62
-
63
-
64
-
65
-
66
-
67
-
68
-
69
-
70
-
71
-
72
-
73
-
74
-
75
-
76
-
77
-
78
-
79
-
80
-
81
-
82
-
83
-
84
-
85
-
86
-
87
-
88
-
89
-
90
-
91
-
92
-
93
-
94
-
95
-
96
-
97
-
98
-
99
-
100
-
101
-
102
-
103
-
104
-
105
-
106
-
107
-
108
-
109
-
110
-
111
-
112
-
113
-
114
-
115
-
116
-
117
-
118
-
119
-
120
-
121
-
122
-
123
-
124
-
125
-
126
-
127
-
128
-
129
-
130
-
131
-
132
-
133
-
134
-
135
-
136
-
137
-
138
-
139
-
140
-
141
-
142
-
143
-
144
-
145
-
146
-
147
-
148
-
149
-
150
-
151
-
152
-
153
-
154
-
155
-
156
-
157
-
158
-
159
-
160
-
161
-
162
-
163
-
164
-
165
-
166
-
167
-
168
-
169
-
170
-
171
-
172
-
173
-
174
-
175
-
176
-
177
-
178
-
179
-
180
-
181
-
182
-
183
-
184
-
185
-
186
-
187
-
188
-
189
-
190
-
191
-
192
-
193
-
194
-
195
-
196
-
197
-
198
-
199
-
200
-
201
-
 202
202 -
 203
203 -
 204
204 -
 205
205 -
 206
206 -
 207
207 -
 208
208 -
 209
209 -
 210
210 -
 211
211 -
 212
212 -
213
-
214
-
215
-
216
-
217
-
218
-
219
-
220
-
221
-
222
 |
 |