Brother International QL-700 Software Users Manual - English - Page 16
Microsoft, Outlook, Creating labels using the Contacts data in Microsoft - windows 8 1
 |
View all Brother International QL-700 manuals
Add to My Manuals
Save this manual to your list of manuals |
Page 16 highlights
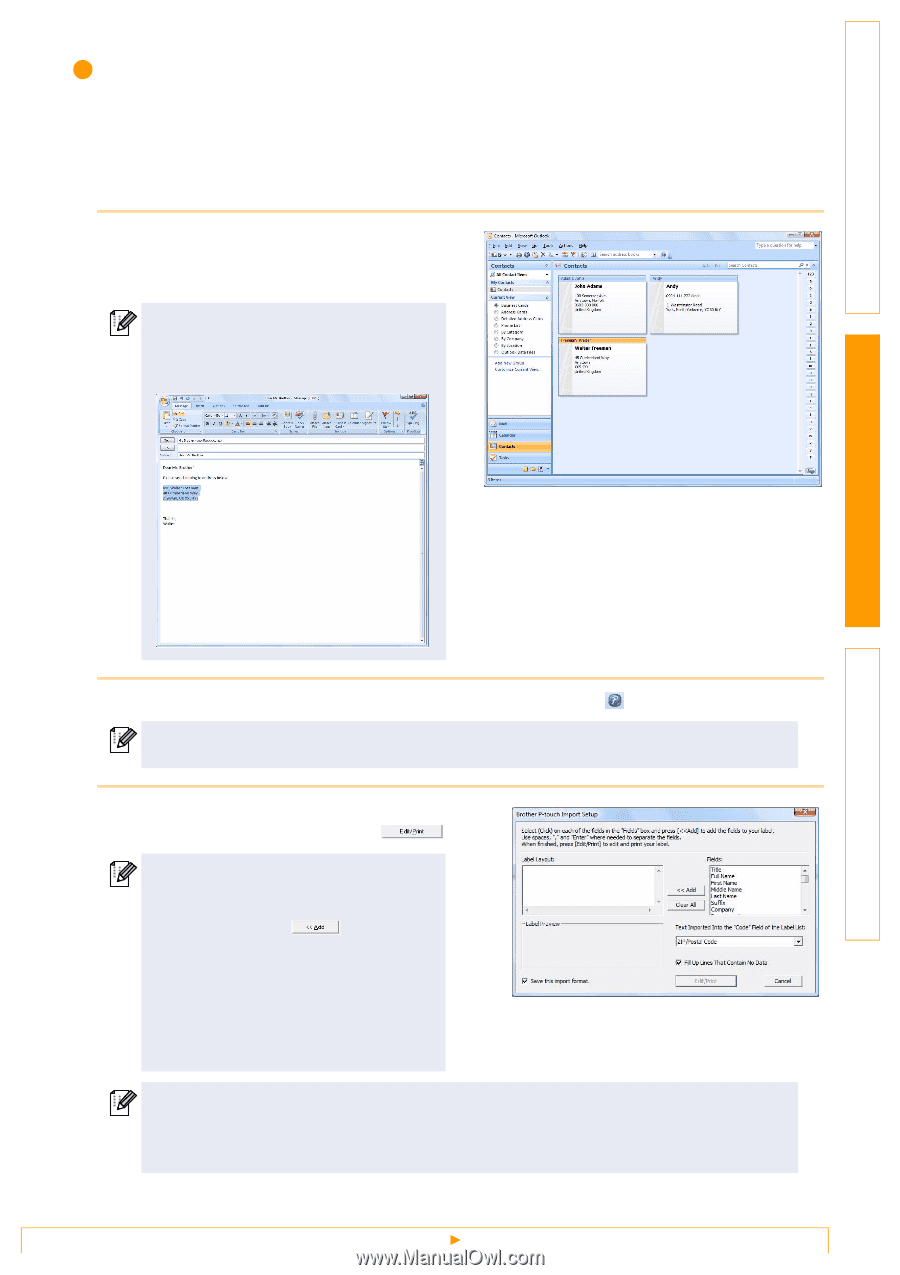
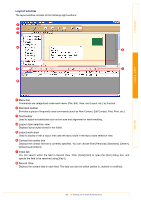
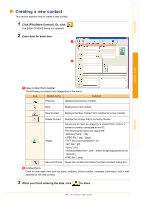
Introduction Microsoft® Outlook® With the Add-In function, you can directly copy the text in Microsoft® Outlook® to a label layout. Items you can import are: Contacts, Calendar items, Deleted Items, Drafts, Inbox, Journal, Notes (text in the Notes dialog box is not available), Outbox, Sent Items and Tasks windows. Creating labels using the Contacts data in Microsoft® Outlook® 1 Open Microsoft® Outlook® Contacts and highlight the contact information you want to include. In Microsoft® Outlook®, you can include not only the Contact data but also the text in a message, as you can do in Microsoft® Word. Creating Labels Appendix 2 On the Microsoft® Outlook® ribbon/standard toolbar, click . For details on how to automatically add the text to the Label List, see "How to add text from Microsoft® Outlook® to the Label List" described on page 16. 3 In [Label Layout], make adjustments to the line feed in the cells and click . [Label Layout] enables you to change the way your text is displayed/printed. When you choose any listed item in the [Fields] box and click , a new field is added to the [Label Layout] box. You can enter spaces, line feeds, commas, and characters for each cell and print them on a label. You can also remove fields in this screen by highlighting the field and pressing the delete key on your keyboard. • For details on how to automatically add the text to the Label List, see "How to add text from Microsoft® Outlook® to the Label List" described on page 16. • If you want to include the data in the Code field of the Label List, choose [Text Imported Into the "Code" Field of the Label List] in the [Brother P-touch Import Setup] dialog box. 15 Creating labels with other applications
-
 1
1 -
2
-
3
-
4
-
5
-
6
-
7
-
8
-
9
-
10
-
 11
11 -
 12
12 -
 13
13 -
 14
14 -
 15
15 -
 16
16 -
 17
17 -
 18
18 -
 19
19 -
 20
20 -
 21
21 -
22
-
23
-
24
-
25
-
26
-
27
-
28
-
29
-
30
-
31
-
32
-
33
-
34
-
35
-
36
-
37
-
38
-
39
-
40
 |
 |