Brother International QL-700 Software Users Manual - English - Page 24
Backing up label templates, Deleting all the printer data - printer labels
 |
View all Brother International QL-700 manuals
Add to My Manuals
Save this manual to your list of manuals |
Page 24 highlights
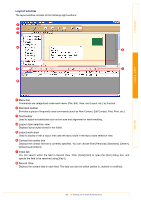
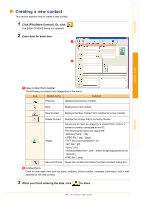
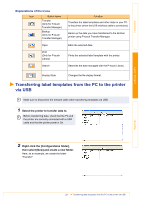
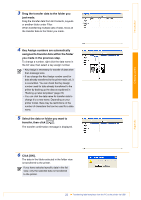
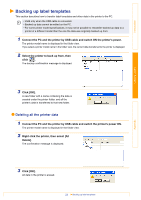
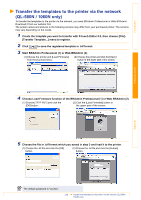
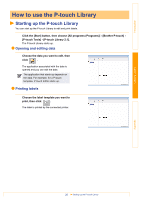
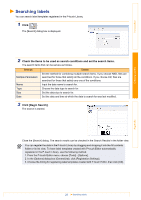
Introduction Backing up label templates This section describes how to transfer label templates and other data in the printer to the PC. • Valid only when the USB cable is connected. • Backed up data cannot be edited on the PC. • For some printer model specifications, it may not be possible to retransfer backed-up data to a printer of a different model than the one the data was originally backed up from. 1 Connect the PC and the printer by USB cable and switch ON the printer's power. The printer model name is displayed in the folder view. If you select a printer model name in the folder view, the current data transferred to the printer is displayed. 2 Select the printer to back up from, then click . The backup confirmation message is displayed. Creating Labels Appendix 3 Click [OK]. A new folder with a name containing the date is created under the printer folder, and all the printer's data is transferred to that new folder. Deleting all the printer data 1 Connect the PC and the printer by USB cable and switch the printer's power ON. The printer model name is displayed in the folder view. 2 Right click the printer, then select [All Delete]. The confirmation message is displayed. 3 Click [OK]. All data in the printer is erased. 23 Backing up label templates
-
 1
1 -
2
-
3
-
4
-
5
-
6
-
7
-
8
-
9
-
10
-
11
-
12
-
13
-
14
-
15
-
16
-
17
-
18
-
 19
19 -
 20
20 -
 21
21 -
 22
22 -
 23
23 -
 24
24 -
 25
25 -
 26
26 -
 27
27 -
 28
28 -
 29
29 -
30
-
31
-
32
-
33
-
34
-
35
-
36
-
37
-
38
-
39
-
40
 |
 |