Brother International QL-700 Software Users Manual - English - Page 30
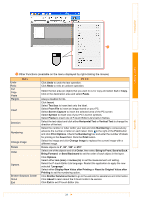
Display New Value after Printing, Reset to Original Value after - not printing
 |
View all Brother International QL-700 manuals
Add to My Manuals
Save this manual to your list of manuals |
Page 30 highlights
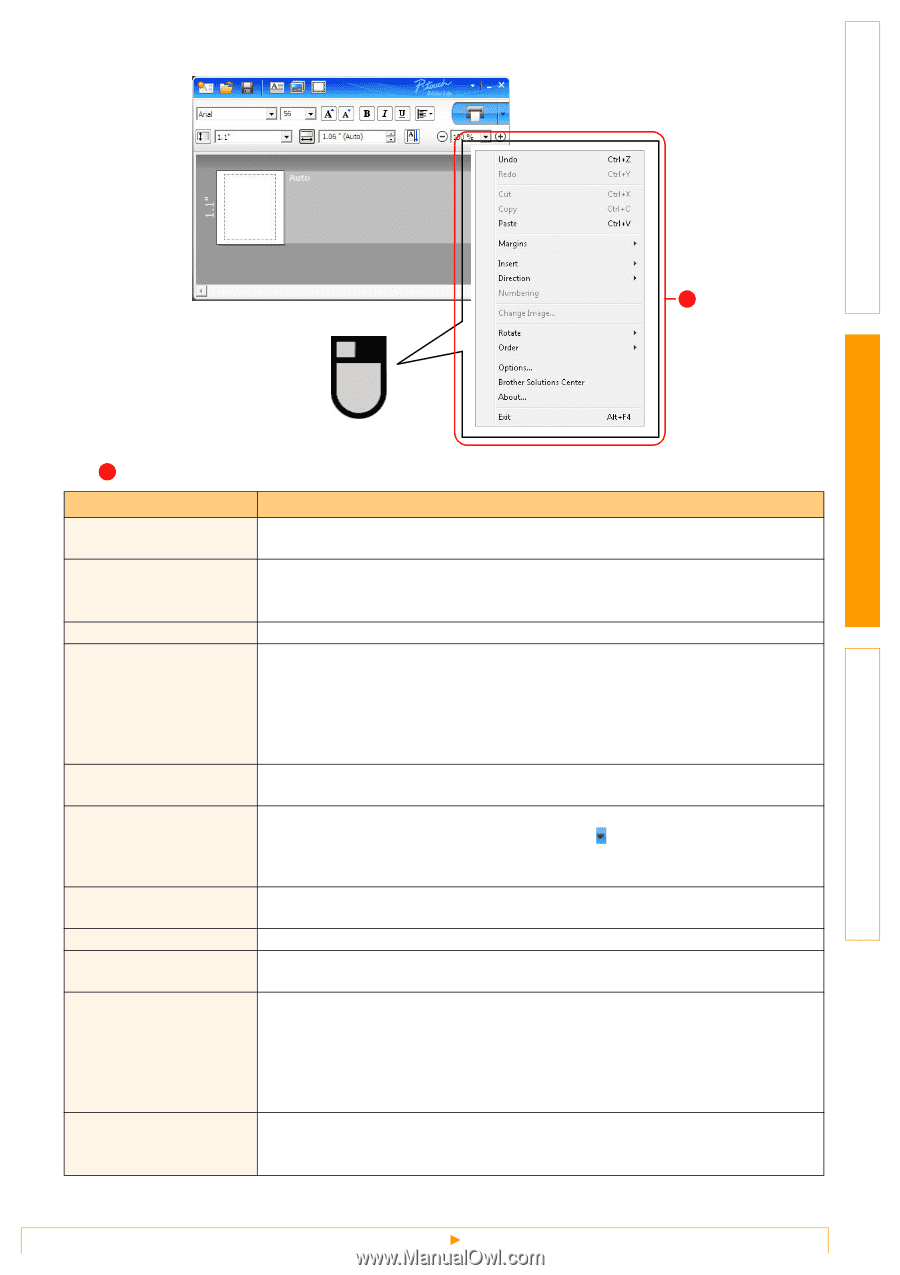
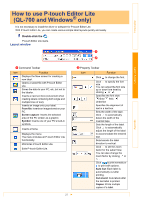
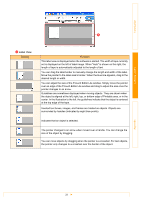
Introduction 4 Creating Labels Appendix 4 Other Functions (available on the menu displayed by right-clicking the mouse) Undo Redo Cut Copy Paste Margins Menu Insert Direction Numbering Change Image Rotate Order Options Brother Solutions Center About Exit Do this Click Undo to undo the last operation. Click Redo to redo an undone operation. Select the text area (or object) that you want to cut or copy and select Cut or Copy. Click in the destination area and select Paste. Always disabled for QL. Click Insert. Select Text box to insert text onto the label. Select From File to insert an image stored on your PC. Select Screen Capture to insert the selected area of the PC screen. Select Symbol to insert one of your PC's built-in symbols. Select Frame to insert one of P-touch Editor Lite's built-in frames. Select the text object and click either Horizontal Text or Vertical Text to change the direction of the text. Select the number or letter within your text and click Numbering to consecutively advance the number or letter on each label. Click to the right of the Print button and click Print Options. Check the Numbering box and enter the number of labels for printing in the Count field. Click the Print button. Select the image and click Change Image to replace the current image with a different image. Rotate objects to 0°, 90°, 180° or 270°. Select one of the objects and click Order, then select Bring to Front, Send to Back, Bring Forward, or Send Backward to set the order of each object in the layer. Click Options. Select either mm (mm) or inches (in) to set the measurement unit setting. Select the P-touch Editor Lite language. Restart the application to apply the new selected "Language". Select either Display New Value after Printing or Reset to Original Value after Printing to set the numbering option. Click Brother Solutions Center to go to the web site for assistance and information. Click About to learn about the P-touch Editor Lite version. Click Exit to exit P-touch Editor Lite. 29
-
 1
1 -
2
-
3
-
4
-
5
-
6
-
7
-
8
-
9
-
10
-
11
-
12
-
13
-
14
-
15
-
16
-
17
-
18
-
19
-
20
-
21
-
22
-
23
-
24
-
 25
25 -
 26
26 -
 27
27 -
 28
28 -
 29
29 -
 30
30 -
 31
31 -
 32
32 -
 33
33 -
 34
34 -
 35
35 -
36
-
37
-
38
-
39
-
40
 |
 |