Canon C83-1004 ImageBrowser_v1x_guide.pdf - Page 72
Converting RAW Images 2/2
 |
UPC - 082966162169
View all Canon C83-1004 manuals
Add to My Manuals
Save this manual to your list of manuals |
Page 72 highlights
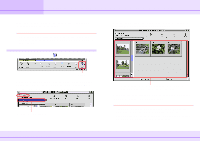
Appendices Converting RAW Images (2/2) How to convert a RAW image (and adjusting image quality) You can convert a RAW image and adjust the image quality, using the following procedure. REFERENCE This image quality adjustment is performed with the original, rich color palette (gradation) preserved. Therefore, you get much better image quality than by converting a RAW image using the simple method and then further processing the image with an image editing program. In the Browser Area, select a RAW image. On the [File] menu, click [Convert RAW Images with User Defined Parameters]. When the following dialog box appears, adjust the image quality and click [OK] to start the conversion. Description of this operation appears here. If you want to adjust the white balance manually, click this button. Then, click the white portion of the image. Preview the full size image. Return to the camera settings used for shooting. Specify the white balance (overall color tone), contrast (between bright and dark spots), sharpness (emphasis of outline) and color saturation. This option is available only if [TIFF 16bit] is selected on the [File Format] tab of the Preferences dialog box. 2. Click this command. 1. Select a RAW image. 72 ImageBrowser Software Guide
-
 1
1 -
2
-
3
-
4
-
5
-
6
-
7
-
8
-
9
-
10
-
11
-
12
-
13
-
14
-
15
-
16
-
17
-
18
-
19
-
20
-
21
-
22
-
23
-
24
-
25
-
26
-
27
-
28
-
29
-
30
-
31
-
32
-
33
-
34
-
35
-
36
-
37
-
38
-
39
-
40
-
41
-
42
-
43
-
44
-
45
-
46
-
47
-
48
-
49
-
50
-
51
-
52
-
53
-
54
-
55
-
56
-
57
-
58
-
59
-
60
-
61
-
62
-
63
-
64
-
65
-
66
-
 67
67 -
 68
68 -
 69
69 -
 70
70 -
 71
71 -
 72
72 -
 73
73 -
 74
74 -
 75
75 -
 76
76 -
 77
77 -
78
-
79
 |
 |
