Canon FS-4 User Guide - Page 38
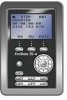
HDD Mode Screen
 |
View all Canon FS-4 manuals
Add to My Manuals
Save this manual to your list of manuals |
Page 38 highlights
Snap (FS-4Pro only) When you select SNAP and press REC, a single frame is grabbed. SNAP can be used with LOCAL and SYNCRO RECORD control modes. If SNAP is the RECORD MODE when you turn off the power or power is interrupted, upon re-boot, the FS-4 will be in NORMAL REC mode. Time Lapse (FS-4Pro only) You can select an interval of up to twenty-four hours. The interval is the period of time between the FS-4 capture of a single frame of video (a value of 00:00:00:00 means no frames will be recorded). Step 1: Press the Right Navigation key from the Record Screen to display the TIME LAPSE screen. Step 2: Step 3: Step 4: Use the Left and Right navigation keys to sequence through HH:MM:SS:FF. Use the Up and Down navigation keys to increment and decrement values. The value is automatically limited to 24 hours. Use BACK to return to the RECORD Screen with the current cursor row set to TIME LAPSE value. The "HH:MM:SS:FF" row is for display only. HDD Mode Screen Value selections on this screen are mutually exclusive. 34
-
 1
1 -
2
-
3
-
4
-
5
-
6
-
7
-
8
-
9
-
10
-
11
-
12
-
13
-
14
-
15
-
16
-
17
-
18
-
19
-
20
-
21
-
22
-
23
-
24
-
25
-
26
-
27
-
28
-
29
-
30
-
31
-
32
-
 33
33 -
 34
34 -
 35
35 -
 36
36 -
 37
37 -
 38
38 -
 39
39 -
 40
40 -
 41
41 -
 42
42 -
 43
43 -
44
-
45
-
46
-
47
-
48
-
49
-
50
-
51
-
52
-
53
-
54
-
55
-
56
-
57
-
58
-
59
-
60
-
61
 |
 |
