Canon MultiPASS MP390 MultiPASS MP390 Software Guide - Page 13
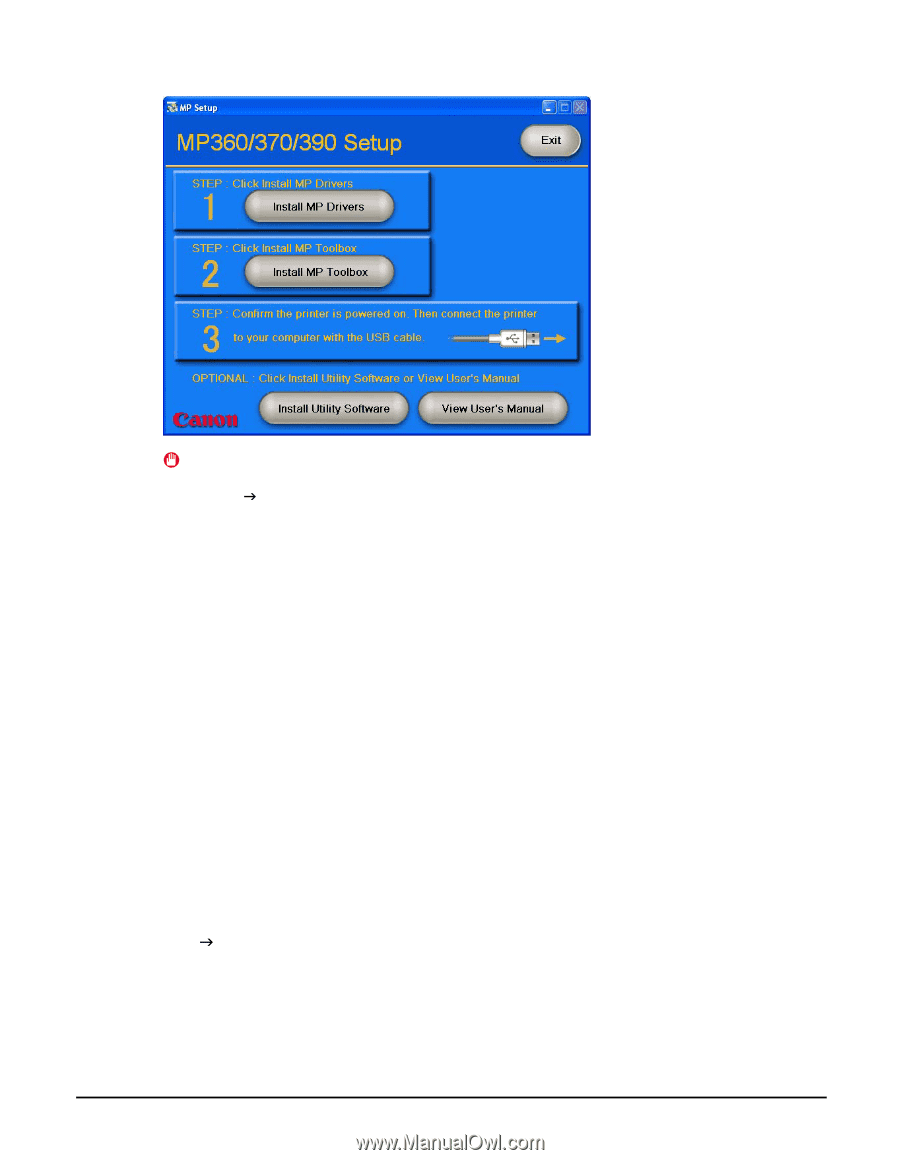
Step 3 Connect the USB cable, Install Utility Software, View User’s Manual
 |
View all Canon MultiPASS MP390 manuals
Add to My Manuals
Save this manual to your list of manuals |
Page 13 highlights
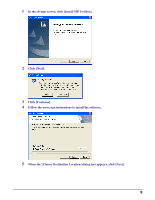
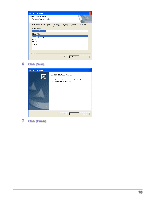
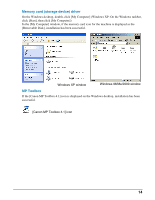
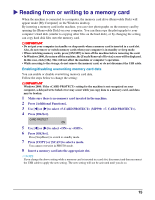
Step 3 Connect the USB cable IMPORTANT If the screen above is not displayed, installation of the MP Drivers or MP Toolbox is not complete. J "Problems installing and uninstalling software" 1 Check that the machine is turned on. 2 Connect the USB cable to the machine and computer USB ports. When you connect the USB cable to the computer, the machine is automatically detected, and the computer performs the various settings. Wait a while as your computer performs the various settings. Depending on your computer, a message may display asking you to restart your computer. If this is the case, restart your computer. After restarting your computer, wait a while for your computer to continue performing the various settings. Install Utility Software To install the Utility Software, in the [Setup] screen, click [Install Utility Software]. You can choose not to install the Utility Software at this stage and install it later. View User's Manual To read the manual on the CD-ROM, click [View User's Manual] on the [Setup] screen. Installation is now complete. In the [Setup] screen, click [Exit] to close the screen. Then remove the CD-ROM from the disk drive. If installation fails before completion Remove the software and reinstall it. J "Removing and reinstalling the software" 11
-
 1
1 -
2
-
3
-
4
-
5
-
6
-
7
-
 8
8 -
 9
9 -
 10
10 -
 11
11 -
 12
12 -
 13
13 -
 14
14 -
 15
15 -
 16
16 -
 17
17 -
 18
18 -
19
-
20
-
21
-
22
-
23
-
24
-
25
-
26
-
27
-
28
-
29
-
30
-
31
-
32
-
33
-
34
-
35
-
36
-
37
-
38
-
39
-
40
-
41
-
42
-
43
-
44
-
45
-
46
-
47
-
48
-
49
-
50
-
51
-
52
-
53
-
54
-
55
-
56
-
57
-
58
-
59
-
60
-
61
-
62
-
63
-
64
-
65
-
66
-
67
-
68
-
69
-
70
-
71
-
72
-
73
-
74
-
75
-
76
-
77
-
78
-
79
-
80
-
81
-
82
-
83
-
84
-
85
-
86
-
87
-
88
-
89
-
90
-
91
-
92
-
93
-
94
-
95
-
96
-
97
-
98
-
99
-
100
-
101
-
102
-
103
-
104
-
105
-
106
-
107
-
108
-
109
-
110
-
111
-
112
-
113
-
114
-
115
-
116
-
117
-
118
-
119
-
120
-
121
-
122
-
123
-
124
-
125
-
126
-
127
-
128
-
129
-
130
-
131
-
132
-
133
-
134
-
135
-
136
-
137
-
138
 |
 |