Canon MultiPASS MP390 MultiPASS MP390 Software Guide - Page 97
Reduce Dust and Scratches], Color Settings], Calibration], Preferences], None], Soft], Normal], Hard]
 |
View all Canon MultiPASS MP390 manuals
Add to My Manuals
Save this manual to your list of manuals |
Page 97 highlights
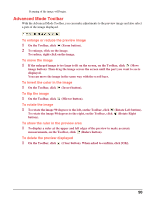
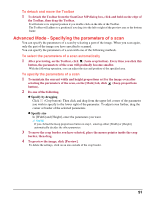
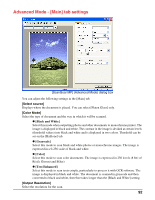
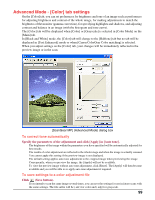
[Reduce Dust and Scratches] Scanned photos may contain white dots caused by dust and scratches. This setting reduces the dust and scratches on photos. Select from [Soft], [Normal] and [Hard]. [None] is selected by default. z [None] For no reduction of dust and scratches. z [Soft] For reducing small dust and scratch marks. With this setting, large dust or scratch marks may remain. z [Normal] Normally this setting is recommended. z [Hard] For reducing large dust and scratch marks but evidence of the reduction process may remain and may also remove delicate parts of the image. IMPORTANT • For scanning printed materials, the [None] setting is recommended. • If [Output Resolution] is set to [600] dpi or less and [Descreen] is selected, you cannot select [Reduce Dust and Scratches]. (If you set [Output Resolution] to [601] dpi or more, the [Descreen] setting will be automatically disabled and you can then set [Reduce Dust and Scratches]. • This setting may not be effective for some types of photos. [Color Settings] Click one of the following. The default setting is [Recommended]. z [Recommended] Vividly reproduces the tone of a document on the screen. It is recommended that you normally select this setting. z [Canon ColorGear Color matching] Select to automatically match the scanner, monitor and color printer colors, thus reducing time and trouble to manually match the monitor and printer colors. This setting is available when [Color] is selected in [Color Mode]. If color matching is selected, the settings on the [Color] tab will not be available (the [Color] tab will disappear). [Calibration] Calibrate the scanner if the colors in the preview image vary from those in the original document. Clicking the [Calibration] button starts the calibration process, which adjusts the scanned image to the proper coloration. IMPORTANT Do not open the document cover while the scanner is calibrating. [Preferences] Click to display the [Preferences] dialog box. You can adjust settings for scanning and previewing. J "Advanced Mode - [Settings 1] tab settings in the [Preferences] dialog box" J "Advanced Mode - [Settings 2] tab settings in the [Preferences] dialog box" 95
-
 1
1 -
2
-
3
-
4
-
5
-
6
-
7
-
8
-
9
-
10
-
11
-
12
-
13
-
14
-
15
-
16
-
17
-
18
-
19
-
20
-
21
-
22
-
23
-
24
-
25
-
26
-
27
-
28
-
29
-
30
-
31
-
32
-
33
-
34
-
35
-
36
-
37
-
38
-
39
-
40
-
41
-
42
-
43
-
44
-
45
-
46
-
47
-
48
-
49
-
50
-
51
-
52
-
53
-
54
-
55
-
56
-
57
-
58
-
59
-
60
-
61
-
62
-
63
-
64
-
65
-
66
-
67
-
68
-
69
-
70
-
71
-
72
-
73
-
74
-
75
-
76
-
77
-
78
-
79
-
80
-
81
-
82
-
83
-
84
-
85
-
86
-
87
-
88
-
89
-
90
-
91
-
 92
92 -
 93
93 -
 94
94 -
 95
95 -
 96
96 -
 97
97 -
 98
98 -
 99
99 -
 100
100 -
 101
101 -
 102
102 -
103
-
104
-
105
-
106
-
107
-
108
-
109
-
110
-
111
-
112
-
113
-
114
-
115
-
116
-
117
-
118
-
119
-
120
-
121
-
122
-
123
-
124
-
125
-
126
-
127
-
128
-
129
-
130
-
131
-
132
-
133
-
134
-
135
-
136
-
137
-
138
 |
 |