Canon MultiPASS MP390 MultiPASS MP390 Software Guide - Page 27
Setting a custom print quality, Color Adjustment], Grayscale Printing], Preview before printing] - parts
 |
View all Canon MultiPASS MP390 manuals
Add to My Manuals
Save this manual to your list of manuals |
Page 27 highlights
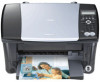
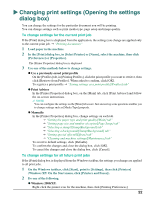
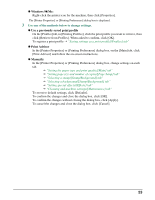
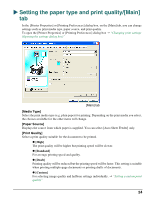
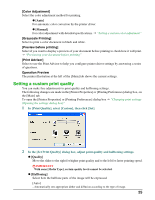
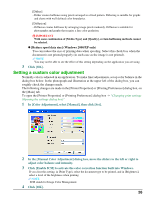
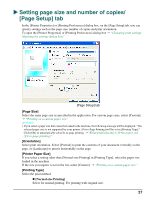
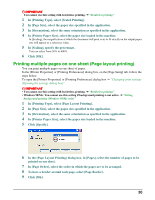
[Color Adjustment] Select the color adjustment method for printing. z [Auto] For automatic color correction by the printer driver. z [Manual] For color adjustment with detailed specifications. J "Setting a custom color adjustment" [Grayscale Printing] Select to print a color document in black and white. [Preview before printing] Select if you want to display a preview of your document before printing to check how it will print. J "Previewing your document before printing" [Print Advisor] Select to use the Print Advisor to help you configure printer driver settings by answering a series of questions. Operation Preview The printer illustration at the left of the [Main] tab shows the current settings. Setting a custom print quality You can make fine adjustments to print quality and halftoning settings. The following changes are made in the [Printer Properties] or [Printing Preferences] dialog box, on the [Main] tab. To open the [Printer Properties] or [Printing Preferences] dialog box J "Changing print settings (Opening the settings dialog box)" 1 In [Print Quality], select [Custom], then click [Set]. 2 In the [Set Print Quality] dialog box, adjust print quality and halftoning settings. z [Quality] Move the slider to the right for higher print quality and to the left for faster printing speed. IMPORTANT With some [Media Type], certain quality levels cannot be selected. z [Halftoning] Select how the halftone parts of the image will be expressed. [Auto] - Automatically sets appropriate dither and diffusion according to the type of image. 25
-
 1
1 -
2
-
3
-
4
-
5
-
6
-
7
-
8
-
9
-
10
-
11
-
12
-
13
-
14
-
15
-
16
-
17
-
18
-
19
-
20
-
21
-
 22
22 -
 23
23 -
 24
24 -
 25
25 -
 26
26 -
 27
27 -
 28
28 -
 29
29 -
 30
30 -
 31
31 -
 32
32 -
33
-
34
-
35
-
36
-
37
-
38
-
39
-
40
-
41
-
42
-
43
-
44
-
45
-
46
-
47
-
48
-
49
-
50
-
51
-
52
-
53
-
54
-
55
-
56
-
57
-
58
-
59
-
60
-
61
-
62
-
63
-
64
-
65
-
66
-
67
-
68
-
69
-
70
-
71
-
72
-
73
-
74
-
75
-
76
-
77
-
78
-
79
-
80
-
81
-
82
-
83
-
84
-
85
-
86
-
87
-
88
-
89
-
90
-
91
-
92
-
93
-
94
-
95
-
96
-
97
-
98
-
99
-
100
-
101
-
102
-
103
-
104
-
105
-
106
-
107
-
108
-
109
-
110
-
111
-
112
-
113
-
114
-
115
-
116
-
117
-
118
-
119
-
120
-
121
-
122
-
123
-
124
-
125
-
126
-
127
-
128
-
129
-
130
-
131
-
132
-
133
-
134
-
135
-
136
-
137
-
138
 |
 |