Canon PIXMA iP5000 iP5000 Quick Start Guide - Page 59
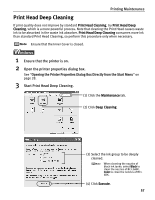
Printing Maintenance, Open the, dialog box., Start Print Head Cleaning. - setup disk
 |
View all Canon PIXMA iP5000 manuals
Add to My Manuals
Save this manual to your list of manuals |
Page 59 highlights
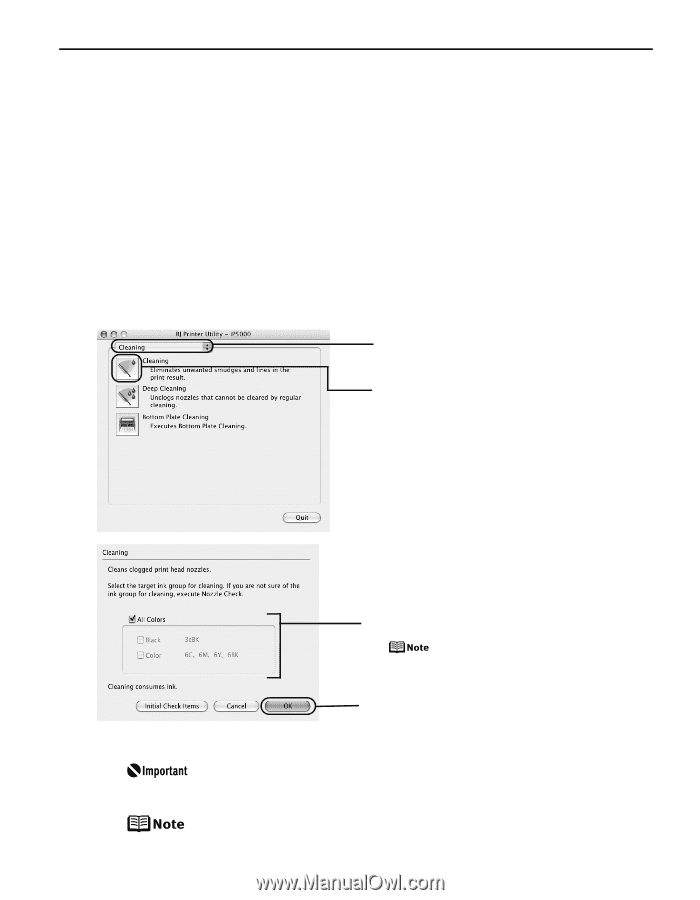
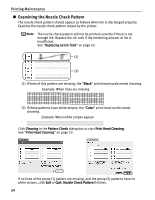
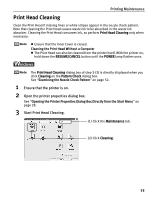
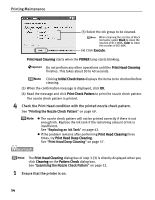
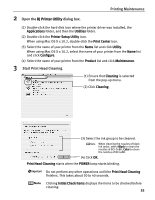
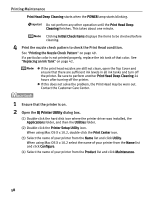
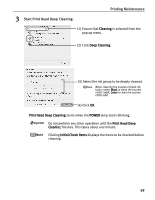
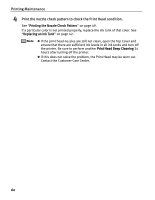
2 Open the BJ Printer Utility dialog box. Printing Maintenance (1) Double-click the hard disk icon where the printer driver was installed, the Applications folder, and then the Utilities folder. (2) Double-click the Printer Setup Utility icon. When using Mac OS X v.10.2, double-click the Print Center icon. (3) Select the name of your printer from the Name list and click Utility. When using Mac OS X v.10.2, select the name of your printer from the Name list and click Configure. (4) Select the name of your printer from the Product list and click Maintenance. 3 Start Print Head Cleaning. (1) Ensure that Cleaning is selected from the pop-up menu. (2) Click Cleaning. (3) Select the ink group to be cleaned. When cleaning the nozzles of black ink tanks: select Black to clean the nozzles of BCI-3eBK, Color to clean the nozzles of BCI-6BK. (4) Click OK. Print Head Cleaning starts when the POWER lamp starts blinking. Do not perform any other operations until the Print Head Cleaning finishes. This takes about 30 to 40 seconds. Clicking Initial Check Items displays the items to be checked before cleaning. 55
-
 1
1 -
2
-
3
-
4
-
5
-
6
-
7
-
8
-
9
-
10
-
11
-
12
-
13
-
14
-
15
-
16
-
17
-
18
-
19
-
20
-
21
-
22
-
23
-
24
-
25
-
26
-
27
-
28
-
29
-
30
-
31
-
32
-
33
-
34
-
35
-
36
-
37
-
38
-
39
-
40
-
41
-
42
-
43
-
44
-
45
-
46
-
47
-
48
-
49
-
50
-
51
-
52
-
53
-
 54
54 -
 55
55 -
 56
56 -
 57
57 -
 58
58 -
 59
59 -
 60
60 -
 61
61 -
 62
62 -
 63
63 -
 64
64 -
65
-
66
-
67
-
68
-
69
-
70
-
71
-
72
-
73
-
74
-
75
-
76
-
77
-
78
-
79
-
80
-
81
-
82
-
83
-
84
-
85
-
86
-
87
-
88
-
89
-
90
-
91
-
92
-
93
-
94
-
95
-
96
-
97
-
98
-
99
-
100
 |
 |