Canon PowerShot ELPH 500 HS PowerShot ELPH 500 HS / IXUS 310 HS Camera User Gu - Page 133
Viewing Images on a TV
 |
View all Canon PowerShot ELPH 500 HS manuals
Add to My Manuals
Save this manual to your list of manuals |
Page 133 highlights
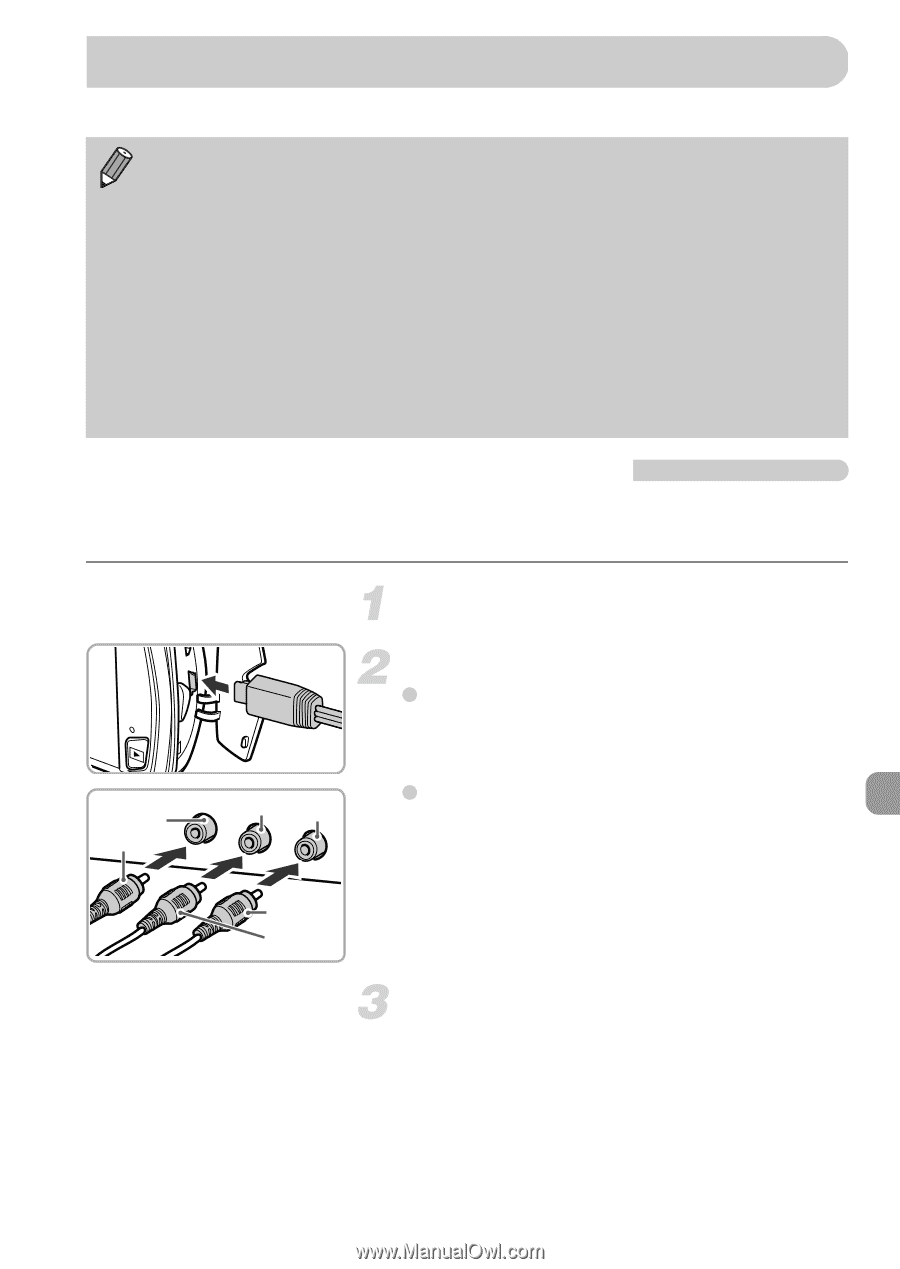
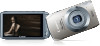
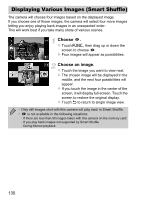
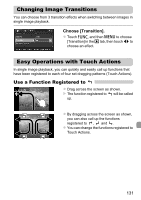
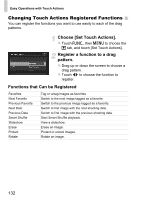
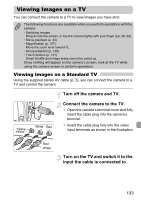
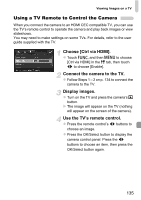
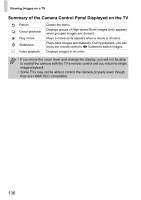
Viewing Images on a TV You can connect the camera to a TV to view images you have shot. The following functions are available when you perform operations with the camera: • Switching images Drag across the screen, or tap the camera lightly with your finger (pp. 28, 29). • Movie playback (p. 33) • Magnification (p. 127) Move the zoom lever toward k. • Group playback (p. 128) • Touch Actions (p. 131) Smart Shuffle and image erase cannot be called up. Since nothing will appear on the camera's screen, look at the TV while using the camera screen to perform operations. Viewing Images on a Standard TV Using the supplied stereo AV cable (p. 2), you can connect the camera to a TV and control the camera. Turn off the camera and TV. Yellow Yellow White Red Connect the camera to the TV. z Open the camera's terminal cover and fully insert the cable plug into the camera's terminal. z Insert the cable plug fully into the video input terminals as shown in the illustration. Red White Turn on the TV and switch it to the input the cable is connected to. 133
-
 1
1 -
2
-
3
-
4
-
5
-
6
-
7
-
8
-
9
-
10
-
11
-
12
-
13
-
14
-
15
-
16
-
17
-
18
-
19
-
20
-
21
-
22
-
23
-
24
-
25
-
26
-
27
-
28
-
29
-
30
-
31
-
32
-
33
-
34
-
35
-
36
-
37
-
38
-
39
-
40
-
41
-
42
-
43
-
44
-
45
-
46
-
47
-
48
-
49
-
50
-
51
-
52
-
53
-
54
-
55
-
56
-
57
-
58
-
59
-
60
-
61
-
62
-
63
-
64
-
65
-
66
-
67
-
68
-
69
-
70
-
71
-
72
-
73
-
74
-
75
-
76
-
77
-
78
-
79
-
80
-
81
-
82
-
83
-
84
-
85
-
86
-
87
-
88
-
89
-
90
-
91
-
92
-
93
-
94
-
95
-
96
-
97
-
98
-
99
-
100
-
101
-
102
-
103
-
104
-
105
-
106
-
107
-
108
-
109
-
110
-
111
-
112
-
113
-
114
-
115
-
116
-
117
-
118
-
119
-
120
-
121
-
122
-
123
-
124
-
125
-
126
-
127
-
 128
128 -
 129
129 -
 130
130 -
 131
131 -
 132
132 -
 133
133 -
 134
134 -
 135
135 -
 136
136 -
 137
137 -
 138
138 -
139
-
140
-
141
-
142
-
143
-
144
-
145
-
146
-
147
-
148
-
149
-
150
-
151
-
152
-
153
-
154
-
155
-
156
-
157
-
158
-
159
-
160
-
161
-
162
-
163
-
164
-
165
-
166
-
167
-
168
-
169
-
170
-
171
-
172
-
173
-
174
-
175
-
176
-
177
-
178
-
179
-
180
-
181
-
182
-
183
-
184
-
185
-
186
-
187
-
188
-
189
-
190
-
191
-
192
-
193
-
194
-
195
-
196
-
197
-
198
-
199
-
200
-
201
-
202
-
203
-
204
-
205
-
206
-
207
-
208
-
209
-
210
-
211
-
212
 |
 |