Canon PowerShot ELPH 500 HS PowerShot ELPH 500 HS / IXUS 310 HS Camera User Gu - Page 57
Inserting the Date and Time
 |
View all Canon PowerShot ELPH 500 HS manuals
Add to My Manuals
Save this manual to your list of manuals |
Page 57 highlights
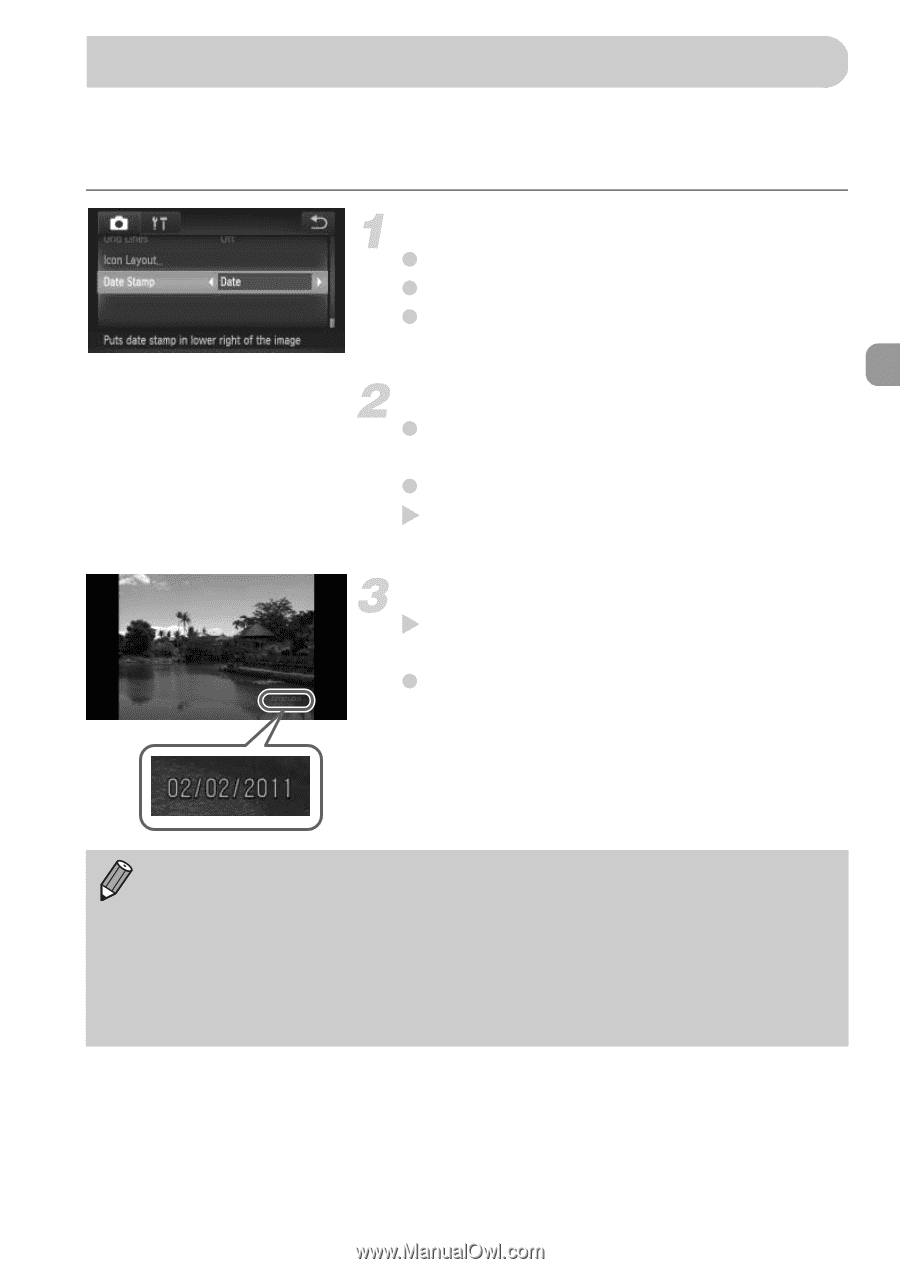
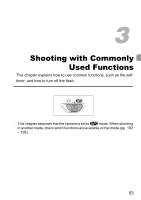
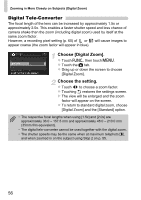
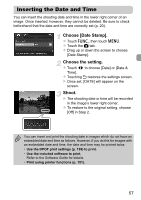
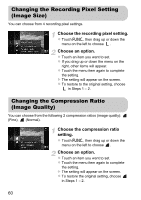
Inserting the Date and Time You can insert the shooting date and time in the lower right corner of an image. Once inserted, however, they cannot be deleted. Be sure to check beforehand that the date and time are correctly set (p. 20). Choose [Date Stamp]. z Touch ø, then touch n. z Touch the 4 tab. z Drag up or down the screen to choose [Date Stamp]. Choose the setting. z Touch qr to choose [Date] or [Date & Time]. z Touching Ú restores the settings screen. X Once set, [DATE] will appear on the screen. Shoot. X The shooting date or time will be recorded in the image's lower right corner. z To restore to the original setting, choose [Off] in Step 2. You can insert and print the shooting date in images which do not have an embedded date and time as follows. However, if you do this for images with an embedded date and time, the date and time may be printed twice. • Use the DPOF print settings (p. 159) to print. • Use the included software to print. Refer to the Software Guide for details. • Print using printer functions (p. 151). 57
-
 1
1 -
2
-
3
-
4
-
5
-
6
-
7
-
8
-
9
-
10
-
11
-
12
-
13
-
14
-
15
-
16
-
17
-
18
-
19
-
20
-
21
-
22
-
23
-
24
-
25
-
26
-
27
-
28
-
29
-
30
-
31
-
32
-
33
-
34
-
35
-
36
-
37
-
38
-
39
-
40
-
41
-
42
-
43
-
44
-
45
-
46
-
47
-
48
-
49
-
50
-
51
-
 52
52 -
 53
53 -
 54
54 -
 55
55 -
 56
56 -
 57
57 -
 58
58 -
 59
59 -
 60
60 -
 61
61 -
 62
62 -
63
-
64
-
65
-
66
-
67
-
68
-
69
-
70
-
71
-
72
-
73
-
74
-
75
-
76
-
77
-
78
-
79
-
80
-
81
-
82
-
83
-
84
-
85
-
86
-
87
-
88
-
89
-
90
-
91
-
92
-
93
-
94
-
95
-
96
-
97
-
98
-
99
-
100
-
101
-
102
-
103
-
104
-
105
-
106
-
107
-
108
-
109
-
110
-
111
-
112
-
113
-
114
-
115
-
116
-
117
-
118
-
119
-
120
-
121
-
122
-
123
-
124
-
125
-
126
-
127
-
128
-
129
-
130
-
131
-
132
-
133
-
134
-
135
-
136
-
137
-
138
-
139
-
140
-
141
-
142
-
143
-
144
-
145
-
146
-
147
-
148
-
149
-
150
-
151
-
152
-
153
-
154
-
155
-
156
-
157
-
158
-
159
-
160
-
161
-
162
-
163
-
164
-
165
-
166
-
167
-
168
-
169
-
170
-
171
-
172
-
173
-
174
-
175
-
176
-
177
-
178
-
179
-
180
-
181
-
182
-
183
-
184
-
185
-
186
-
187
-
188
-
189
-
190
-
191
-
192
-
193
-
194
-
195
-
196
-
197
-
198
-
199
-
200
-
201
-
202
-
203
-
204
-
205
-
206
-
207
-
208
-
209
-
210
-
211
-
212
 |
 |