Canon PowerShot G11 PowerShot G11 Camera User Guide - Page 154
Changing the Way the Image Displays Right, After Shooting, Customizing Display Information
 |
View all Canon PowerShot G11 manuals
Add to My Manuals
Save this manual to your list of manuals |
Page 154 highlights
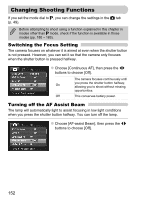
Changing Shooting Functions Changing the Way the Image Displays Right After Shooting You can change the way the image displays after shooting. ● Choose [Review Info], then press the qr buttons to choose an option. Off Displays the image only. Detailed Displays detailed information (p. 45). The area inside the AF frame is Focus Check magnified, focus. The allowing you procedure is to check the the same as in "Checking the Focus" (p. 126). Customizing Display Information You can change which information is displayed by switching between custom displays with each press of the l button. ● Choose [Custom Display], then press the m button. ● Press the opqr buttons or turn the  dial to select an item and press the m button. A mark will appear on items that will display. ● Press the opqr buttons or turn the  dial to choose , , or and press the m button to set the custom displays that appear when the l button is pressed. Custom displays marked with a will not appear when the l button is pressed. The custom display currently being used cannot be marked with a . 154
-
 1
1 -
2
-
3
-
4
-
5
-
6
-
7
-
8
-
9
-
10
-
11
-
12
-
13
-
14
-
15
-
16
-
17
-
18
-
19
-
20
-
21
-
22
-
23
-
24
-
25
-
26
-
27
-
28
-
29
-
30
-
31
-
32
-
33
-
34
-
35
-
36
-
37
-
38
-
39
-
40
-
41
-
42
-
43
-
44
-
45
-
46
-
47
-
48
-
49
-
50
-
51
-
52
-
53
-
54
-
55
-
56
-
57
-
58
-
59
-
60
-
61
-
62
-
63
-
64
-
65
-
66
-
67
-
68
-
69
-
70
-
71
-
72
-
73
-
74
-
75
-
76
-
77
-
78
-
79
-
80
-
81
-
82
-
83
-
84
-
85
-
86
-
87
-
88
-
89
-
90
-
91
-
92
-
93
-
94
-
95
-
96
-
97
-
98
-
99
-
100
-
101
-
102
-
103
-
104
-
105
-
106
-
107
-
108
-
109
-
110
-
111
-
112
-
113
-
114
-
115
-
116
-
117
-
118
-
119
-
120
-
121
-
122
-
123
-
124
-
125
-
126
-
127
-
128
-
129
-
130
-
131
-
132
-
133
-
134
-
135
-
136
-
137
-
138
-
139
-
140
-
141
-
142
-
143
-
144
-
145
-
146
-
147
-
148
-
 149
149 -
 150
150 -
 151
151 -
 152
152 -
 153
153 -
 154
154 -
 155
155 -
 156
156 -
 157
157 -
 158
158 -
 159
159 -
160
-
161
-
162
-
163
-
164
-
165
-
166
-
167
-
168
-
169
-
170
-
171
-
172
-
173
-
174
-
175
-
176
-
177
-
178
-
179
-
180
-
181
-
182
-
183
-
184
-
185
-
186
-
187
-
188
-
189
-
190
-
191
-
192
-
193
-
194
-
195
-
196
 |
 |
