Canon PowerShot G11 PowerShot G11 Camera User Guide - Page 80
Manually Correcting the White Balance
 |
View all Canon PowerShot G11 manuals
Add to My Manuals
Save this manual to your list of manuals |
Page 80 highlights
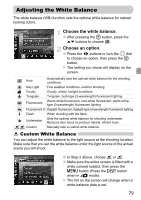
Adjusting the White Balance If you change camera settings after recording white balance data, the tone may not turn out properly. Manually Correcting the White Balance You can manually correct the white balance. This adjustment will have the same effect as using a commercially-available color temperature conversion filter or color compensating filter. Choose the white balance. ● After pressing the m button, press the op buttons to choose , then press the qr buttons or turn the  dial to choose an option. Adjust the setting. ● Press the l button to display the adjustments screen. ● Press the qrop buttons to adjust the level of correction. ● To reset the correction level, press the n button. ● Press the l button to complete the setting. • B stands for blue, A for amber, M for magenta, and G for green. • Even if you change the white balance setting in Step 1 after making adjustments in the correction level, those adjustments will be retained. However, the adjustments will be reset if Custom White Balance data is recorded. • One level of the blue/amber correction is equivalent to 7 mireds of a color temperature conversion filter. (Mired: Measuring unit indicating the density of a color temperature conversion filter.) 80
-
 1
1 -
2
-
3
-
4
-
5
-
6
-
7
-
8
-
9
-
10
-
11
-
12
-
13
-
14
-
15
-
16
-
17
-
18
-
19
-
20
-
21
-
22
-
23
-
24
-
25
-
26
-
27
-
28
-
29
-
30
-
31
-
32
-
33
-
34
-
35
-
36
-
37
-
38
-
39
-
40
-
41
-
42
-
43
-
44
-
45
-
46
-
47
-
48
-
49
-
50
-
51
-
52
-
53
-
54
-
55
-
56
-
57
-
58
-
59
-
60
-
61
-
62
-
63
-
64
-
65
-
66
-
67
-
68
-
69
-
70
-
71
-
72
-
73
-
74
-
 75
75 -
 76
76 -
 77
77 -
 78
78 -
 79
79 -
 80
80 -
 81
81 -
 82
82 -
 83
83 -
 84
84 -
 85
85 -
86
-
87
-
88
-
89
-
90
-
91
-
92
-
93
-
94
-
95
-
96
-
97
-
98
-
99
-
100
-
101
-
102
-
103
-
104
-
105
-
106
-
107
-
108
-
109
-
110
-
111
-
112
-
113
-
114
-
115
-
116
-
117
-
118
-
119
-
120
-
121
-
122
-
123
-
124
-
125
-
126
-
127
-
128
-
129
-
130
-
131
-
132
-
133
-
134
-
135
-
136
-
137
-
138
-
139
-
140
-
141
-
142
-
143
-
144
-
145
-
146
-
147
-
148
-
149
-
150
-
151
-
152
-
153
-
154
-
155
-
156
-
157
-
158
-
159
-
160
-
161
-
162
-
163
-
164
-
165
-
166
-
167
-
168
-
169
-
170
-
171
-
172
-
173
-
174
-
175
-
176
-
177
-
178
-
179
-
180
-
181
-
182
-
183
-
184
-
185
-
186
-
187
-
188
-
189
-
190
-
191
-
192
-
193
-
194
-
195
-
196
 |
 |
