Canon PowerShot SD500 ImageBrowser 5.1 Software User Guide - Page 11
Downloading Images to Your Computer 4/6
 |
View all Canon PowerShot SD500 manuals
Add to My Manuals
Save this manual to your list of manuals |
Page 11 highlights
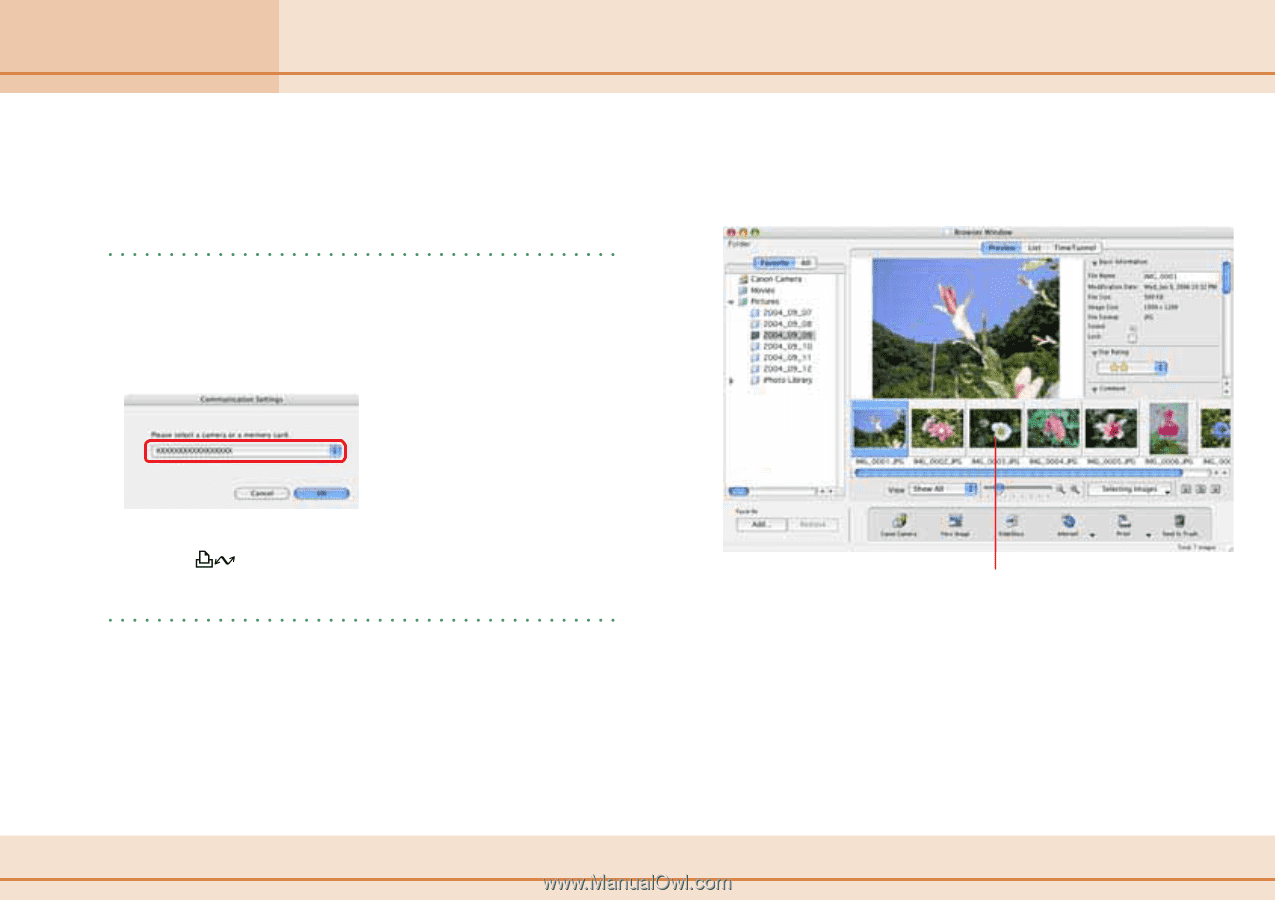
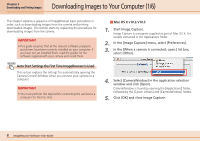
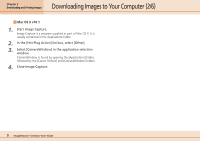
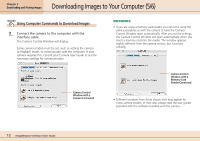
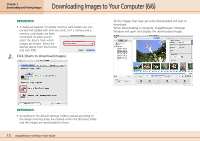
Chapter 2 Downloading and Printing Images Downloading Images to Your Computer (4/6) Some camera models must have settings, such as the Playback mode, set to communicate with the computer. If your camera requires this, consult your Camera User Guide to set the necessary settings for communication. REFERENCE • If a remote shooting window opens, the Camera Control Window will not open. Please close the remote shooting window. • A dialog will appear if a camera and a memory card reader are both connected to allow you to select the device from which images are shown. Select the desired device from the list box and click [OK]. The images will begin to download. The downloaded images will be saved into folders according to the shooting date. The images will display in the Main Window when the download is complete. 2. Set the Direct transfer settings on the camera, and push the (Print/Share) button or [SET] button. REFERENCE • See your Camera User Guide for explanations of the settings and commands related to the Direct Transfer menu that appears in the camera's LCD monitor. • If you click Settings on the computer, you can change the destination folder for image files. See "Downloading Images Automatically" in Chapter 3 for instructions on how to change the destination folder. • By the default settings, downloaded images are saved to the [Pictures] folder. 11 ImageBrowser Software User Guide Downloaded Images
-
 1
1 -
2
-
3
-
4
-
5
-
 6
6 -
 7
7 -
 8
8 -
 9
9 -
 10
10 -
 11
11 -
 12
12 -
 13
13 -
 14
14 -
 15
15 -
 16
16 -
17
-
18
-
19
-
20
-
21
-
22
-
23
-
24
-
25
-
26
-
27
-
28
-
29
-
30
-
31
-
32
-
33
-
34
-
35
-
36
-
37
-
38
-
39
-
40
-
41
-
42
-
43
-
44
-
45
-
46
-
47
-
48
-
49
-
50
-
51
-
52
-
53
-
54
-
55
-
56
-
57
-
58
-
59
-
60
-
61
-
62
-
63
-
64
-
65
-
66
-
67
-
68
-
69
-
70
-
71
-
72
-
73
-
74
-
75
-
76
-
77
-
78
-
79
-
80
-
81
-
82
-
83
-
84
-
85
-
86
-
87
-
88
-
89
-
90
-
91
-
92
-
93
-
94
-
95
-
96
-
97
-
98
-
99
-
100
-
101
-
102
-
103
-
104
-
105
-
106
-
107
-
108
-
109
-
110
-
111
-
112
-
113
-
114
-
115
 |
 |