Canon PowerShot SD500 ImageBrowser 5.1 Software User Guide - Page 73
Editing Images 2/4
 |
View all Canon PowerShot SD500 manuals
Add to My Manuals
Save this manual to your list of manuals |
Page 73 highlights
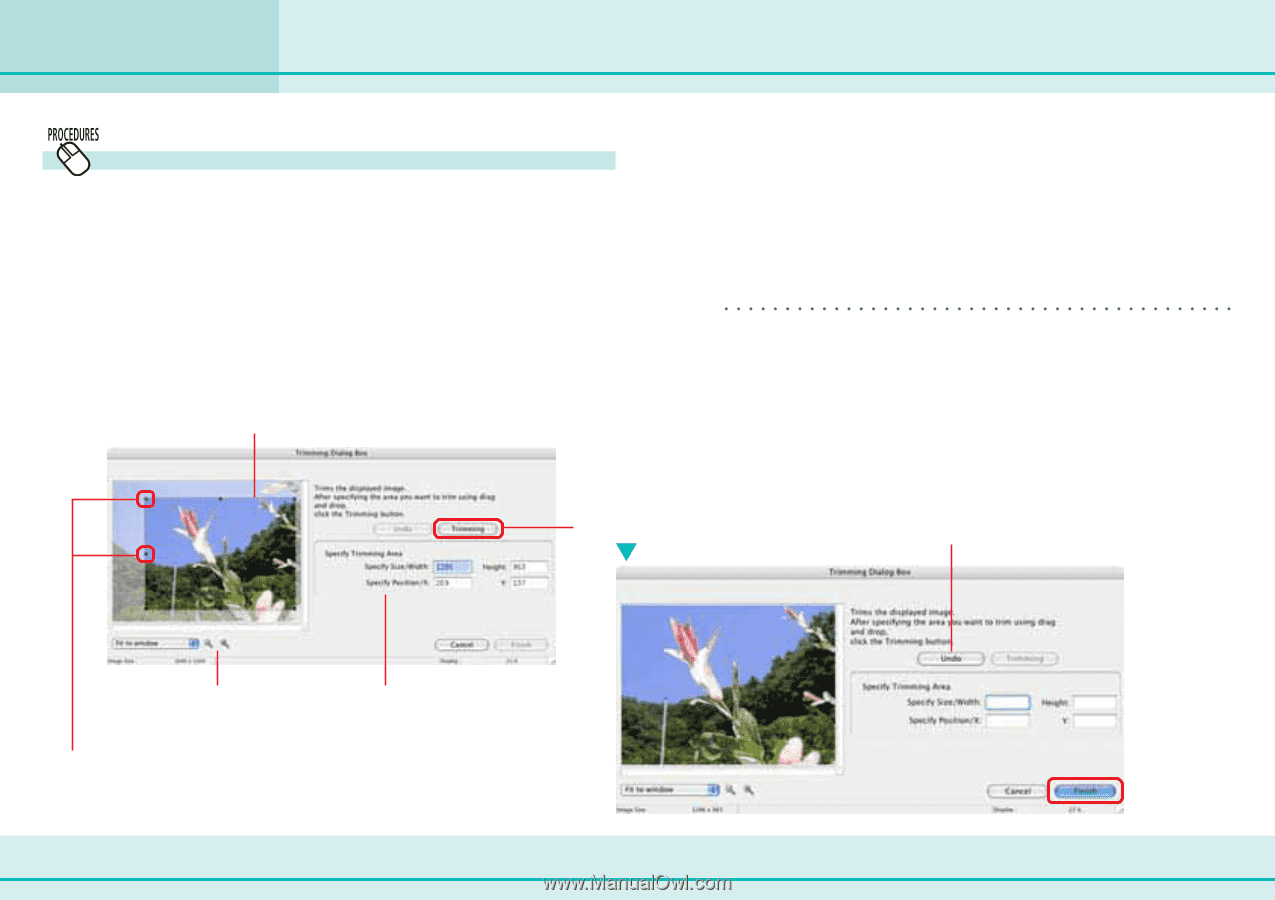
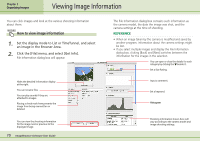
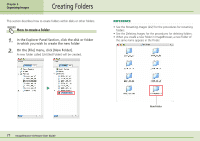
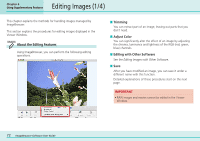
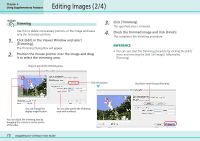
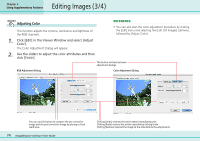
Editing Images (2/4) Chapter 6 Using Supplementary Features Trimming Use this to delete unnecessary portions of the image and leave only the necessary portions. 1. Click [Edit] in the Viewer Window and select [Trimming]. The Trimming Dialog Box will appear. 2. Position the mouse pointer over the image and drag it to select the trimming area. Drag to specify the trimming area. 3. Click [Trimming]. The specified area is trimmed. 4. Check the trimmed image and click [Finish]. This completes the trimming procedure. REFERENCE • You can also start the trimming procedure by clicking the [Edit] menu and selecting the [Edit Still Image], followed by [Trimming]. Click this button. Use this to reset the specified area. You can change the display magnification. You can adjust the trimming area by dragging the corners or center points of the sides. You can also specify the trimming area with numbers. 73 ImageBrowser Software User Guide
-
 1
1 -
2
-
3
-
4
-
5
-
6
-
7
-
8
-
9
-
10
-
11
-
12
-
13
-
14
-
15
-
16
-
17
-
18
-
19
-
20
-
21
-
22
-
23
-
24
-
25
-
26
-
27
-
28
-
29
-
30
-
31
-
32
-
33
-
34
-
35
-
36
-
37
-
38
-
39
-
40
-
41
-
42
-
43
-
44
-
45
-
46
-
47
-
48
-
49
-
50
-
51
-
52
-
53
-
54
-
55
-
56
-
57
-
58
-
59
-
60
-
61
-
62
-
63
-
64
-
65
-
66
-
67
-
 68
68 -
 69
69 -
 70
70 -
 71
71 -
 72
72 -
 73
73 -
 74
74 -
 75
75 -
 76
76 -
 77
77 -
 78
78 -
79
-
80
-
81
-
82
-
83
-
84
-
85
-
86
-
87
-
88
-
89
-
90
-
91
-
92
-
93
-
94
-
95
-
96
-
97
-
98
-
99
-
100
-
101
-
102
-
103
-
104
-
105
-
106
-
107
-
108
-
109
-
110
-
111
-
112
-
113
-
114
-
115
 |
 |