Canon PowerShot SD500 ImageBrowser 5.1 Software User Guide - Page 89
Printing Images 3/8
 |
View all Canon PowerShot SD500 manuals
Add to My Manuals
Save this manual to your list of manuals |
Page 89 highlights
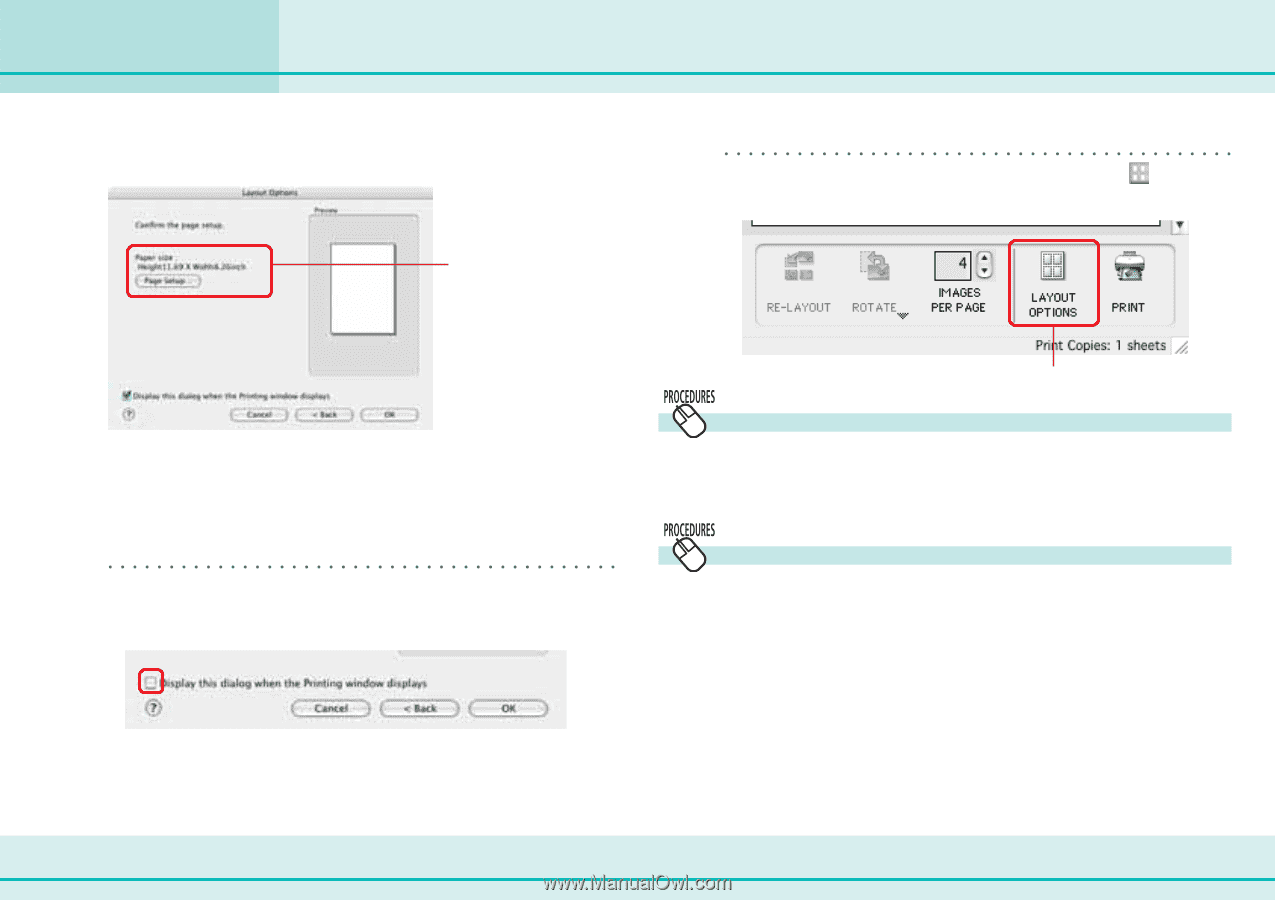
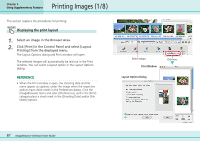
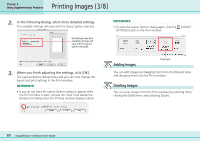
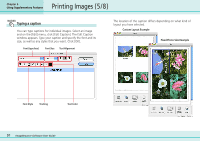
Printing Images (3/8) Chapter 6 Using Supplementary Features 2. In the following dialog, select more detailed settings. The available settings will vary with the layout option selected. Set settings here (the available settings will vary with the layout option selected). REFERENCE • To open the Layout Options dialog again, click the (LAYOUT OPTIONS) button in the Print window. 3. When you finish adjusting the settings, click [OK]. The Layout Options dialog closes and you can now change the layout and print settings in the Print window. REFERENCE • If you do not want the Layout Options dialog to appear while the Print window is open, remove the check mark beside the [Display this dialog when the Printing window displays] option. Adding Images Click here. You can add images by dragging them from the Browser Area and dropping them into the Print window. Deleting Images You can clear images from the Print window by selecting them, clicking the [Edit] menu and selecting [Clear]. 89 ImageBrowser Software User Guide
-
 1
1 -
2
-
3
-
4
-
5
-
6
-
7
-
8
-
9
-
10
-
11
-
12
-
13
-
14
-
15
-
16
-
17
-
18
-
19
-
20
-
21
-
22
-
23
-
24
-
25
-
26
-
27
-
28
-
29
-
30
-
31
-
32
-
33
-
34
-
35
-
36
-
37
-
38
-
39
-
40
-
41
-
42
-
43
-
44
-
45
-
46
-
47
-
48
-
49
-
50
-
51
-
52
-
53
-
54
-
55
-
56
-
57
-
58
-
59
-
60
-
61
-
62
-
63
-
64
-
65
-
66
-
67
-
68
-
69
-
70
-
71
-
72
-
73
-
74
-
75
-
76
-
77
-
78
-
79
-
80
-
81
-
82
-
83
-
 84
84 -
 85
85 -
 86
86 -
 87
87 -
 88
88 -
 89
89 -
 90
90 -
 91
91 -
 92
92 -
 93
93 -
 94
94 -
95
-
96
-
97
-
98
-
99
-
100
-
101
-
102
-
103
-
104
-
105
-
106
-
107
-
108
-
109
-
110
-
111
-
112
-
113
-
114
-
115
 |
 |