Canon S330 Photo Application Guide(Mac) - Page 95
side of the window shows how the photos are arranged under the current settings.
 |
View all Canon S330 manuals
Add to My Manuals
Save this manual to your list of manuals |
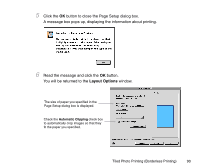
Page 95 highlights
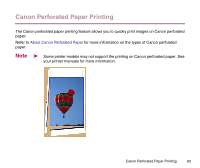
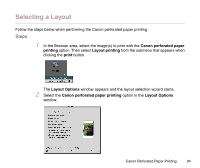
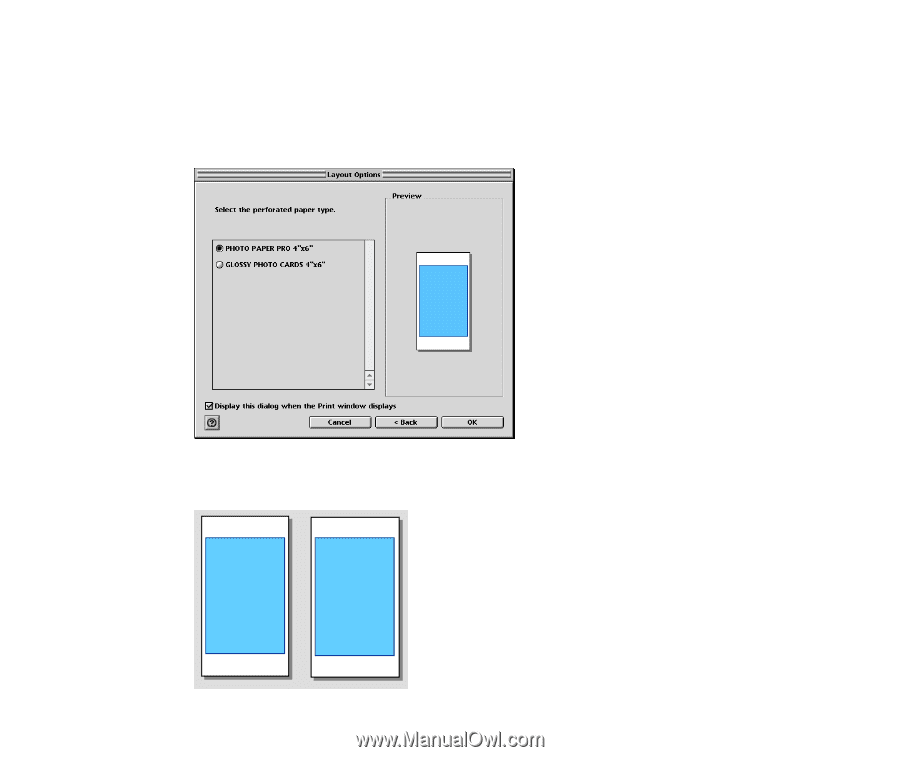
3 Click the Next button to proceed to the next page. 4 Specify the type of Canon perforated paper. When you select the type of Canon perforated paper, the Preview area on the right side of the window shows how the photos are arranged under the current settings. The figure below illustrates how the photos are placed depending on the selected type of Canon perforated paper. Canon Perforated Paper Printing 95
-
 1
1 -
2
-
3
-
4
-
5
-
6
-
7
-
8
-
9
-
10
-
11
-
12
-
13
-
14
-
15
-
16
-
17
-
18
-
19
-
20
-
21
-
22
-
23
-
24
-
25
-
26
-
27
-
28
-
29
-
30
-
31
-
32
-
33
-
34
-
35
-
36
-
37
-
38
-
39
-
40
-
41
-
42
-
43
-
44
-
45
-
46
-
47
-
48
-
49
-
50
-
51
-
52
-
53
-
54
-
55
-
56
-
57
-
58
-
59
-
60
-
61
-
62
-
63
-
64
-
65
-
66
-
67
-
68
-
69
-
70
-
71
-
72
-
73
-
74
-
75
-
76
-
77
-
78
-
79
-
80
-
81
-
82
-
83
-
84
-
85
-
86
-
87
-
88
-
89
-
 90
90 -
 91
91 -
 92
92 -
 93
93 -
 94
94 -
 95
95 -
 96
96 -
 97
97 -
 98
98 -
 99
99 -
 100
100 -
101
-
102
-
103
-
104
-
105
-
106
-
107
-
108
-
109
-
110
-
111
-
112
-
113
-
114
-
115
-
116
-
117
-
118
-
119
-
120
-
121
-
122
-
123
-
124
-
125
-
126
-
127
-
128
-
129
-
130
-
131
-
132
-
133
-
134
-
135
-
136
-
137
 |
 |
Canon Perforated Paper Printing
95
3
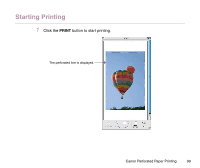
Click the
Next
button to proceed to the next page.
4
Specify the type of Canon perforated paper.
When you select the type of Canon perforated paper, the
Preview
area on the right
side of the window shows how the photos are arranged under the current settings.
The figure below illustrates how the photos are placed depending on the selected
type of Canon perforated paper.