Craftsman 28913 Operation Manual - Page 8
Remove, Tractor, Carton, Before, Removing, Attach, Steering, Wheel - tool boxes
 |
View all Craftsman 28913 manuals
Add to My Manuals
Save this manual to your list of manuals |
Page 8 highlights
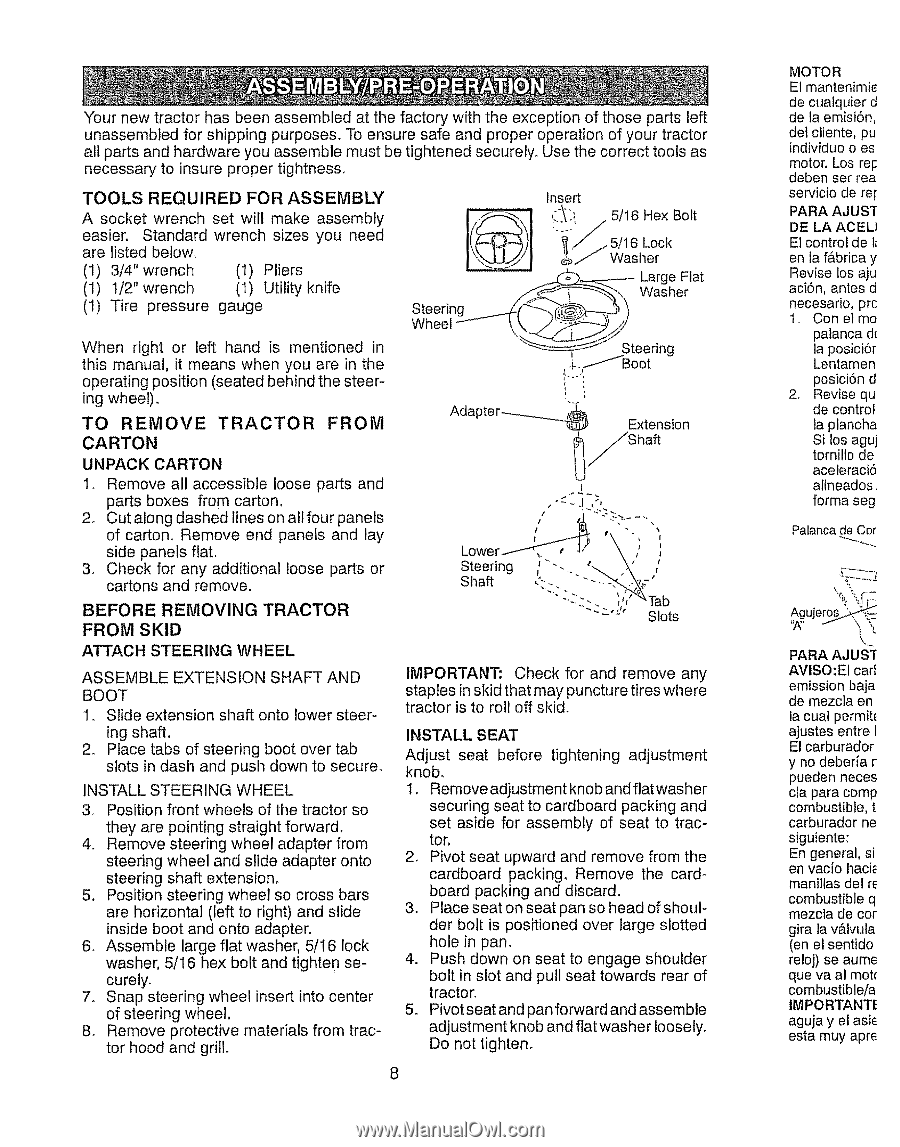
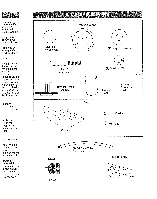
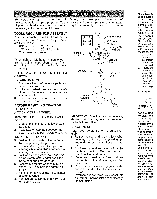
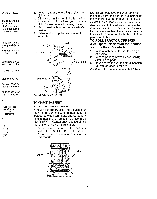
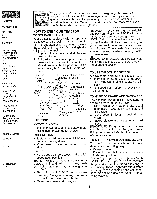
"four new tractor has been assembled at the factory with the exception of those parts left unassembled for shipping purposes. To ensure safe and proper operation of your tractor all parts and hardware you assemble must be tightened securely. Use the correct tools as necessary to insure proper tightness. TOOLS REQUIRED FOR ASSEMBLY A socket wrench set will make assembly easier: Standard wrench sizes you need are listed below_ (1) 3/4"wrench (1) 1/2" wrench (1) Tire pressure (I) Pliers (I) Utility' knife gauge When right or left hand is mentioned in this manual, it means when you are in the operating position (seated behind the steering wheel). TO REMOVE TRACTOR FROM CARTON UNPACK CARTON I. Remove all accessible loose parts and parts boxes from carton, 2. Cut along dashed lines on all four panels of carton. Remove end panels and lay side panels flat, 3. Check for any additional loose parts or cartons and remove. BEFORE REMOVING TRACTOR FROM SKID ATTACH STEERING WHEEL ASSEMBLE EXTENSION SHAFT AND BOOT 1. Slide extension shaft onto lower steer- ing shaft. 2. Place tabs of steering boot over tab slots in dash and push down to secure. INSTALL STEERING WHEEL 3_ Position front wheels of the tractor so they are pointing straight forward. 4. Remove steering wheel adapter from steering wheel and slide adapter onto steering shaft extension. 5. Position steering wheel so cross bars are horizontal (left to right) and slide inside boot and onto adapter. 6. Assemble large flat washer, 5/16 lock washer, 5/16 hex bolt and tighten securely. 7. Snap steering wheel insert into center of steering wheel. 8. Remove protective materials from tractor hood and grill. IMPORTANT: Check for and remove any staples in skid that may puncture tires where tractor is to roll off skid. INSTALL SEAT Adjust seat before tightening adjustment knob. t. Remove adjustment knob and flatwasher securing seat to cardboard packing and set aside for assembly of seat to tractor. 2_ Pivot seat upward and remove from the cardboard packing. Remove the cardboard packing and discard. 3. Place seat on seat pan so head of shoulder bolt is positioned over large slotted hole in pan. 4. Push down on seat to engage shoulder bolt in slot and pull seat towards rear of tractor. 5. Pivotseatand panforwardand assemble adjustment knob and flat washer loosely. Do not tighten° 8 MOTOR El mantenimie de cualquier d de la emisi6n, del cliente, pu individuo o es motor,, Los rel: deben ser rea servicio de re_ PARA AJUS_ DE LA ACELI El control de 1_ en ia f&brica y Revise los aju aci6n, antes d necesario, prc 1. Con el me palanca d{ la posici6r Lentamen posici6n d 2., Revise qu de control la plancha Si los aguj tornillo de aceleraci5 alineados.. forma seg Palanca de Cur PARA AJUS_ AVISO:EI carf emission baja de mezc]a en ia cual permit_ ajustes entre I El carburador y no deberia r pueden neces cia pare comp combustible, t carburador ne siguiente: En general, si en vacie haci_ manillas del re combustible q mezcta de cor gira la v&lvula (en el sentido reloj) se aurae que vaal mot_ combustible/a IMPORTANTE aguja y el asie esta muy apre
-
 1
1 -
2
-
 3
3 -
 4
4 -
 5
5 -
 6
6 -
 7
7 -
 8
8 -
 9
9 -
 10
10 -
 11
11 -
 12
12 -
 13
13 -
14
-
15
-
16
-
17
-
18
-
19
-
20
-
21
-
22
-
23
-
24
-
25
-
26
-
27
-
28
-
29
-
30
-
31
-
32
-
33
-
34
-
35
-
36
-
37
-
38
-
39
-
40
-
41
-
42
-
43
-
44
-
45
-
46
-
47
-
48
-
49
-
50
-
51
-
52
-
53
-
54
-
55
-
56
-
57
-
58
-
59
-
60
-
61
-
62
-
63
-
64
 |
 |