Craftsman 28913 Operation Manual - Page 9
clutch/brake
 |
View all Craftsman 28913 manuals
Add to My Manuals
Save this manual to your list of manuals |
Page 9 highlights
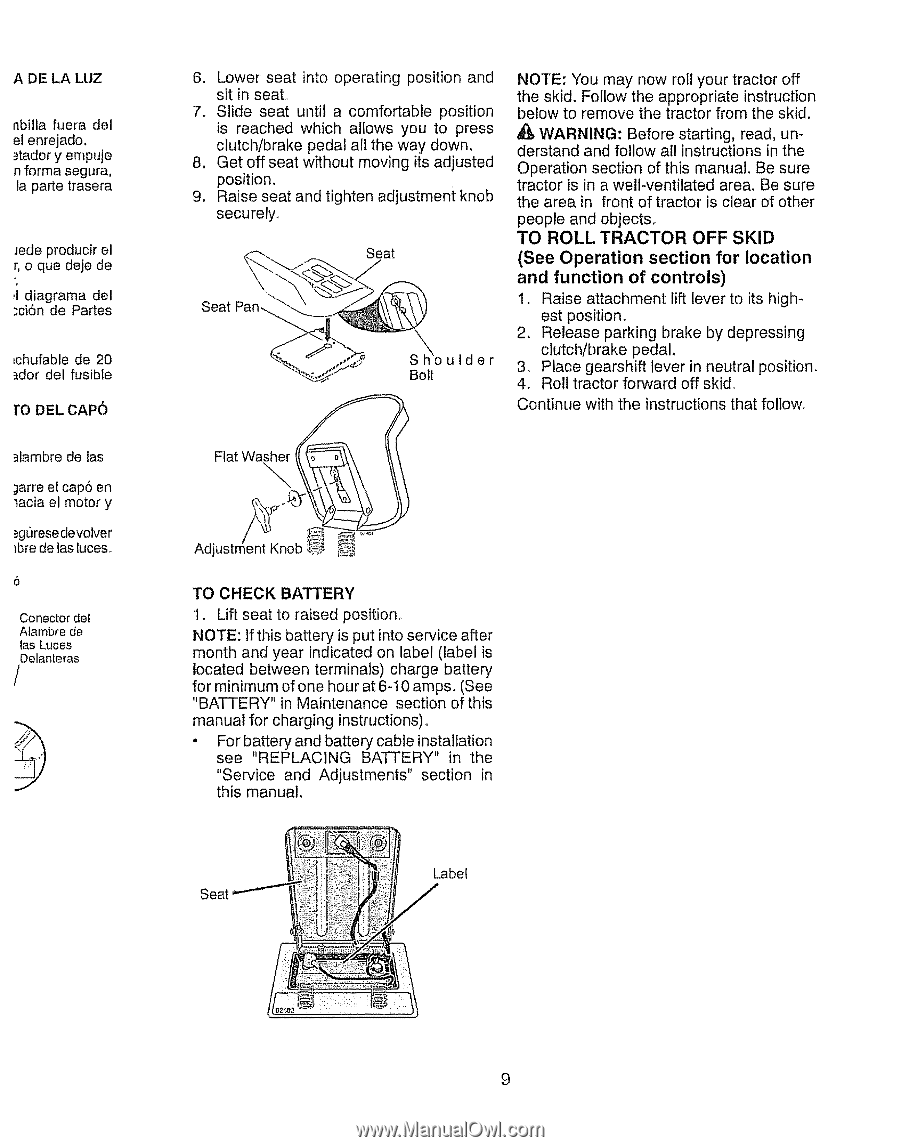
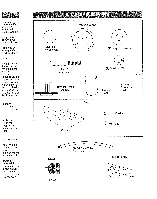
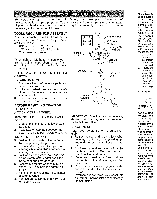
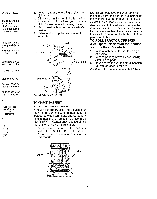
A DE LA LUZ nbilla fuera del el enrejado. .=tadory empuje n forma segura, la pare trasera _ede producir el r, o que deje de ,I diagrama del .'ci6n de Partes =chufable de 20 _dor del fusible ro DEL CAPO alambre de las tarre el cap6 en tacia el motor y .=gOresedevolver _brede las luces. Conector del Alambre de las Luces Delanteras / 6, Lower' seat into operating position and sit in seat. 7o Slide seat until a comfortable position is reached which allows you to press clutch/brake pedal all the way down. 8, Get off seat without moving its adjusted position. 9, Raise seat and tighten adjustment knob securely_ Seat Seat Sh'koulder Bolt ) NOTE: You may now roll your tractor off the skid. Follow the appropriate instruction below to remove the tractor from the skid. _, WARNING: Before starting, read, understand and follow all instructions in the Operation section of this manual. Be sure tractor is in a well-ventilated area. Be sure the area in front of tractor is clear of other people and objects_ TO ROLL TRACTOR OFF SKID (See Operation section for location and function of controls) 1. Raise attachment lift lever to its highest position. 2, Release parking brake by depressing clutch/brake pedal° 3. Place gearshift lever in neutral position. 4, Roll tractor forward off skid. Continue with the instructions that follow. TO CHECK BATTERY 1. Lift seat to raised position+ NOTE: If this battery is put into service after month and year indicated on label (label is located between terminals) charge battery for minimum of one hour at 6-I0 amps. (See "BATTERY" in Maintenance section of this manual for charging instructions)° • For battery and battery cable installation see "REPLACING BATTERY" in the "Service and Adjustments" section in this manual. Seat i Label 9
-
 1
1 -
2
-
3
-
 4
4 -
 5
5 -
 6
6 -
 7
7 -
 8
8 -
 9
9 -
 10
10 -
 11
11 -
 12
12 -
 13
13 -
 14
14 -
15
-
16
-
17
-
18
-
19
-
20
-
21
-
22
-
23
-
24
-
25
-
26
-
27
-
28
-
29
-
30
-
31
-
32
-
33
-
34
-
35
-
36
-
37
-
38
-
39
-
40
-
41
-
42
-
43
-
44
-
45
-
46
-
47
-
48
-
49
-
50
-
51
-
52
-
53
-
54
-
55
-
56
-
57
-
58
-
59
-
60
-
61
-
62
-
63
-
64
 |
 |