D-Link DGS-3208F Product Manual - Page 47
Con Filtering and Forwarding Table
 |
UPC - 790069222092
View all D-Link DGS-3208F manuals
Add to My Manuals
Save this manual to your list of manuals |
Page 47 highlights
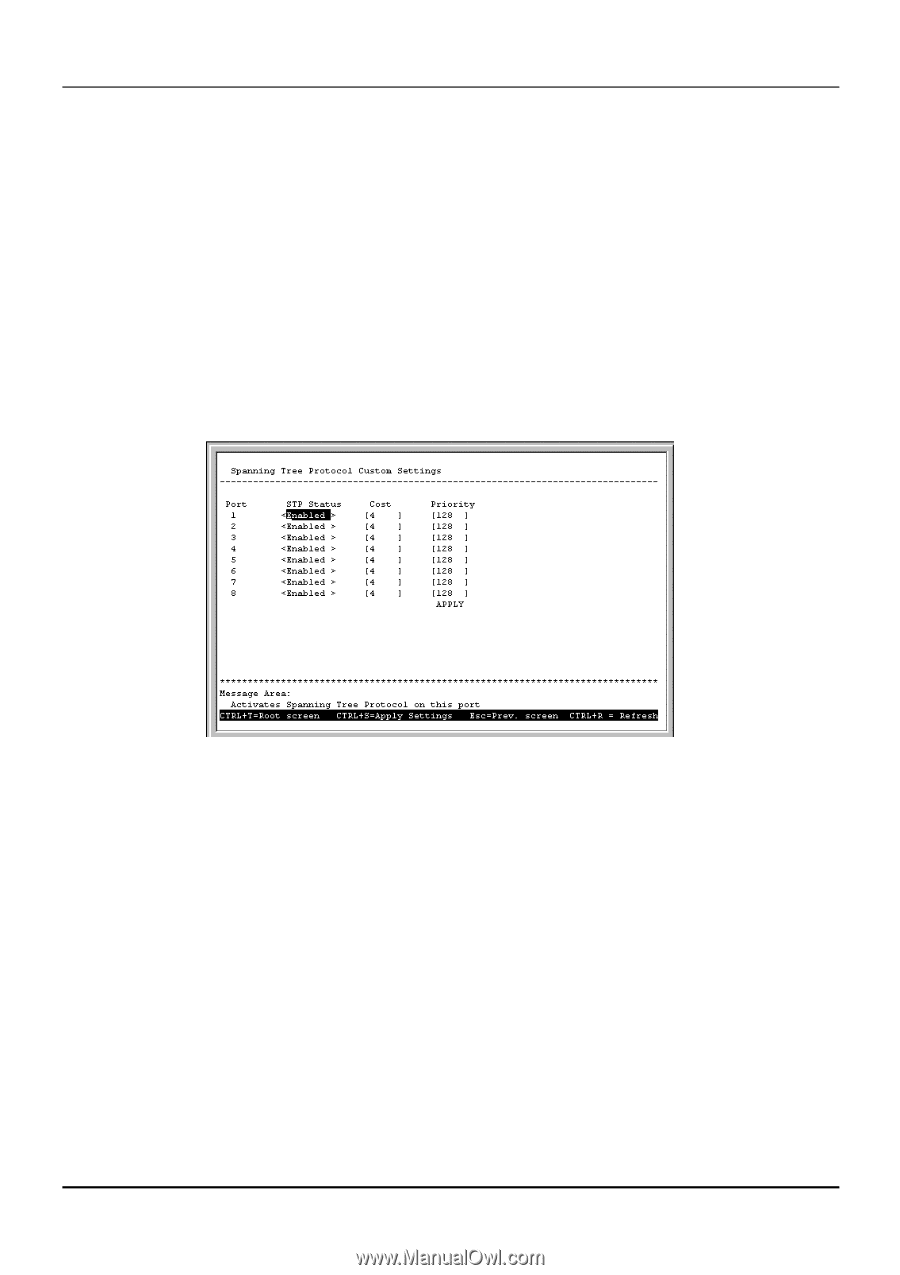
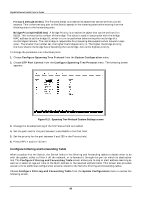
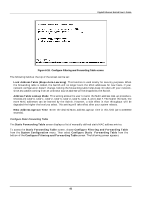
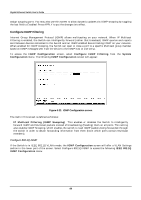
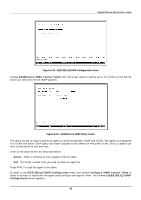
Gigabit Ethernet Switch User's Guide ♦ Forward Delay(4-30 Sec) The Forward Delay is a read-write object that can be set from 4 to 30 seconds. This is the time any port on the Switch spends in the listening state while moving from the blocking state to the forwarding state. ♦ Bridge Priority(0-65535 Sec) A Bridge Priority is a read-write object that can be set from 0 to 65535. This is the priority number of the bridge. The value is used in conjunction with the bridge MAC address to set the bridge ID, which in turn is used when determining the root bridge of a multibridged network. The root bridge is responsible for processing data packets when network loops occur. The smaller the number set, the higher the bridge priority is. The higher the bridge priority, the more chance the bridge has of becoming the root bridge. Zero is the highest priority. To change the parameters on individual ports: 1. Choose Configure Spanning Tree Protocol from the System Configuration menu. 2. Choose STP Port Control from the Configure Spanning Tree Protocol menu. The following screen appears: Figure 6-17. Spanning Tree Protocol Custom Settings screen 3. Change the Disabled setting of the STP Status field to Enabled. 4. Set the path cost for the port between 1 and 65535 in the Cost field. 5. Set the priority for the port between 0 and 255 in the Priority field. 6. Press APPLY and hit . Configure Filtering and Forwarding Table When a packet hits the Switch, the Switch looks in the filtering and forwarding tables to decide what to do with the packet; either to filter it off the network, or to forward it through the port on which its destination lies. The Configure Filtering and Forwarding Table screen allows you to stop or start address learning as well as to select an age-out time of the MAC address in the selected address table. This screen also provides access to three additional configuration screens related to the Switch's filtering and forwarding tables. Choose Configure Filtering and Forwarding Table from the System Configuration menu to access the following screen: 40
-
 1
1 -
2
-
3
-
4
-
5
-
6
-
7
-
8
-
9
-
10
-
11
-
12
-
13
-
14
-
15
-
16
-
17
-
18
-
19
-
20
-
21
-
22
-
23
-
24
-
25
-
26
-
27
-
28
-
29
-
30
-
31
-
32
-
33
-
34
-
35
-
36
-
37
-
38
-
39
-
40
-
41
-
 42
42 -
 43
43 -
 44
44 -
 45
45 -
 46
46 -
 47
47 -
 48
48 -
 49
49 -
 50
50 -
 51
51 -
 52
52 -
53
-
54
-
55
-
56
-
57
-
58
-
59
-
60
-
61
-
62
-
63
-
64
-
65
-
66
-
67
-
68
-
69
-
70
-
71
-
72
-
73
-
74
-
75
-
76
-
77
-
78
-
79
-
80
-
81
-
82
-
83
-
84
-
85
-
86
-
87
-
88
-
89
-
90
-
91
-
92
-
93
-
94
-
95
-
96
-
97
-
98
-
99
-
100
-
101
-
102
-
103
-
104
-
105
-
106
-
107
-
108
-
109
-
110
-
111
-
112
-
113
-
114
-
115
-
116
-
117
-
118
-
119
-
120
-
121
-
122
-
123
-
124
-
125
-
126
-
127
-
128
-
129
-
130
-
131
-
132
-
133
 |
 |