D-Link DNS-320L DNS-320L Manual - Page 227
Upload, Download, Refresh, Delete, Rename, Properties
 |
View all D-Link DNS-320L manuals
Add to My Manuals
Save this manual to your list of manuals |
Page 227 highlights
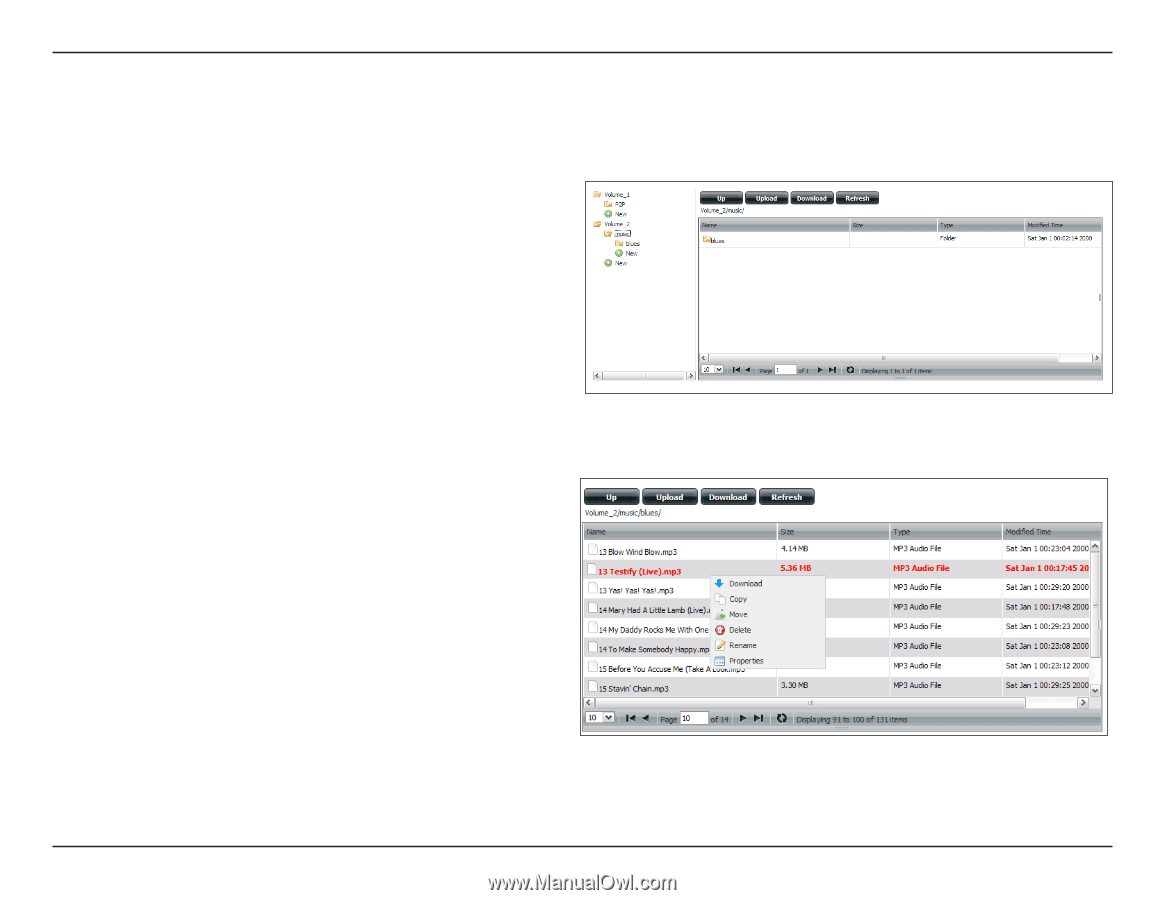
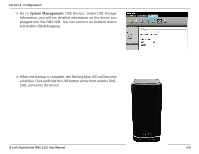
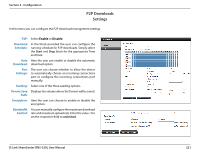
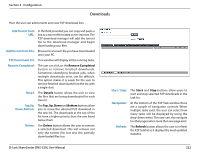
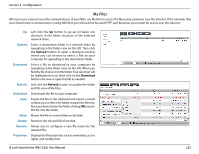
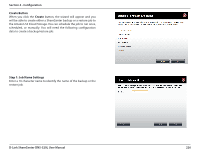
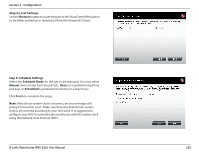
Section 4 - Configuration My Files Whenever you cannot mount the network shares of your NAS, use My Files to access the files using a browser over the internet. If the network, that your ShareCenter is connected to is using NAT then you will need to forward HTTP port 80 across your router for access over the internet. Up: Left click the Up button to go up (or back) one directory in the folder structure of the selected network share. Upload: Select a destination folder in a network share by navigating in the folder view on the left. Then click the Upload button to open a dialogue window where you can browse to select a file on your computer for uploading to the destination folder. Download: Select a file to download to your computer by navigating in the folder view on the left. When you find the file click on it in the folder. Your selection will be highlighted in red. Next click on the Download button and save or open the file as needed. Refresh: Left click the Refresh button to update the folder and file view of My Files. Download: Downloads the file to your computer. Copy: Copies the file to the clipboard and opens a wizard to allow you to select the folder to paste the file into. Once you have chosen the folder clicking OK to paste the file into the folder. Move: Moves the file to a new folder on the disk. Delete: Removes the selected file from disk. Rename: Allows you to configure a new file name for the selected file. Properties: Displays the file properties such as ownership, access rights, and modify time. D-Link ShareCenter DNS-320L User Manual 223
-
 1
1 -
2
-
3
-
4
-
5
-
6
-
7
-
8
-
9
-
10
-
11
-
12
-
13
-
14
-
15
-
16
-
17
-
18
-
19
-
20
-
21
-
22
-
23
-
24
-
25
-
26
-
27
-
28
-
29
-
30
-
31
-
32
-
33
-
34
-
35
-
36
-
37
-
38
-
39
-
40
-
41
-
42
-
43
-
44
-
45
-
46
-
47
-
48
-
49
-
50
-
51
-
52
-
53
-
54
-
55
-
56
-
57
-
58
-
59
-
60
-
61
-
62
-
63
-
64
-
65
-
66
-
67
-
68
-
69
-
70
-
71
-
72
-
73
-
74
-
75
-
76
-
77
-
78
-
79
-
80
-
81
-
82
-
83
-
84
-
85
-
86
-
87
-
88
-
89
-
90
-
91
-
92
-
93
-
94
-
95
-
96
-
97
-
98
-
99
-
100
-
101
-
102
-
103
-
104
-
105
-
106
-
107
-
108
-
109
-
110
-
111
-
112
-
113
-
114
-
115
-
116
-
117
-
118
-
119
-
120
-
121
-
122
-
123
-
124
-
125
-
126
-
127
-
128
-
129
-
130
-
131
-
132
-
133
-
134
-
135
-
136
-
137
-
138
-
139
-
140
-
141
-
142
-
143
-
144
-
145
-
146
-
147
-
148
-
149
-
150
-
151
-
152
-
153
-
154
-
155
-
156
-
157
-
158
-
159
-
160
-
161
-
162
-
163
-
164
-
165
-
166
-
167
-
168
-
169
-
170
-
171
-
172
-
173
-
174
-
175
-
176
-
177
-
178
-
179
-
180
-
181
-
182
-
183
-
184
-
185
-
186
-
187
-
188
-
189
-
190
-
191
-
192
-
193
-
194
-
195
-
196
-
197
-
198
-
199
-
200
-
201
-
202
-
203
-
204
-
205
-
206
-
207
-
208
-
209
-
210
-
211
-
212
-
213
-
214
-
215
-
216
-
217
-
218
-
219
-
220
-
221
-
 222
222 -
 223
223 -
 224
224 -
 225
225 -
 226
226 -
 227
227 -
 228
228 -
 229
229 -
 230
230 -
 231
231 -
 232
232 -
233
-
234
-
235
-
236
-
237
-
238
-
239
-
240
-
241
-
242
-
243
-
244
-
245
-
246
-
247
-
248
-
249
-
250
-
251
-
252
-
253
-
254
-
255
-
256
-
257
-
258
-
259
-
260
-
261
-
262
-
263
-
264
-
265
 |
 |