D-Link DSM 330 User Guide - Page 12
Additional Audio Connections, Advanced DivX Connected Device Setup
 |
UPC - 790069313424
View all D-Link DSM 330 manuals
Add to My Manuals
Save this manual to your list of manuals |
Page 12 highlights
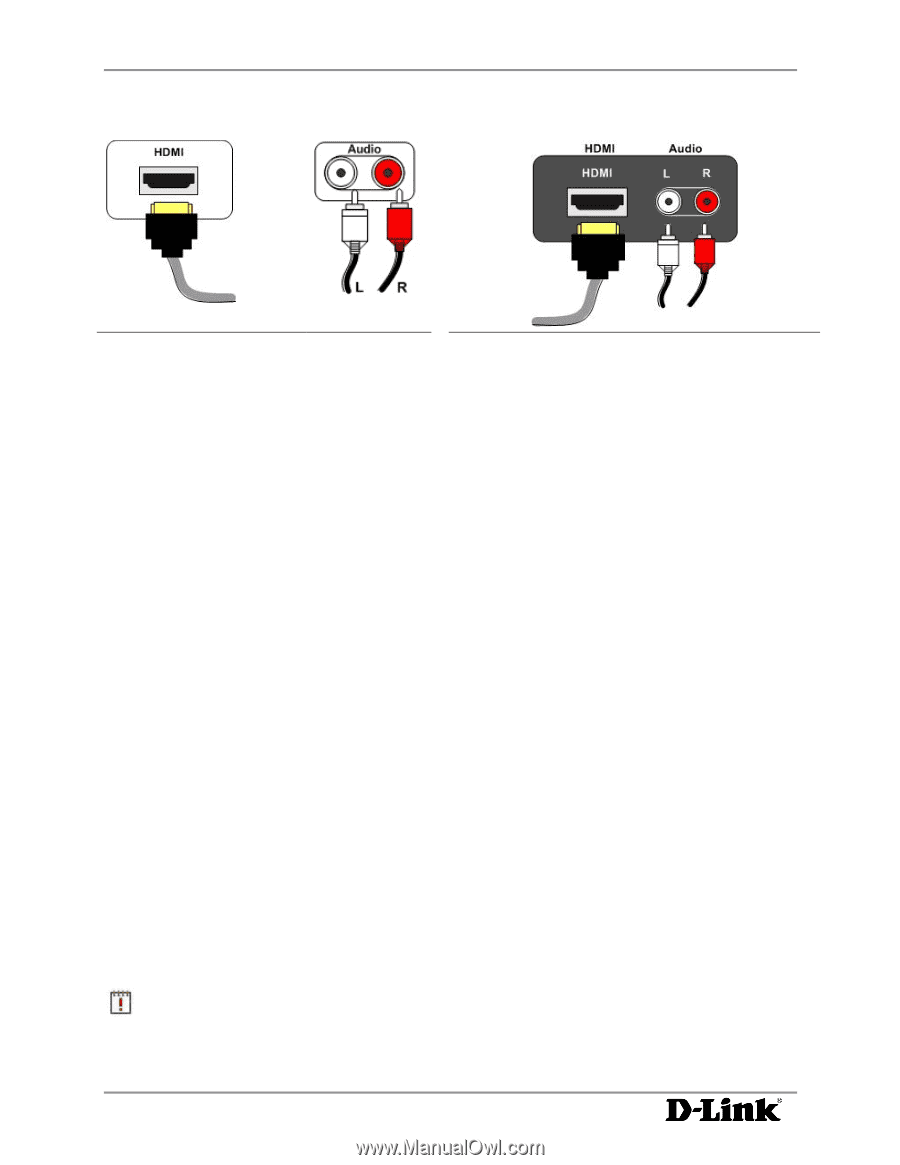
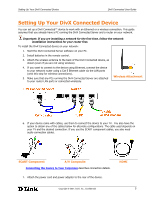
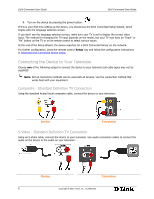
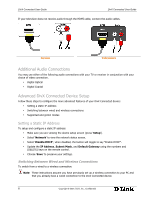
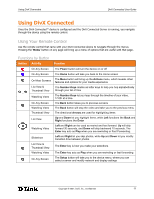
DivX Connected User Guide DivX Connected User Guide S If your television does not receive audio through the HDMI cable, connect the audio cables. Device Television Additional Audio Connections You may use either of the following audio connections with your TV or receiver in conjunction with your choice of video connection. • Digital Optical • Digital Coaxial Advanced DivX Connected Device Setup Follow these steps to configure the more advanced features of your DivX Connected device: • Setting a static IP address • Switching between wired and wireless connections • Supported encryption modes Setting a Static IP Address To setup and configure a static IP address: • Make sure you are viewing the device setup screen (press 'Setup'). • Select 'Network' to view the network status screen. • Select 'Disable DHCP'; when disabled, the button will toggle to say "Enable DHCP". • Update the IP Address, Subnet Mask, and Default Gateway using the numbers and (DELETE) keys on the remote control. • Choose 'Save' to preserve your settings. Switching Between Wired and Wireless Connections To switch from a wired to a wireless connection: Note: These instructions assume you have previously set up a wireless connection to your PC and that you already have a wired connection to the DivX Connected device. 8 Copyright © 2007, DivX, Inc., Confidential
-
 1
1 -
2
-
3
-
4
-
5
-
6
-
 7
7 -
 8
8 -
 9
9 -
 10
10 -
 11
11 -
 12
12 -
 13
13 -
 14
14 -
 15
15 -
 16
16 -
 17
17 -
18
-
19
-
20
-
21
-
22
-
23
-
24
-
25
-
26
-
27
-
28
-
29
-
30
-
31
-
32
-
33
-
34
-
35
-
36
-
37
-
38
 |
 |