Dell 962 All In One Photo Printer 21H0420.book - Page 34
Loading Paper, Load Plain Paper Into the Paper Support
 |
View all Dell 962 All In One Photo Printer manuals
Add to My Manuals
Save this manual to your list of manuals |
Page 34 highlights
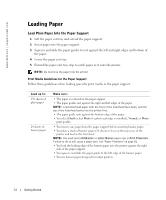
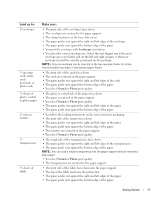
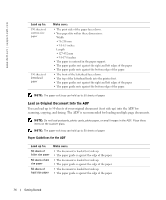
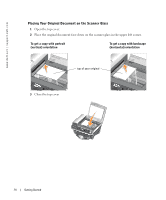
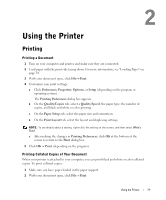
www.dell.com | support.dell.com Loading Paper Load Plain Paper Into the Paper Support 1 Lift the paper exit tray and extend the paper support. 2 Insert paper into the paper support. 3 Squeeze and slide the paper guides to rest against the left and right edges and bottom of the paper. 4 Lower the paper exit tray. 5 Extend the paper exit tray stop to catch paper as it exits the printer. NOTE: Do not force the paper into the printer. Print Media Guidelines for the Paper Support Follow these guidelines when loading specialty print media in the paper support. Load up to: 150 sheets of plain paper 20 sheets of banner paper Make sure: • The paper is centered in the paper support. • The paper guides rest against the right and left edges of the paper. NOTE: Load letterhead paper with the front of the letterhead face down, and the top of the letterhead going into the printer first. • The paper guide rests against the bottom edge of the paper. • You select Draft (select Photo if a photo cartridge is installed), Normal, or Photo print quality. • You remove any paper from the paper support before inserting banner paper. • You place a stack of banner paper (20 sheets or less) on the top cover of the printer and feed in the first sheet. NOTE: You must select A4 Banner or Letter Banner paper size in Print Properties. Failure to do so will cause a paper jam. See "Paper Problems" on page 81. • You load the leading edge of the banner paper into the printer against the right side of the paper support. • You squeeze and slide the paper guide to the left edge of the banner paper. • You use banner paper designed for inkjet printers. 34 Getting Started
-
 1
1 -
2
-
3
-
4
-
5
-
6
-
7
-
8
-
9
-
10
-
11
-
12
-
13
-
14
-
15
-
16
-
17
-
18
-
19
-
20
-
21
-
22
-
23
-
24
-
25
-
26
-
27
-
28
-
 29
29 -
 30
30 -
 31
31 -
 32
32 -
 33
33 -
 34
34 -
 35
35 -
 36
36 -
 37
37 -
 38
38 -
 39
39 -
40
-
41
-
42
-
43
-
44
-
45
-
46
-
47
-
48
-
49
-
50
-
51
-
52
-
53
-
54
-
55
-
56
-
57
-
58
-
59
-
60
-
61
-
62
-
63
-
64
-
65
-
66
-
67
-
68
-
69
-
70
-
71
-
72
-
73
-
74
-
75
-
76
-
77
-
78
-
79
-
80
-
81
-
82
-
83
-
84
-
85
-
86
-
87
-
88
-
89
-
90
-
91
-
92
-
93
-
94
-
95
-
96
-
97
-
98
-
99
-
100
-
101
-
102
-
103
-
104
-
105
-
106
-
107
-
108
-
109
-
110
-
111
-
112
-
113
-
114
-
115
-
116
-
117
-
118
-
119
-
120
-
121
-
122
 |
 |