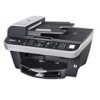
Dell 962 All In One Photo Printer 21H0420.book - Page 63
Select, Start, All Programs, Programs, Printers, Dell Photo AIO Printer, Printer Setup Utility
 |
View all Dell 962 All In One Photo Printer manuals
Add to My Manuals
Save this manual to your list of manuals |
Page 63 highlights
4 Enter a two-digit speed dial number from 01 to 79, and then press Select. 5 Enter the fax number, and then press Select. 6 Enter the name using the keypad. a Find the number button that corresponds to the letter you want to enter, and press it repeatedly until the correct letter appears. b Press > to move to the next character space. NOTE: To enter a space between words, press > twice. c Repeat the previous steps until you are finished entering text. 7 Press Select when you are finished. Saved appears on the display. Create a Speed Dial List From the Computer 1 Click Start → All Programs (or Programs) → Dell Printers → Dell Photo AIO Printer 962 → Printer Setup Utility. 2 Click the Speed Dial tab. 3 Follow the instructions on the Speed Dial tab to add a new number to your speed dial list. Create a Group Dial List From the Operator Panel 1 Press Mode until the Fax LED is lit. 2 Press Menu until you see EDIT SPEED DIAL. 3 If the current option is Add, press Select. Press > to scroll, if necessary. 4 Enter a two-digit speed dial number from 80 to 99, and then press Select. 5 Enter the first fax number, and then press Select. 6 Press 1 to enter another number. 7 Enter the next fax number, and then press Select. 8 After you have entered all of the group fax numbers (up to five), press 2 to enter the group list name. 9 Enter the name using the keypad. a Find the number button that corresponds to the letter you want to enter and press it repeatedly until the correct letter appears. b Press > to move to the next character space. Using the Printer 63
-
 1
1 -
2
-
3
-
4
-
5
-
6
-
7
-
8
-
9
-
10
-
11
-
12
-
13
-
14
-
15
-
16
-
17
-
18
-
19
-
20
-
21
-
22
-
23
-
24
-
25
-
26
-
27
-
28
-
29
-
30
-
31
-
32
-
33
-
34
-
35
-
36
-
37
-
38
-
39
-
40
-
41
-
42
-
43
-
44
-
45
-
46
-
47
-
48
-
49
-
50
-
51
-
52
-
53
-
54
-
55
-
56
-
57
-
 58
58 -
 59
59 -
 60
60 -
 61
61 -
 62
62 -
 63
63 -
 64
64 -
 65
65 -
 66
66 -
 67
67 -
 68
68 -
69
-
70
-
71
-
72
-
73
-
74
-
75
-
76
-
77
-
78
-
79
-
80
-
81
-
82
-
83
-
84
-
85
-
86
-
87
-
88
-
89
-
90
-
91
-
92
-
93
-
94
-
95
-
96
-
97
-
98
-
99
-
100
-
101
-
102
-
103
-
104
-
105
-
106
-
107
-
108
-
109
-
110
-
111
-
112
-
113
-
114
-
115
-
116
-
117
-
118
-
119
-
120
-
121
-
122
 |
 |
