Dell Alienware 15 R4 Service Manual - Page 84
Troubleshooting, Flashing the BIOS, Flashing BIOS (USB key)
 |
View all Dell Alienware 15 R4 manuals
Add to My Manuals
Save this manual to your list of manuals |
Page 84 highlights
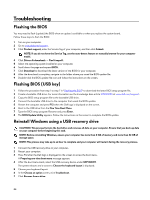
Troubleshooting Flashing the BIOS You may need to flash (update) the BIOS when an update is available or when you replace the system board. Follow these steps to flash the BIOS: 1 Turn on your computer. 2 Go to www.dell.com/support. 3 Click Product support, enter the Service Tag of your computer, and then click Submit. NOTE: If you do not have the Service Tag, use the auto-detect feature or manually browse for your computer model. 4 Click Drivers & downloads → Find it myself. 5 Select the operating system installed on your computer. 6 Scroll down the page and expand BIOS. 7 Click Download to download the latest version of the BIOS for your computer. 8 After the download is complete, navigate to the folder where you saved the BIOS update file. 9 Double-click the BIOS update file icon and follow the instructions on the screen. Flashing BIOS (USB key) 1 Follow the procedure from step 1 to step 7 in "Flashing the BIOS" to download the latest BIOS setup program file. 2 Create a bootable USB drive. For more information see the knowledge base article SLN143196 at www.dell.com/support. 3 Copy the BIOS setup program file to the bootable USB drive. 4 Connect the bootable USB drive to the computer that needs the BIOS update. 5 Restart the computer and press F12 when the Dell logo is displayed on the screen. 6 Boot to the USB drive from the One Time Boot Menu. 7 Type the BIOS setup program filename and press Enter. 8 The BIOS Update Utility appears. Follow the instructions on the screen to complete the BIOS update. Reinstall Windows using a USB recovery drive CAUTION: This process formats the hard drive and removes all data on your computer. Ensure that you back up data on your computer before beginning this task. NOTE: Before reinstalling Windows, ensure your computer has more than 2 GB of memory and more than 32 GB of storage space. NOTE: This process may take up to an hour to complete and your computer will restart during the recovery process. 1 Connect the USB recovery drive to your computer. 2 Restart your computer. 3 Press F12 after the Dell logo is displayed on the screen to access the boot menu. A Preparing one-time boot menu message appears. 4 After the boot menu loads, select the USB recovery device under UEFI BOOT. The system reboots and a screen to Choose the keyboard layout is displayed. 5 Choose your keyboard layout. 6 In the Choose an option screen, click Troubleshoot. 7 Click Recover from a drive. 84
-
 1
1 -
2
-
3
-
4
-
5
-
6
-
7
-
8
-
9
-
10
-
11
-
12
-
13
-
14
-
15
-
16
-
17
-
18
-
19
-
20
-
21
-
22
-
23
-
24
-
25
-
26
-
27
-
28
-
29
-
30
-
31
-
32
-
33
-
34
-
35
-
36
-
37
-
38
-
39
-
40
-
41
-
42
-
43
-
44
-
45
-
46
-
47
-
48
-
49
-
50
-
51
-
52
-
53
-
54
-
55
-
56
-
57
-
58
-
59
-
60
-
61
-
62
-
63
-
64
-
65
-
66
-
67
-
68
-
69
-
70
-
71
-
72
-
73
-
74
-
75
-
76
-
77
-
78
-
 79
79 -
 80
80 -
 81
81 -
 82
82 -
 83
83 -
 84
84 -
 85
85 -
 86
86 -
 87
87 -
 88
88
 |
 |