Dell Dimension 4550 Dell Dimension 4550 Owner's Manual - Page 113
Replacing the Battery
 |
View all Dell Dimension 4550 manuals
Add to My Manuals
Save this manual to your list of manuals |
Page 113 highlights
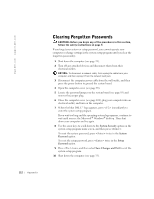
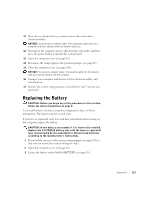
11 Turn off any attached devices and disconnect them from their electrical outlets. NOTICE: To disconnect a network cable, first unplug the cable from your computer and then unplug it from the network wall jack. 12 Disconnect the computer power cable from the wall outlet, and then press the power button to ground the system board. 13 Open the computer cover (see page 83). 14 Reconnect the jumper plug to the password jumper (see page 85). 15 Close the computer cover (see page 104). NOTICE: To connect a network cable, first plug the cable into the network wall jack and then plug it into the computer. 16 Connect your computer and devices to their electrical outlets, and turn them on. 17 Reenter the system setup program as described in step 7 and set new passwords. Replacing the Battery CAUTION: Before you begin any of the procedures in this section, follow the safety instructions on page 9. A coin-cell battery maintains computer configuration, date, and time information. The battery can last several years. If you have to repeatedly reset time and date information after turning on the computer, replace the battery. CAUTION: A new battery can explode if it is incorrectly installed. Replace the 3-V CR2032 battery only with the same or equivalent type recommended by the manufacturer. Discard used batteries according to the manufacturer's instructions. 1 Record all the screens in the system setup program (see page 110) so that you can restore the correct settings at step 7. 2 Open the computer cover (see page 83). 3 Locate the battery socket labelled BATTERY (see page 85). Appendix 113
-
 1
1 -
2
-
3
-
4
-
5
-
6
-
7
-
8
-
9
-
10
-
11
-
12
-
13
-
14
-
15
-
16
-
17
-
18
-
19
-
20
-
21
-
22
-
23
-
24
-
25
-
26
-
27
-
28
-
29
-
30
-
31
-
32
-
33
-
34
-
35
-
36
-
37
-
38
-
39
-
40
-
41
-
42
-
43
-
44
-
45
-
46
-
47
-
48
-
49
-
50
-
51
-
52
-
53
-
54
-
55
-
56
-
57
-
58
-
59
-
60
-
61
-
62
-
63
-
64
-
65
-
66
-
67
-
68
-
69
-
70
-
71
-
72
-
73
-
74
-
75
-
76
-
77
-
78
-
79
-
80
-
81
-
82
-
83
-
84
-
85
-
86
-
87
-
88
-
89
-
90
-
91
-
92
-
93
-
94
-
95
-
96
-
97
-
98
-
99
-
100
-
101
-
102
-
103
-
104
-
105
-
106
-
107
-
 108
108 -
 109
109 -
 110
110 -
 111
111 -
 112
112 -
 113
113 -
 114
114 -
 115
115 -
 116
116 -
 117
117 -
 118
118 -
119
-
120
-
121
-
122
-
123
-
124
-
125
-
126
-
127
-
128
-
129
-
130
-
131
-
132
-
133
-
134
-
135
-
136
-
137
-
138
-
139
-
140
-
141
-
142
-
143
-
144
-
145
-
146
-
147
-
148
-
149
-
150
-
151
-
152
 |
 |
