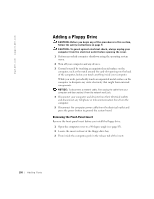
Dell Dimension 4550 Dell Dimension 4550 Owner's Manual - Page 98
Gently slide the new hard drive into the upper bay until you hear
 |
View all Dell Dimension 4550 manuals
Add to My Manuals
Save this manual to your list of manuals |
Page 98 highlights
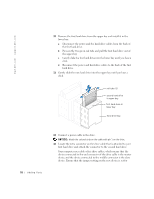
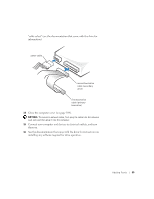
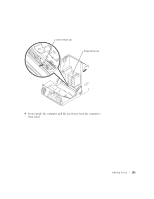
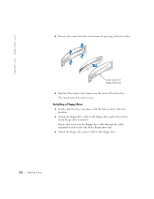
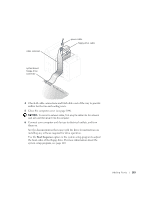
www.dell.com | support.dell.com 10 Remove the first hard drive from the upper bay and install it in the lower bay: a Disconnect the power and the hard-drive cables from the back of the first hard drive. b Press in the two green rail tabs and pull the first hard drive out of the upper bay. c Gently slide the first hard drive into the lower bay until you hear a click. d Reconnect the power and hard-drive cables to the back of the first hard drive. 11 Gently slide the new hard drive into the upper bay until you hear a click. rail tabs (2) second hard drive in upper bay first hard drive in lower bay hard drive bay 98 A d d i n g Pa r ts 12 Connect a power cable to the drive. NOTICE: Match the colored strip on the cable with pin 1 on the drive. 13 Locate the extra connector on the drive cable that is attached to your first hard drive and attach the connector to the second hard drive. Your computer uses cable-select drive cables, which means that the device connected to the end connector of the drive cable is the master device and the device connected to the middle connector is the slave device. Ensure that the jumper setting on the new device is set for
-
 1
1 -
2
-
3
-
4
-
5
-
6
-
7
-
8
-
9
-
10
-
11
-
12
-
13
-
14
-
15
-
16
-
17
-
18
-
19
-
20
-
21
-
22
-
23
-
24
-
25
-
26
-
27
-
28
-
29
-
30
-
31
-
32
-
33
-
34
-
35
-
36
-
37
-
38
-
39
-
40
-
41
-
42
-
43
-
44
-
45
-
46
-
47
-
48
-
49
-
50
-
51
-
52
-
53
-
54
-
55
-
56
-
57
-
58
-
59
-
60
-
61
-
62
-
63
-
64
-
65
-
66
-
67
-
68
-
69
-
70
-
71
-
72
-
73
-
74
-
75
-
76
-
77
-
78
-
79
-
80
-
81
-
82
-
83
-
84
-
85
-
86
-
87
-
88
-
89
-
90
-
91
-
92
-
 93
93 -
 94
94 -
 95
95 -
 96
96 -
 97
97 -
 98
98 -
 99
99 -
 100
100 -
 101
101 -
 102
102 -
 103
103 -
104
-
105
-
106
-
107
-
108
-
109
-
110
-
111
-
112
-
113
-
114
-
115
-
116
-
117
-
118
-
119
-
120
-
121
-
122
-
123
-
124
-
125
-
126
-
127
-
128
-
129
-
130
-
131
-
132
-
133
-
134
-
135
-
136
-
137
-
138
-
139
-
140
-
141
-
142
-
143
-
144
-
145
-
146
-
147
-
148
-
149
-
150
-
151
-
152
 |
 |
