Dell Force10 S4820T Installing the S4820T System - Page 29
Installing an AC or DC Power Supply, a suitable grounding point. - force 10
 |
View all Dell Force10 S4820T manuals
Add to My Manuals
Save this manual to your list of manuals |
Page 29 highlights
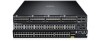
NOTE: Coat the one-hole lug with an anti-oxidant compound prior to crimping. Also, bring any un-plated mating surfaces to a shiny finish and coat with an anti-oxidant prior to mating. Plated mating surfaces must be clean and free from contamination. 1 Take the one M4x0.7 screw from the package. 2 Cut the cable to the desired length. The cable length must facilitate proper operation of the fault interrupt circuits. Dell Force10 recommends using of the shortest cable route allowable. 3 Attach the one-hole lug to the chassis using the supplied 10-32 screw with the captive internal tooth lock washer. Torque the screw to 20 in-lbs. 4 Attach the other end of the ground cable to a suitable ground point. The rack installation ears are not a suitable grounding point. Installing an AC or DC Power Supply The S4820T supports two hot-swappable power supplies units (PSUs) and fans that provide cooling for the system. The S4820T supports AC and DC power supplies with two air-flow directions (I/O to PSU or PSU to I/O). Two PSUs are required for full redundancy, but the system will operate with a single PSU. NOTE: If you use a single PSU, you must install a blank plate in the other PSU slot. Dell Force10 recommends using power supply 1 (PSU1) as the blank plate slot. The PSUs are field replaceable. When running with full redundancy (two power supplies installed and running), you can remove and replace one PSU while the other PSU is running without disrupting traffic. The S4820T does not support mixing PSU types. You cannot replace an AC PSU with a DC PSU and you cannot replace an AC-R PSU with a DC-R PSU. WARNING: Electrostatic discharge (ESD) damage can occur if components are mishandled. Always wear an ESD-preventive wrist or heel ground strap when handling the S4820T and its components. CAUTION: To prevent electrical shock, ensure the S4820T is grounded properly. If you do not ground your equipment correctly, excessive emissions may result. Use a qualified electrician to ensure the power cables meet your local electrical requirements. Figure 4-6. S4820T Power Supply PS0 PS1 NOTE: The PSU slides into the slot smoothly. Do not force a PSU into a slot as this may damage the PSU or the S4820T chassis. NOTE: Ensure that the PSU is correctly installed. When the PSU is correctly installed, the power connector is on the right side of the PSU and the status LED is at the top of the PSU NOTE: If you use a single PSU, you must install a blank plate in the other PSU slot. Dell Force10 recommends using power supply 1 (PSU1) as the blank plate slot. To install an AC or DC power supply, follow these steps: Installing the S4820T | 29
-
 1
1 -
2
-
3
-
4
-
5
-
6
-
7
-
8
-
9
-
10
-
11
-
12
-
13
-
14
-
15
-
16
-
17
-
18
-
19
-
20
-
21
-
22
-
23
-
 24
24 -
 25
25 -
 26
26 -
 27
27 -
 28
28 -
 29
29 -
 30
30 -
 31
31 -
 32
32 -
 33
33 -
 34
34 -
35
-
36
-
37
-
38
-
39
-
40
-
41
-
42
-
43
-
44
-
45
-
46
-
47
-
48
-
49
-
50
-
51
-
52
-
53
-
54
-
55
-
56
-
57
-
58
-
59
-
60
 |
 |
