Dell Force10 S4820T Installing the S4820T System - Page 31
Installing QSFP+ Optics, Removing QSFP+ Optics, Splitting QSFP+ Ports to SFP+ or RJ-45 Ports
 |
View all Dell Force10 S4820T manuals
Add to My Manuals
Save this manual to your list of manuals |
Page 31 highlights
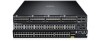
Installing QSFP+ Optics The S4820T has four QSFP+ optical ports. For supported optics, refer to http:// www.force10networks.com/products/specifications.asp. WARNING: ESD damage can occur if components are mishandled. Always wear an ESD-preventive wrist or heel ground strap when handling the S4820T and its components. WARNING: When working with optical fibers, follow all warning labels and always wear eye protection. Never look directly into the end of a terminated or unterminated fiber or connector, which may cause eye damage. To install QSFP+ optics into an open port, follow these steps: 1 Position the optic so it is in the correct position. The optic has a key that prevents it from being inserted incorrectly. 2 Insert the optic into the port until it gently snaps into place. NOTE: Both rows of QSFP+ ports require that the 40G optics be inserted with the tabs facing up. Removing QSFP+ Optics Remove an optic by pushing the tab on the optic and sliding the optic from the port. When removing optics with Direct Attach Cables (DACs) from the port, pull the release tab firmly and steadily. Prior to pulling the release tab, you may need to gently push the optic into the port to ensure it is seated properly. Do not jerk or tug repeatedly on the tab. Splitting QSFP+ Ports to SFP+ or RJ-45 Ports The S4820T supports splitting a single 40G QSFP+ port into four 10G SFP+ ports or four 10G RJ-45 ports using one of the supported breakout cables. For the system to recognize the port type change, you must enter the stack-unit portmode command. For example: stack-unit stack-unit port number portmode quad • stack-unit: Enter the stack member unit identifier of the stack member to reset. Range: 0 - 11. • number: Enter the port number of the 40G port to be split. Range:0-31. Important Points to Know: • The unit number with the split ports must be the default (stack-unit 0). You can verify this using the show system brief command. If the unit ID is not 0, you must renumber it to 0 before the ports are split by using the stackunit id renumber 0 command in EXEC mode. • The quad port must be in a default configuration before you can split it into four 10G ports. The 40G port is lost in the configuration when you split the port, so be sure the port is also removed from other L2/L3 feature configurations. • For the split-port change to take effect, you must reload the system after issuing the command. Save your configuration. Installing the S4820T | 31
-
 1
1 -
2
-
3
-
4
-
5
-
6
-
7
-
8
-
9
-
10
-
11
-
12
-
13
-
14
-
15
-
16
-
17
-
18
-
19
-
20
-
21
-
22
-
23
-
24
-
25
-
 26
26 -
 27
27 -
 28
28 -
 29
29 -
 30
30 -
 31
31 -
 32
32 -
 33
33 -
 34
34 -
 35
35 -
 36
36 -
37
-
38
-
39
-
40
-
41
-
42
-
43
-
44
-
45
-
46
-
47
-
48
-
49
-
50
-
51
-
52
-
53
-
54
-
55
-
56
-
57
-
58
-
59
-
60
 |
 |
