Dell Inspiron 1100 Inspiron 1100 Owner's Manual - Page 100
Before You Add or Replace Parts, Memory
 |
View all Dell Inspiron 1100 manuals
Add to My Manuals
Save this manual to your list of manuals |
Page 100 highlights
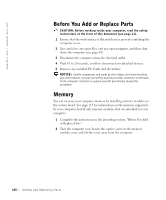
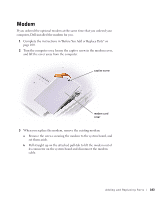
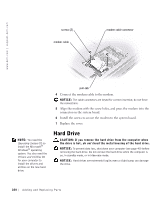
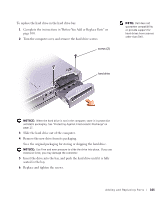
www.dell.com | support.dell.com Before You Add or Replace Parts CAUTION: Before working inside your computer, read the safety instructions at the front of this document (see page 11). 1 Ensure that the work surface is flat and clean to prevent scratching the computer cover. 2 Save and close any open files, exit any open programs, and then shut down the computer (see page 40). 3 Disconnect the computer from the electrical outlet. 4 Wait 10 to 20 seconds, and then disconnect any attached devices. 5 Remove any installed PC Cards and the battery. NOTICE: Handle components and cards by their edges, and avoid touching pins and contacts. Ground yourself by touching a metal connector on the back of the computer. Continue to ground yourself periodically during this procedure. Memory You can increase your computer memory by installing memory modules on the system board. See page 115 for information on the memory supported by your computer. Install only memory modules that are intended for your computer. 1 Complete the instructions in the preceding section, "Before You Add or Replace Parts." 2 Turn the computer over, loosen the captive screw in the memory module cover, and lift the cover away from the computer. 100 Adding and Replacing Pa rts
-
 1
1 -
2
-
3
-
4
-
5
-
6
-
7
-
8
-
9
-
10
-
11
-
12
-
13
-
14
-
15
-
16
-
17
-
18
-
19
-
20
-
21
-
22
-
23
-
24
-
25
-
26
-
27
-
28
-
29
-
30
-
31
-
32
-
33
-
34
-
35
-
36
-
37
-
38
-
39
-
40
-
41
-
42
-
43
-
44
-
45
-
46
-
47
-
48
-
49
-
50
-
51
-
52
-
53
-
54
-
55
-
56
-
57
-
58
-
59
-
60
-
61
-
62
-
63
-
64
-
65
-
66
-
67
-
68
-
69
-
70
-
71
-
72
-
73
-
74
-
75
-
76
-
77
-
78
-
79
-
80
-
81
-
82
-
83
-
84
-
85
-
86
-
87
-
88
-
89
-
90
-
91
-
92
-
93
-
94
-
 95
95 -
 96
96 -
 97
97 -
 98
98 -
 99
99 -
 100
100 -
 101
101 -
 102
102 -
 103
103 -
 104
104 -
 105
105 -
106
-
107
-
108
-
109
-
110
-
111
-
112
-
113
-
114
-
115
-
116
-
117
-
118
-
119
-
120
-
121
-
122
-
123
-
124
-
125
-
126
-
127
-
128
-
129
-
130
-
131
-
132
-
133
-
134
-
135
-
136
-
137
-
138
-
139
-
140
-
141
-
142
-
143
-
144
-
145
-
146
-
147
-
148
-
149
-
150
-
151
-
152
-
153
-
154
-
155
-
156
-
157
-
158
-
159
-
160
-
161
-
162
-
163
-
164
 |
 |
