Dell Inspiron 560s Service Manual - Page 22
Replacing the Optical Drive
 |
View all Dell Inspiron 560s manuals
Add to My Manuals
Save this manual to your list of manuals |
Page 22 highlights
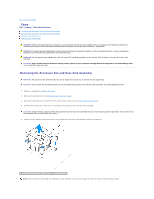
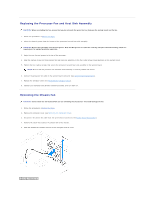
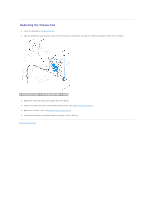
7. Replace the computer cover (see Replacing the Computer Cover). 8. Connect your computer and devices to electrical outlets, and then turn them on. 9. Configure the drives in system setup (see System Setup Options). Replacing the Optical Drive 1. Follow the procedures in Before You Begin. 2. If not present, attach the two shoulder screws to the optical drive. NOTE: If you are replacing an existing drive, remove the shoulder screws from the existing drive and attach them to the replacement drive. 3. Gently slide the optical drive into the optical-drive bay, until the optical drive snaps into place. 4. Connect the power cable and the data cable to the optical drive. 5. If disconnected, connect the data cable to the system board connector (see System Board Components). 6. Replace the front bezel (see Replacing the Front Bezel). 7. Replace the computer cover (see Replacing the Computer Cover). 8. Connect your computer and devices to electrical outlets, and turn them on. See the documentation that came with the optical drive for instructions on installing any software required for optical drive operation. 9. Check the System Setup for drive configuration changes (see Entering System Setup). Back to Contents Page
-
 1
1 -
2
-
3
-
4
-
5
-
6
-
7
-
8
-
9
-
10
-
11
-
12
-
13
-
14
-
15
-
16
-
 17
17 -
 18
18 -
 19
19 -
 20
20 -
 21
21 -
 22
22 -
 23
23 -
 24
24 -
 25
25 -
 26
26 -
 27
27 -
28
-
29
-
30
-
31
-
32
-
33
-
34
-
35
-
36
-
37
-
38
-
39
-
40
-
41
-
42
 |
 |