Dell OptiPlex 9030 All In One Dell OptiPlex 9030 All-In-One Owners Manual
Dell OptiPlex 9030 All In One Manual
 |
View all Dell OptiPlex 9030 All In One manuals
Add to My Manuals
Save this manual to your list of manuals |
Dell OptiPlex 9030 All In One manual content summary:
- Dell OptiPlex 9030 All In One | Dell OptiPlex 9030 All-In-One Owners Manual - Page 1
Dell OptiPlex 9030 All-In-One Owner's Manual Regulatory Model: W09C Regulatory Type: W09C001 - Dell OptiPlex 9030 All In One | Dell OptiPlex 9030 All-In-One Owners Manual - Page 2
you make better use of your computer. CAUTION: A CAUTION indicates either potential damage to hardware or loss of data and tells you how to avoid the problem. WARNING: A WARNING indicates a potential for property damage, personal injury, or death. Copyright © 2014 Dell Inc. All rights reserved. This - Dell OptiPlex 9030 All In One | Dell OptiPlex 9030 All-In-One Owners Manual - Page 3
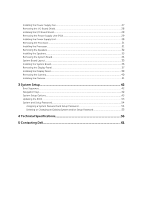
...18 Installing the Coin-Cell Battery...18 Removing the Optical Drive...18 Installing the Optical Drive...20 Removing the Hard Drive...20 Installing the Hard Drive...21 Removing the Intrusion Switch...22 Installing the Intrusion Switch...23 Removing the Wireless Local Area Network (WLAN) Card - Dell OptiPlex 9030 All In One | Dell OptiPlex 9030 All-In-One Owners Manual - Page 4
Removing the Processor...31 Installing the Processor...31 Removing the Speakers...32 Installing the Speakers...33 Removing the System Board...34 System Board Layout...35 Installing the System Board...36 Removing System and/or Setup Password 55 4 Technical Specifications 56 5 Contacting Dell...61 - Dell OptiPlex 9030 All In One | Dell OptiPlex 9030 All-In-One Owners Manual - Page 5
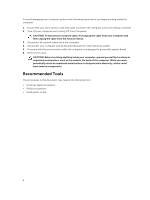
only be done by a certified service technician. You should only perform troubleshooting and simple repairs as authorized in your product documentation, or as directed by the online or telephone service and support team. Damage due to servicing that is not authorized by Dell is not covered by your - Dell OptiPlex 9030 All In One | Dell OptiPlex 9030 All-In-One Owners Manual - Page 6
attached devices from their electrical outlets. 5. Press and hold the power button while the computer is unplugged to ground the system board. 6. Remove the cover. CAUTION: Before touching anything inside your computer, ground yourself by touching an unpainted metal surface, such as the metal at the - Dell OptiPlex 9030 All In One | Dell OptiPlex 9030 All-In-One Owners Manual - Page 7
Turning Off Your Computer CAUTION: To avoid losing data, save and close all open files and exit all open programs before you turn off your computer. 1. Shut down the operating system: • In Windows 8.1: - Using a touch-enabled device: a. Swipe in from the right edge of the screen, opening the Charms - Dell OptiPlex 9030 All In One | Dell OptiPlex 9030 All-In-One Owners Manual - Page 8
Important Information NOTE: Avoid using the touchscreen in dusty, hot, or humid environments. NOTE: Sudden change in temperature may cause condensation on the inner surface of the glass screen, which will disappear after a short time and does not affect normal usage. 8 - Dell OptiPlex 9030 All In One | Dell OptiPlex 9030 All-In-One Owners Manual - Page 9
shield 2. memory shield 3. I/O board shield 4. speaker cover 5. power-supply diagnostic board 6. power-supply fan 7. converter board 8. power and on-screen display (OSD) buttons board 9. intrusion switch 10. optical drive 11. power-supply fan bracket 12. power-supply unit 13. VESA mount bracket 9 - Dell OptiPlex 9030 All In One | Dell OptiPlex 9030 All-In-One Owners Manual - Page 10
display bracket 2. coin-cell battery 4. WLAN card 6. hard drive 8. system board 10. speaker 12. optical-drive cable 14. heatsink assembly Removing the VESA Stand 1. Follow the procedures in Before Working Inside Your Computer. 2. Place the computer on a flat surface, display side facing downwards - Dell OptiPlex 9030 All In One | Dell OptiPlex 9030 All-In-One Owners Manual - Page 11
the VESA Stand 1. Align and place the VESA stand on the back of the computer. 2. Place and press the VESA cover on the computer, until it clicks into place. 3. Follow the procedures in After Working Inside Your Computer. Removing the Back Cover 1. Follow the procedures in Before Working Inside Your - Dell OptiPlex 9030 All In One | Dell OptiPlex 9030 All-In-One Owners Manual - Page 12
Align the back cover to its original position on the computer. 2. Hold locks on both sides to secure the back cover to the computer. 3. Install the VESA stand. 4. Follow the procedures in After Working Inside Your Computer. Removing the Memory 1. Follow the procedures in Before Working Inside Your - Dell OptiPlex 9030 All In One | Dell OptiPlex 9030 All-In-One Owners Manual - Page 13
the release tabs spring back to secure them in place. 3. Place the memory shield back into its place. 4. Install the: a. back cover b. VESA stand 5. Follow the procedures in After Working Inside Your Computer. Removing the VESA Mount Bracket 1. Follow the procedures in Before Working Inside Your - Dell OptiPlex 9030 All In One | Dell OptiPlex 9030 All-In-One Owners Manual - Page 14
the bracket on the back of the computer. 2. Tighten the screws that secure the VESA mount bracket to the computer. 3. Install the: a. back cover b. VESA stand 4. Follow the procedures in After Working Inside Your Computer. Removing the Power and On-Screen Display (OSD) Buttons Board 1. Follow the - Dell OptiPlex 9030 All In One | Dell OptiPlex 9030 All-In-One Owners Manual - Page 15
[1]. b. Lift the power and OSD buttons board from the chassis [2]. c. Disconnect the cable from the power and OSD buttons board to remove it from the computer [3]. Installing the Power and OSD Buttons Board 1. Insert the power and OSD buttons board into its slot and fix the tape to secure it - Dell OptiPlex 9030 All In One | Dell OptiPlex 9030 All-In-One Owners Manual - Page 16
board shield on the back of the computer. 2. Tighten the screws that secure the system-board shield to the computer. 3. Install the: a. VESA mount bracket b. back cover c. VESA stand 4. Follow the procedures in After Working Inside Your Computer. Removing the Converter Board 1. Follow the procedures - Dell OptiPlex 9030 All In One | Dell OptiPlex 9030 All-In-One Owners Manual - Page 17
[2]. c. Remove the screws that secure the converter board to the computer [3]. d. Lift the converter board away from the computer [4]. Installing its place. 2. Tighten the screws to secure the converter board to the computer. 3. Connect the converter-board cable and display-backlight cable to the - Dell OptiPlex 9030 All In One | Dell OptiPlex 9030 All-In-One Owners Manual - Page 18
back into place and secures it. 3. Install: a. system-board shield b. base cover c. VESA stand 4. Follow the procedures in After Working Inside Your Computer. Removing the Optical Drive 1. Follow the procedures in Before Working Inside Your Computer. 2. Remove the: a. VESA stand b. back cover 18 - Dell OptiPlex 9030 All In One | Dell OptiPlex 9030 All-In-One Owners Manual - Page 19
: a. Press the securing tab down to release the optical drive [1]. b. Slide the optical drive outward to remove it from the computer [2]. 4. Perform the following steps as shown in the illustration: a. Disconnect the optical-drive cables from the connector on the system board [1] [2]. b. Unthread - Dell OptiPlex 9030 All In One | Dell OptiPlex 9030 All-In-One Owners Manual - Page 20
Inside Your Computer. Removing the Hard Drive 1. Follow the procedures in Before Working Inside Your Computer. 2. Remove the: a. VESA stand b. back cover c. VESA mount bracket 3. Unthread the cables from the notches on the hard-drive bracket. Disconnect the hard-drive cables from the hard drive. 20 - Dell OptiPlex 9030 All In One | Dell OptiPlex 9030 All-In-One Owners Manual - Page 21
in the illustration: a. Remove the screws that secure the hard-drive cage to the computer [1]. b. Lift the hard-drive cage away from the computer [2]. Installing the Hard Drive 1. For a 3.5-inch hard drive, slide the hard drive into the hard-drive bracket. 2. For a 2.5-inch hard drive, tighten the - Dell OptiPlex 9030 All In One | Dell OptiPlex 9030 All-In-One Owners Manual - Page 22
VESA stand 8. Follow the procedures in After Working Inside Your Computer. Removing the Intrusion Switch 1. Follow the procedures in Before Working Inside Your Computer. 2. Remove the: a. VESA stand b. back cover c. VESA mount bracket d. system-board shield 3. Disconnect the intrusion-switch cable - Dell OptiPlex 9030 All In One | Dell OptiPlex 9030 All-In-One Owners Manual - Page 23
) Card 1. Follow the procedures in Before Working Inside Your Computer. 2. Remove the: a. VESA stand b. back cover c. VESA mount bracket d. system-board shield 3. Disconnect the WLAN cables. Remove the screws that secure the WLAN card to the system board. Remove the WLAN card from the connector. 23 - Dell OptiPlex 9030 All In One | Dell OptiPlex 9030 All-In-One Owners Manual - Page 24
Follow the procedures in After Working Inside Your Computer. Removing the Heatsink Assembly 1. Follow the procedures in Before Working Inside Your Computer. 2. Remove the: a. VESA stand b. back cover c. VESA mount bracket d. system-board shield 3. Remove the screws that secure the heatsink module to - Dell OptiPlex 9030 All In One | Dell OptiPlex 9030 All-In-One Owners Manual - Page 25
d. VESA stand 4. Follow the procedures in After Working Inside Your Computer. Removing the Processor Fan 1. Follow the procedures in Before Working Inside Your Computer. 2. Remove the: a. VESA stand b. back cover c. VESA mount bracket d. system-board shield 3. Perform the following steps as shown - Dell OptiPlex 9030 All In One | Dell OptiPlex 9030 All-In-One Owners Manual - Page 26
on the system board and thread the cable on the hooks in the computer. 4. Install: a. system-board shield b. VESA mount bracket c. back cover d. VESA stand 5. Follow the procedures in After Working Inside Your Computer. Removing the Power-Supply Fan 1. Follow the procedures in Before Working Inside - Dell OptiPlex 9030 All In One | Dell OptiPlex 9030 All-In-One Owners Manual - Page 27
[1]. b. Remove the screws that secure the power-supply fan to the chassis [2]. c. Lift the power-supply fan away from the computer [3]. Installing duct from the computer. 3. Tighten the screw that secures the fan duct to the chassis. 4. Install: a. system-board shield b. VESA mount bracket c. back - Dell OptiPlex 9030 All In One | Dell OptiPlex 9030 All-In-One Owners Manual - Page 28
I/O Board Shield 1. Follow the procedures in Before Working Inside Your Computer. 2. Remove the: a. VESA stand b. back cover c. VESA mount bracket d. power supply fan e. system-board shield f. speaker cover 3. Remove the screws that secure the power-button board to the I/O board shield. Disconnect - Dell OptiPlex 9030 All In One | Dell OptiPlex 9030 All-In-One Owners Manual - Page 29
the I/O board shield. 5. Place the I/O panel on the computer. 6. Install: a. power-supply fan b. system-board shield c. VESA mount bracket d. back cover e. speaker cover f. VESA stand 7. Follow the procedures in After Working Inside Your Computer. Removing the Power Supply Unit (PSU) 1. Follow the - Dell OptiPlex 9030 All In One | Dell OptiPlex 9030 All-In-One Owners Manual - Page 30
from the connector on the system board. 4. Perform the following steps as shown in the illustration: a. Unthread the cable from the hooks in the computer [1]. b. Remove the screws that secure the power-supply unit to the chassis [2]. c. Slide upwards to release the power-supply unit from the chassis - Dell OptiPlex 9030 All In One | Dell OptiPlex 9030 All-In-One Owners Manual - Page 31
VESA stand 6. Follow the procedures in After Working Inside Your Computer. Removing the Processor 1. Follow the procedures in Before Working Inside Your Computer. 2. Remove the: a. VESA stand b. back cover c. VESA mount bracket d. system-board shield e. heatsink assembly 3. Press the release lever - Dell OptiPlex 9030 All In One | Dell OptiPlex 9030 All-In-One Owners Manual - Page 32
the procedures in Before Working Inside Your Computer. 2. Remove the: a. VESA stand b. back cover c. VESA mount bracket d. system-board shield e. I/O board shield f. speaker cover 3. Perform the following steps as shown in the illustration: a. Disconnect the speaker cables from the connector on the - Dell OptiPlex 9030 All In One | Dell OptiPlex 9030 All-In-One Owners Manual - Page 33
the computer. Installing the Speakers 1. Place and align the speakers on the chassis. Tighten the screws that secure the speaker to the chassis. 2. Thread the cables on the notches. Connect the speaker cables to the system board. 3. Install: a. system-board shield b. I/O board shield c. VESA mount - Dell OptiPlex 9030 All In One | Dell OptiPlex 9030 All-In-One Owners Manual - Page 34
the System Board 1. Follow the procedures in Before Working Inside Your Computer. 2. Remove the: a. VESA stand b. back cover c. VESA mount bracket d. system-board shield e. memory f. optical drive g. hard drive h. heatsink assembly i. power supply unit j. input/output (I/O) board shield k. converter - Dell OptiPlex 9030 All In One | Dell OptiPlex 9030 All-In-One Owners Manual - Page 35
following steps as shown in the illustration. a. Remove the screws that secure the system board to the computer [1]. b. Slide the system board to release it from the computer [2]. c. Lift the system board away from the computer [3]. 5. Lift and remove the system board from the chassis. System Board - Dell OptiPlex 9030 All In One | Dell OptiPlex 9030 All-In-One Owners Manual - Page 36
: a. power-supply fan b. converter board c. input/output (I/O) board shield d. power supply unit e. heatsink assembly f. hard drive g. optical drive h. memory i. system-board shield j. VESA mount bracket k. back cover l. VESA stand 5. Follow the procedures in After Working Inside Your Computer. 36 - Dell OptiPlex 9030 All In One | Dell OptiPlex 9030 All-In-One Owners Manual - Page 37
1. Follow the procedures in Before Working Inside Your Computer. 2. Remove the: a. VESA stand b. back cover c. VESA mount bracket d. system-board shield e. input/output (I/O) board shield f. WLAN card g. optical drive h. hard drive i. intrusion switch j. power and OSD buttons board k. converter - Dell OptiPlex 9030 All In One | Dell OptiPlex 9030 All-In-One Owners Manual - Page 38
4. Unthread all the cables from their tabs on the display panel. 5. Remove the screw that secure WEB GND cable. Remove the tape from both sides of the display panel. 38 - Dell OptiPlex 9030 All In One | Dell OptiPlex 9030 All-In-One Owners Manual - Page 39
6. Remove the screws that secure the base panel to the chassis. Lift the display-panel base from the display bezel. Installing the Display Panel 1. of the display panel.. 5. Align all the cables through their tabs on the display panel. 6. Tighten the screws to secure the latches to the computer. 39 - Dell OptiPlex 9030 All In One | Dell OptiPlex 9030 All-In-One Owners Manual - Page 40
1. Follow the procedures in Before Working Inside Your Computer. 2. Remove the: a. VESA stand b. back cover c. VESA mount bracket d. system-board shield e. input/output (I/O) board shield f. WLAN card g. optical drive h. hard drive i. intrusion switch j. power and OSD buttons board k. converter - Dell OptiPlex 9030 All In One | Dell OptiPlex 9030 All-In-One Owners Manual - Page 41
cable from the camera and remove the camera from the computer. Installing the Camera 1. hard drive k. optical drive l. WLAN card m. input/output (I/O) board shield n. system-board shield o. VESA mount bracket p. back cover q. VESA stand 4. Follow the procedures in After Working Inside Your Computer - Dell OptiPlex 9030 All In One | Dell OptiPlex 9030 All-In-One Owners Manual - Page 42
thresholds • Manage your computer security Boot Sequence Boot Sequence allows you to bypass the System Setup‐defined boot device order and boot directly to a specific device (for example: optical drive or hard drive). During the Power-on Self Test (POST), when the Dell logo appears, you can - Dell OptiPlex 9030 All In One | Dell OptiPlex 9030 All-In-One Owners Manual - Page 43
Tag, Asset Tag, Ownership Tag, Ownership Date, Manufacture Date, and Express Service Code. • Memory Information - Displays Memory Installed, Memory Available, Memory Speed, Memory Channel Mode, Memory Technology, DIMM A Size, DIMM B Size. • PCI Information - Displays SLOT1 and SLOT2. • Processor - Dell OptiPlex 9030 All In One | Dell OptiPlex 9030 All-In-One Owners Manual - Page 44
by default. • Enabled w/Cloud Desktop NOTE: Depending on the computer and its installed devices, the items listed in this section may or may not appear. SATA Operation Allows you to configure the operating mode of the integrated SATA hard drive controller. • Disabled - The SATA controllers - Dell OptiPlex 9030 All In One | Dell OptiPlex 9030 All-In-One Owners Manual - Page 45
ON - SATA is configured to support RAID mode. This option is selected by default. Drives Allows you to enable or disable the various on-board drives: • SATA-0 • SATA-1 SMART Reporting This field controls if the hard drive errors for the integrated drives are reported during system startup. This - Dell OptiPlex 9030 All In One | Dell OptiPlex 9030 All-In-One Owners Manual - Page 46
password will take effect immediately. Allows you to set, change, or delete the password on the computer's internal hard disk drive (HDD). Successful changes to this password take effect immediately. The drive does not have a password set by default. • Enter the old password • Enter the new password - Dell OptiPlex 9030 All In One | Dell OptiPlex 9030 All-In-One Owners Manual - Page 47
to determine whether changes to the system and hard disk passwords are permitted when an administrator password options will be displayed. • TPM ACPI support • TPM PPI Deprivation Override • Deactivate • module interface of the optional Computrace Service from Absolute Software. • Deactivate - Dell OptiPlex 9030 All In One | Dell OptiPlex 9030 All-In-One Owners Manual - Page 48
. If the card has not been configured by Data Protection or Encryption , the option will be disabled. • Clear Owner- This option is disabled by default. Allows you to determine if you access the Option Read Only Memory (OROM) configuration screens via hotkeys during boot. These settings prenvent - Dell OptiPlex 9030 All In One | Dell OptiPlex 9030 All-In-One Owners Manual - Page 49
one supported is greater than 3. • Enable CPUID Limit - This option is disabled by default. Allows you to enable or disable Intel TurboBoost mode of the processor. This option is enabled by default. • Disabled - Does not allow the TurboBoost driver Specifies how the computer will respond when - Dell OptiPlex 9030 All In One | Dell OptiPlex 9030 All-In-One Owners Manual - Page 50
enabled, the fan runs at full speed. This option allows you to enable USB devices to wake the computer from standby. • Enable USB Wake Support - This option is enabled by default. This option allows the computer to power up from the off state when triggered by a special LAN signal. Wake-up from the - Dell OptiPlex 9030 All In One | Dell OptiPlex 9030 All-In-One Owners Manual - Page 51
enabled when the computer boots. This option is enabled by default. Table 9. Virtualization Support Option Description Virtualization Bluetooth Both the options are enabled by default. Description Displays the service tag of your computer. Allows you to create a system asset tag if an asset - Dell OptiPlex 9030 All In One | Dell OptiPlex 9030 All-In-One Owners Manual - Page 52
selected by default. NOTE: This option is relevant only when the Integrated NIC control in the System Configuration group is set to Enable with Cloud Desktop. This option specifies the static IP address of the client. The default IP Address is 255.255.255.255 NOTE: This option is relevant only - Dell OptiPlex 9030 All In One | Dell OptiPlex 9030 All-In-One Owners Manual - Page 53
instructions on screen. 4. If you are unable to locate or find the Service Tag, click the Product Category of your computer. 5. Choose the Product Type from the list. 6. Select your computer model and the Product Support page of your computer appears. 7. Click Get drivers and click View All Drivers - Dell OptiPlex 9030 All In One | Dell OptiPlex 9030 All-In-One Owners Manual - Page 54
data on your computer. CAUTION: Anyone can access the data stored on your computer if it is not locked and left unattended. NOTE: Your computer or System Setup screen, select System Security and press . The System Security screen appears. 2. In the System Security screen, verify that Password - Dell OptiPlex 9030 All In One | Dell OptiPlex 9030 All-In-One Owners Manual - Page 55
1. In the System BIOS or System Setup screen, select System Security and press . The System Security screen is displayed. 2. In the System Security screen, verify that Password Status is Unlocked. 3. . 6. Press to save the changes and exit from the System Setup. The computer reboots. 55 - Dell OptiPlex 9030 All In One | Dell OptiPlex 9030 All-In-One Owners Manual - Page 56
your computer, click Start (Start icon) → Help and Support, and then select the option to view information about your computer. GB Table 16. Video Feature Video Controller (Integrated) Video Memory External Display Support Specification Integrated Intel HD Graphics 4600 (4th generation Core i5/ - Dell OptiPlex 9030 All In One | Dell OptiPlex 9030 All-In-One Owners Manual - Page 57
Speaker Internal speaker amplifier Internal microphone support Volume controls Table 18. Communications Feature Network adapter Wireless Table 19. Cards Feature M.2 slots Specification Intel High Definition Audio with Waves MaxxVoice Pro single 4-ohms speakers software, firmware, driver, etc.) may - Dell OptiPlex 9030 All In One | Dell OptiPlex 9030 All-In-One Owners Manual - Page 58
/ 178 vertical 0.2652 mm on-screen controls Specification one 2.5-inch SATA hard drive or one 2.5-inch SATA drive with an adapter bracket NOTE: It supports dual hard drive. one DVD-ROM SATA drive or DVD+/- RW SATA drive Specification • one line-out connector at rear • one global headset port at side - Dell OptiPlex 9030 All In One | Dell OptiPlex 9030 All-In-One Owners Manual - Page 59
30 degrees Table 26. Physical Dimensions Feature Width Height Depth: non-touch touch Weight: non-touch touch Specification 567.50 mm (22.34 inches) - Without of the computer. White light - Blinking white light indicates that the computer is reading data from or writing data to the hard drive. White - Dell OptiPlex 9030 All In One | Dell OptiPlex 9030 All-In-One Owners Manual - Page 60
light - The power supply is turned on and is functional. The power cable must be connected to the power connector (at the back of the computer) and the electrical outlet. Specification 0°C to 35 °C (50 °F to 95 °F) -40 °C to 65 °C (-40 °F to 149 °F) 20% to 80% (non-condensing) 20% to 80% (non - Dell OptiPlex 9030 All In One | Dell OptiPlex 9030 All-In-One Owners Manual - Page 61
options. Availability varies by country and product, and some services may not be available in your area. To contact Dell for sales, technical support, or customer service issues: 1. Visit dell.com/support 2. Select your support category. 3. Verify your country or region in the Choose a Country
-
 1
1 -
 2
2 -
 3
3 -
 4
4 -
 5
5 -
 6
6 -
 7
7 -
8
-
9
-
10
-
11
-
12
-
13
-
14
-
15
-
16
-
17
-
18
-
19
-
20
-
21
-
22
-
23
-
24
-
25
-
26
-
27
-
28
-
29
-
30
-
31
-
32
-
33
-
34
-
35
-
36
-
37
-
38
-
39
-
40
-
41
-
42
-
43
-
44
-
45
-
46
-
47
-
48
-
49
-
50
-
51
-
52
-
53
-
54
-
55
-
56
-
57
-
58
-
59
-
60
-
61
 |
 |

Dell OptiPlex 9030 All-In-One
Owner's Manual
Regulatory Model: W09C
Regulatory Type: W09C001