Dell OptiPlex VDI Blaster Edition Windows Embedded Standard (WES) - Administra - Page 40
Naming Your Thin Client, Joining a Domain or, Workgroup
 |
View all Dell OptiPlex VDI Blaster Edition manuals
Add to My Manuals
Save this manual to your list of manuals |
Page 40 highlights
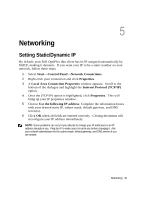
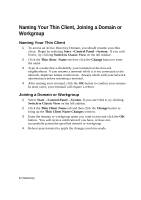
Naming Your Thin Client, Joining a Domain or Workgroup Naming Your Thin Client 1 To access an Active Directory Domain, you should rename your thin client. Begin by selecting Start→Control Panel→System. If you can't find it, try clicking Switch to Classic View on the left sidebar. 2 Click the Thin client Name tab then click the Change button to enter the name. 3 Type in a name that will identify your terminal on the network neighborhood. If you rename a terminal while it is not connected to the network, duplicate names could occur. Always check with your network administrator before renaming a terminal. 4 After naming your terminal, click the OK button to confirm your rename. In most cases, your terminal will require a reboot. Joining a Domain or Workgroup 1 Select Start→Control Panel→System. If you can't find it, try clicking Switch to Classic View on the left sidebar. 2 Click the Thin Client Name tab and then click the Change button to bring up the Thin Client Name Changes window. 3 Enter the domain or workgroup name you want to join and click the OK button. You will receive notification if you have, or have not, successfully joined the specified domain or workgroup. 4 Reboot your terminal to apply the changes you have made. 40 | Networking
-
 1
1 -
2
-
3
-
4
-
5
-
6
-
7
-
8
-
9
-
10
-
11
-
12
-
13
-
14
-
15
-
16
-
17
-
18
-
19
-
20
-
21
-
22
-
23
-
24
-
25
-
26
-
27
-
28
-
29
-
30
-
31
-
32
-
33
-
34
-
 35
35 -
 36
36 -
 37
37 -
 38
38 -
 39
39 -
 40
40 -
 41
41 -
 42
42 -
 43
43 -
 44
44 -
 45
45 -
46
-
47
-
48
-
49
 |
 |
