Dell PowerApp 110 Rack Installation Guide - Page 15
Marking the Rack, CAUTION: If you are installing more than one PowerApp appliance, install
 |
View all Dell PowerApp 110 manuals
Add to My Manuals
Save this manual to your list of manuals |
Page 15 highlights
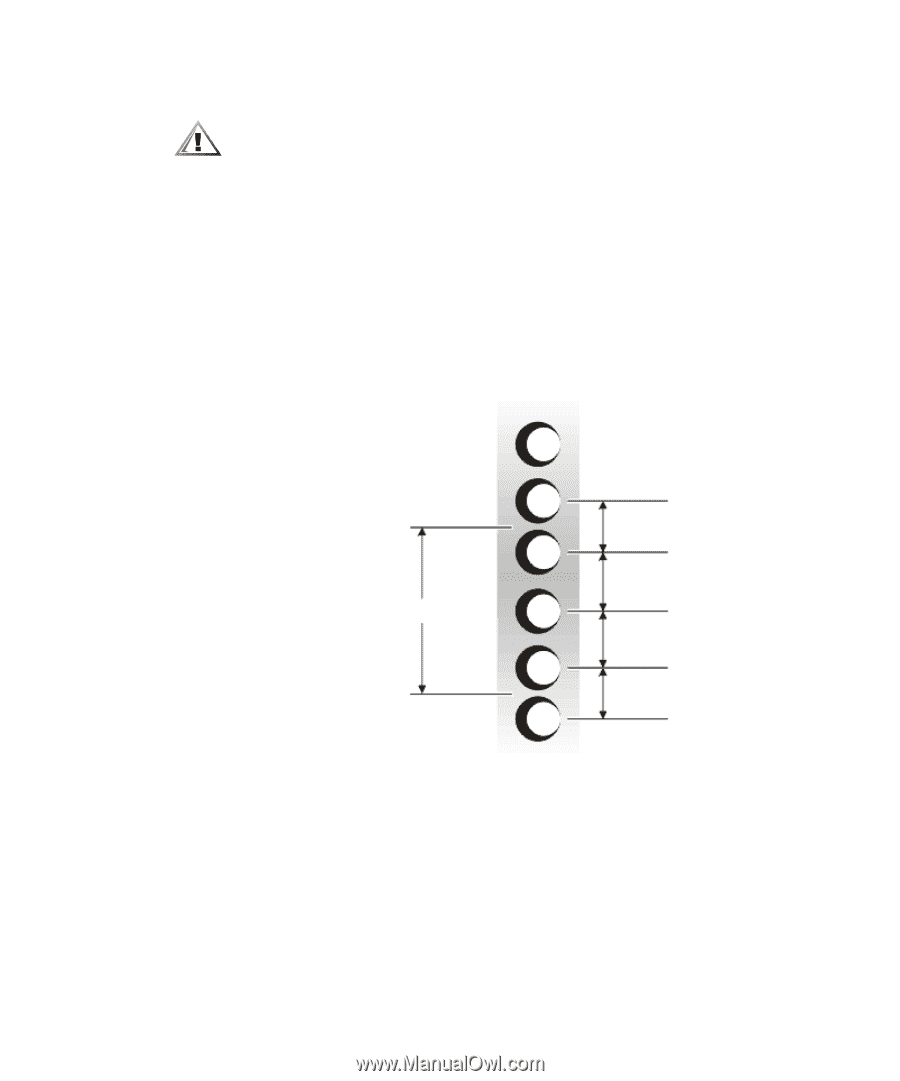
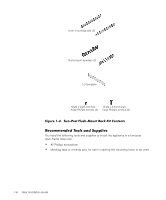
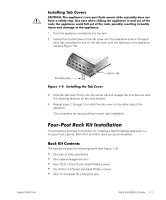
Marking the Rack 1. Determine where you want to place the bottom of the PowerApp appliance. CAUTION: If you are installing more than one PowerApp appliance, install the first appliance in the lowest available position in the rack. 2. Place the 1-U template over the front of the two-posts of the rack in the desired location. 3. Position the bottom of the template in line with the desired bottom position of the computer chassis. 4. Mark the upper and lower-mounting positions on the vertical rails as shown by the V-notches on the sides of the template. Each 1-U (1.75-inch) vertical space has three holes, with center-to-center spacing between holes (beginning at the center of the top hole of a 1-U space) of 0.625, 0.625, and 0.5 inch (see Figure 1-5). 1.75 inches (1 U) 0.5 inch 0.625 inch 0.625 inch 0.5 inch Figure 1-5. Two-Post Open-Frame Relay Rack 1-U Hole Spacing support.dell.com Rack Installation Guide 1-7
-
 1
1 -
2
-
3
-
4
-
5
-
6
-
7
-
8
-
9
-
 10
10 -
 11
11 -
 12
12 -
 13
13 -
 14
14 -
 15
15 -
 16
16 -
 17
17 -
 18
18 -
 19
19 -
 20
20 -
21
-
22
-
23
-
24
-
25
-
26
-
27
-
28
-
29
-
30
-
31
-
32
-
33
-
34
 |
 |