Dell PowerApp 110 Rack Installation Guide - Page 26
Installing the Slide Assemblies in the Rack, One Rack Unit
 |
View all Dell PowerApp 110 manuals
Add to My Manuals
Save this manual to your list of manuals |
Page 26 highlights
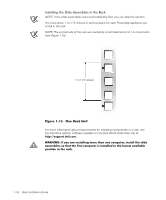
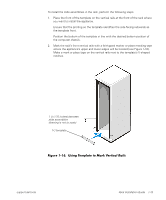
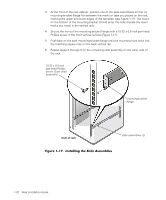
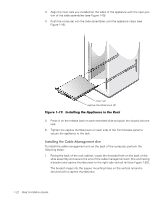
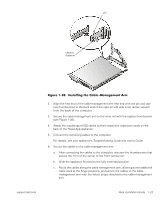
Installing the Slide Assemblies in the Rack NOTE: If the slide assemblies were preinstalled by Dell, you can skip this section. You must allow 1 U (1.75 inches) of vertical space for each PowerApp appliance you install in the rack. NOTE: The vertical rails of the rack are marked by small indentations in 1-U increments (see Figure 1-15). 1 U (1.75 inches) Figure 1-15. One Rack Unit For more information about requirements for installing components in a rack, see the Dell Rack Advisor software available on the Dell World Wide Web site at http://support.dell.com. WARNING: If you are installing more than one computer, install the slide assemblies so that the first computer is installed in the lowest available position in the rack. 1-18 Rack Installation Guide
-
 1
1 -
2
-
3
-
4
-
5
-
6
-
7
-
8
-
9
-
10
-
11
-
12
-
13
-
14
-
15
-
16
-
17
-
18
-
19
-
20
-
 21
21 -
 22
22 -
 23
23 -
 24
24 -
 25
25 -
 26
26 -
 27
27 -
 28
28 -
 29
29 -
 30
30 -
 31
31 -
32
-
33
-
34
 |
 |
