Dell PowerApp 110 Rack Installation Guide - Page 25
Removing the 24-U Rack Doors
 |
View all Dell PowerApp 110 manuals
Add to My Manuals
Save this manual to your list of manuals |
Page 25 highlights
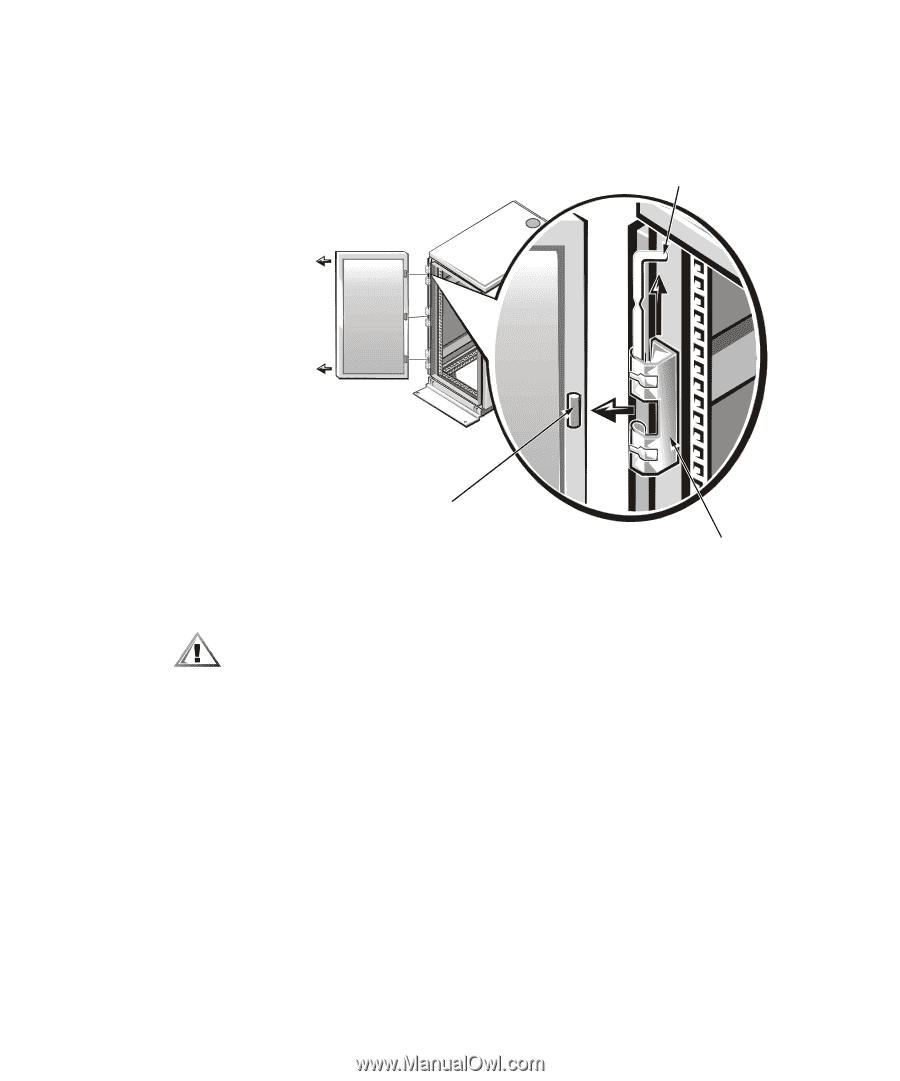
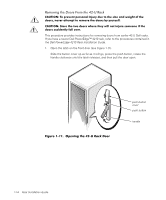
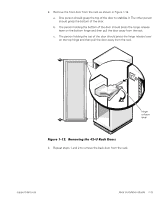
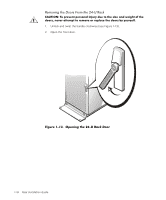
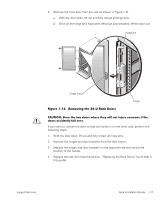
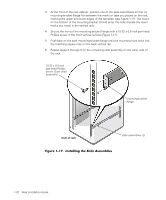
3. Remove the front door from the rack as shown in Figure 1-14. a. With the door open, lift out and fully retract all hinge pins. b. Once all the hinge pins have been lifted out and retracted, lift the door out. hinge pin hinge insert Figure 1-14. Removing the 24-U Rack Doors hinge CAUTION: Store the two doors where they will not injure someone if the doors accidently fall over. If you want to reverse the door so that the handle is on the other side, perform the following steps: 1. With the door open, lift out and fully retract all hinge pins. 2. Remove the hinges and door brackets from the door frame. 3. Replace the hinges and door brackets on the opposite side and switch the position of the handle. 4. Replace the rack door (see the section, "Replacing the Rack Doors", found later in this guide). support.dell.com Rack Installation Guide 1-17
-
 1
1 -
2
-
3
-
4
-
5
-
6
-
7
-
8
-
9
-
10
-
11
-
12
-
13
-
14
-
15
-
16
-
17
-
18
-
19
-
 20
20 -
 21
21 -
 22
22 -
 23
23 -
 24
24 -
 25
25 -
 26
26 -
 27
27 -
 28
28 -
 29
29 -
 30
30 -
31
-
32
-
33
-
34
 |
 |