Dell PowerApp 110 Rack Installation Guide - Page 30
Installing the Cable-Management Arm, Installing the Appliance in the Rack
 |
View all Dell PowerApp 110 manuals
Add to My Manuals
Save this manual to your list of manuals |
Page 30 highlights
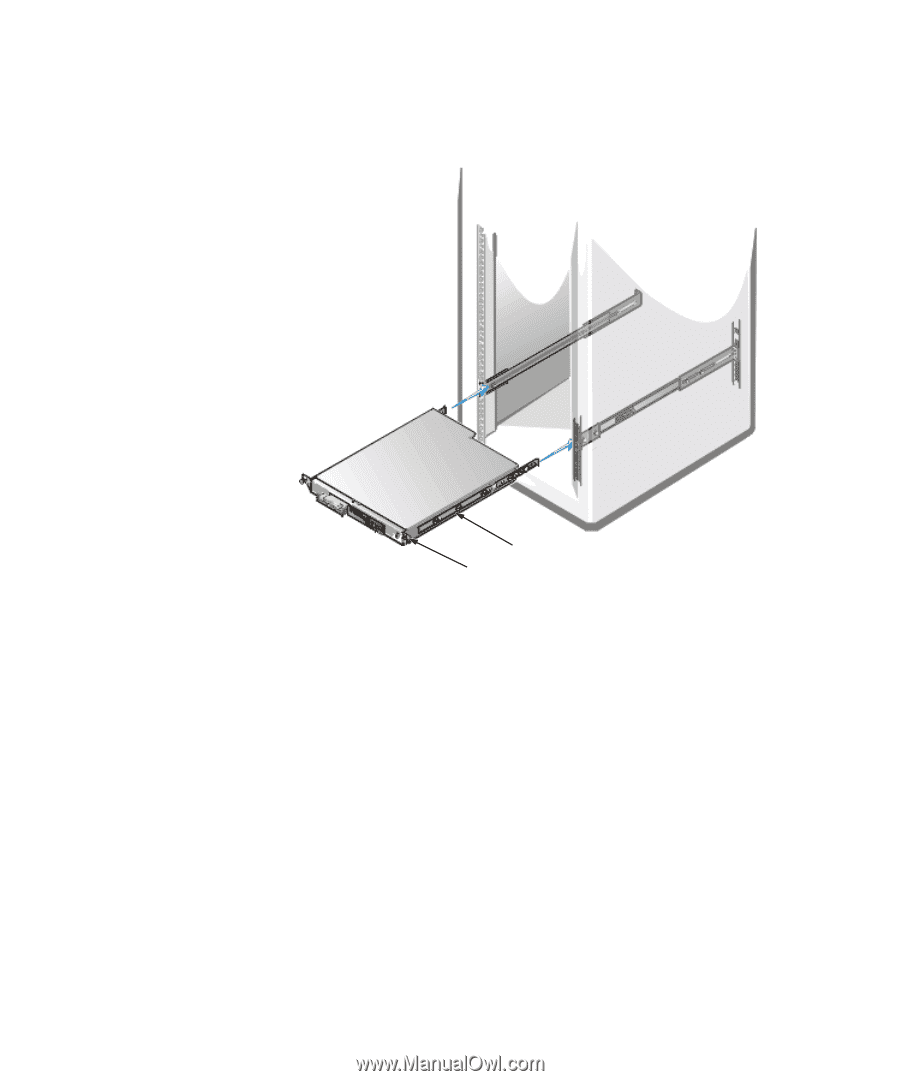
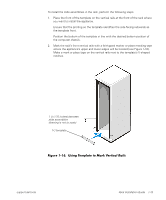
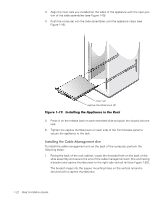
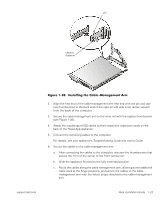
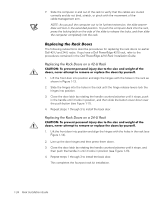
3. Align the inner rails you installed on the sides of the appliance with the open portion of the slide assemblies (see Figure 1-19). 4. Push the computer into the slide assemblies until the appliance stops (see Figure 1-19). inner rail captive thumbscrews (2) Figure 1-19. Installing the Appliance in the Rack 5. Press in on the release latch on each extended slide and push the chassis into the rack. 6. Tighten the captive thumbscrews on each side of the front chassis panel to secure the appliance to the rack. Installing the Cable-Management Arm To install the cable-management arm on the back of the computer, perform the following steps: 1. Facing the back of the rack cabinet, locate the threaded hole on the back of the slide assembly and secure the end of the cable-management arm (the end having a bracket and captive thumbscrew) to the right side vertical rail (see Figure 1-20). The bracket snaps into the square mounting holes on the vertical rail and is secured with a captive thumbscrew. 1-22 Rack Installation Guide
-
 1
1 -
2
-
3
-
4
-
5
-
6
-
7
-
8
-
9
-
10
-
11
-
12
-
13
-
14
-
15
-
16
-
17
-
18
-
19
-
20
-
21
-
22
-
23
-
24
-
 25
25 -
 26
26 -
 27
27 -
 28
28 -
 29
29 -
 30
30 -
 31
31 -
 32
32 -
 33
33 -
 34
34
 |
 |