Dell PowerApp 110 Rack Installation Guide - Page 31
Installing the Cable-Management Arm, Troubleshooting Guide, User's Guide
 |
View all Dell PowerApp 110 manuals
Add to My Manuals
Save this manual to your list of manuals |
Page 31 highlights
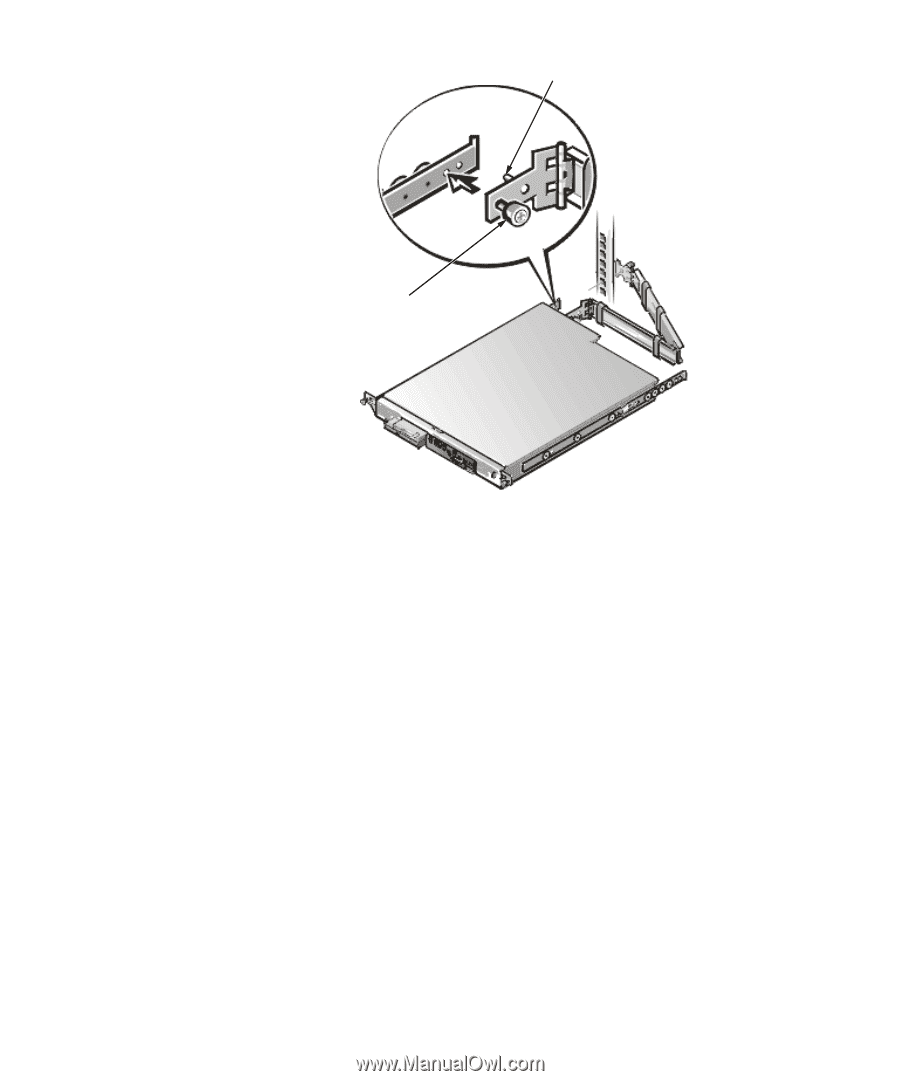
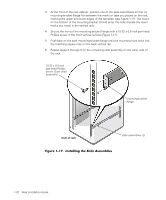
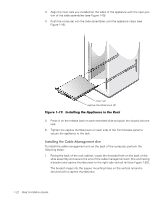
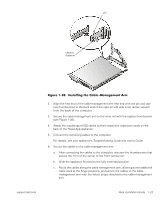
pin captive fastener Figure 1-20. Installing the Cable-Management Arm 2. Align the free end of the cable-management arm (the end with the pin and captive thumbscrew) to the back end of the right (or left) side inner rail (as viewed from the back) of the computer. 3. Secure the cable-management arm to the inner rail with the captive thumbscrew (see Figure 1-20). 4. Attach the input/output (I/O) cables to their respective expansion cards on the back of the PowerApp appliance. 5. Connect the remaining cables to the computer. For details, see your appliance's Troubleshooting Guide and User's Guide. 6. Secure the cables to the cable-management arm: a. After connecting the cables to the computer, unscrew the thumbscrews that secure the front of the server to the front vertical rail. b. Slide the appliance forward to the fully extended position. c. Route the cables along the cable-management arm, allowing some additional cable slack at the hinge positions, and secure the cables to the cablemanagement arm with the Velcro straps attached to the cable-management arm. support.dell.com Rack Installation Guide 1-23
-
 1
1 -
2
-
3
-
4
-
5
-
6
-
7
-
8
-
9
-
10
-
11
-
12
-
13
-
14
-
15
-
16
-
17
-
18
-
19
-
20
-
21
-
22
-
23
-
24
-
25
-
 26
26 -
 27
27 -
 28
28 -
 29
29 -
 30
30 -
 31
31 -
 32
32 -
 33
33 -
 34
34
 |
 |