Dell PowerApp 110 Rack Installation Guide - Page 22
Removing the Doors From the 42-U Rack, Opening the 42-U Rack Door
 |
View all Dell PowerApp 110 manuals
Add to My Manuals
Save this manual to your list of manuals |
Page 22 highlights
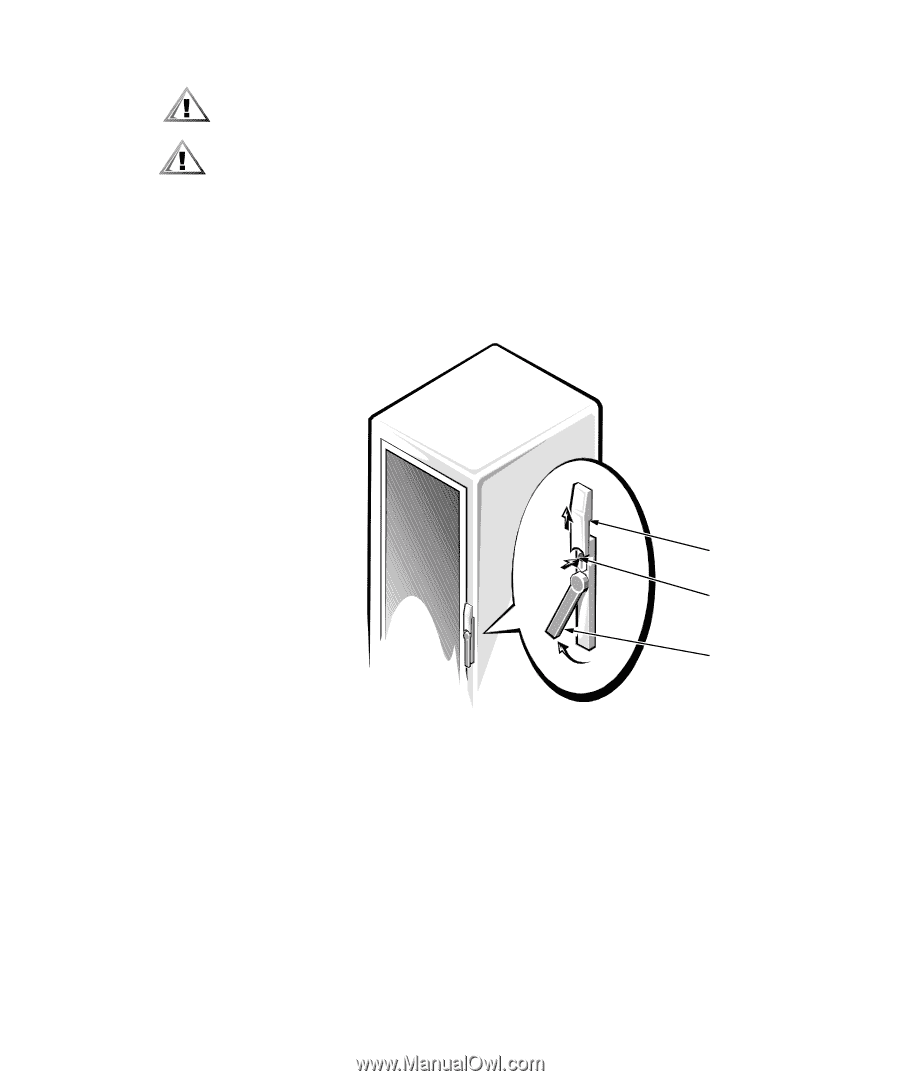
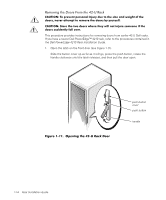
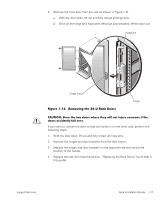
Removing the Doors From the 42-U Rack CAUTION: To prevent personal injury due to the size and weight of the doors, never attempt to remove the doors by yourself. CAUTION: Store the two doors where they will not injure someone if the doors accidently fall over. This procedure provides instructions for removing doors from earlier 42-U Dell racks. If you have a newer Dell PowerEdge™ 4210 rack, refer to the procedures contained in the Dell PowerEdge 4210 Rack Installation Guide. 1. Open the latch on the front door (see Figure 1-11). Slide the button cover up as far as it will go, press the push button, rotate the handle clockwise until the latch releases, and then pull the door open. Figure 1-11. Opening the 42-U Rack Door push-button cover push button handle 1-14 Rack Installation Guide
-
 1
1 -
2
-
3
-
4
-
5
-
6
-
7
-
8
-
9
-
10
-
11
-
12
-
13
-
14
-
15
-
16
-
 17
17 -
 18
18 -
 19
19 -
 20
20 -
 21
21 -
 22
22 -
 23
23 -
 24
24 -
 25
25 -
 26
26 -
 27
27 -
28
-
29
-
30
-
31
-
32
-
33
-
34
 |
 |