Dell PowerApp 110 Rack Installation Guide - Page 27
Using Template to Mark Vertical Rails, the computer chassis.
 |
View all Dell PowerApp 110 manuals
Add to My Manuals
Save this manual to your list of manuals |
Page 27 highlights
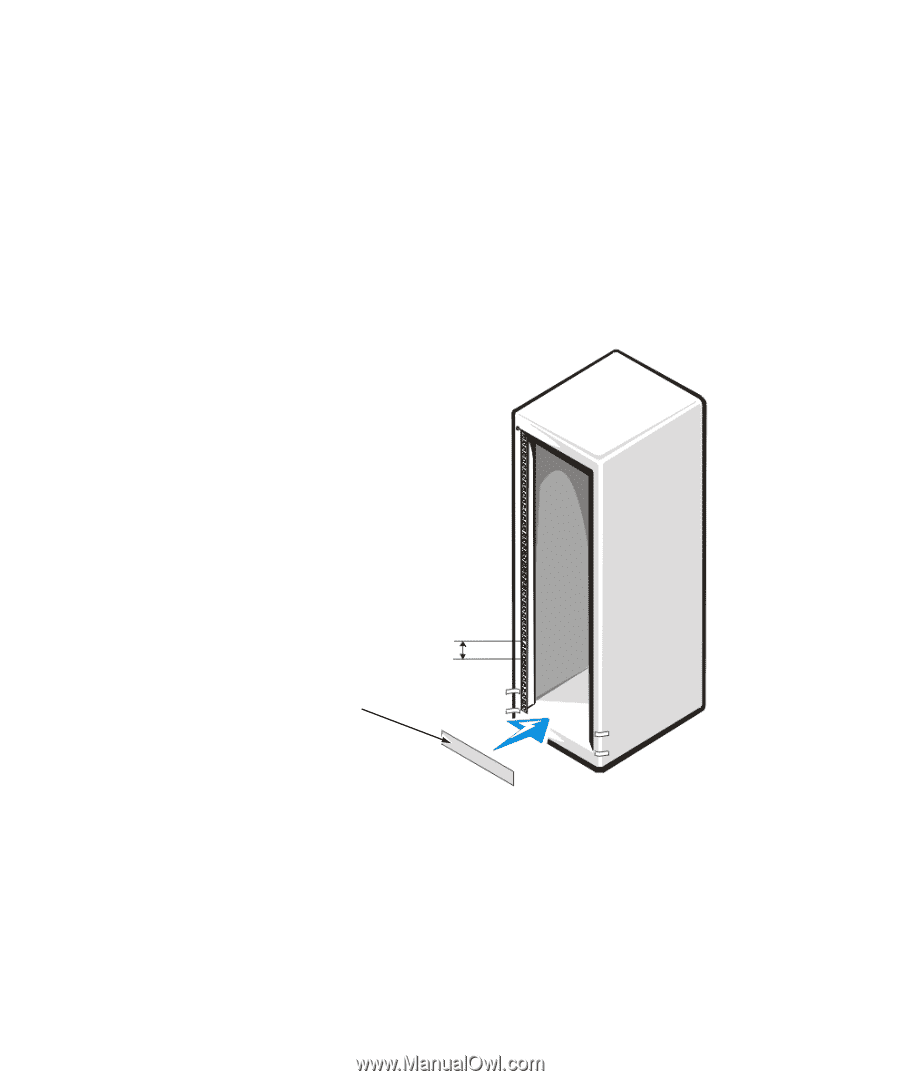
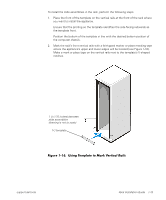
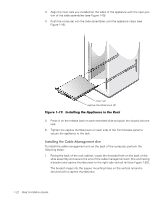
To install the slide assemblies in the rack, perform the following steps: 1. Place the front of the template on the vertical rails at the front of the rack where you want to install the appliance. Ensure that the printing on the template identifies the side facing outwards as the template front. Position the bottom of the template in line with the desired bottom position of the computer chassis. 2. Mark the rack's front vertical rails with a felt-tipped marker or place masking tape where the appliance's upper and lower edges will be located (see Figure 1-16). Make a mark or place tape on the vertical rails next to the template's V-shaped notches. 1 U (1.75 inches) between slide assemblies (drawing is not to scale) 1-U template Figure 1-16. Using Template to Mark Vertical Rails support.dell.com Rack Installation Guide 1-19
-
 1
1 -
2
-
3
-
4
-
5
-
6
-
7
-
8
-
9
-
10
-
11
-
12
-
13
-
14
-
15
-
16
-
17
-
18
-
19
-
20
-
21
-
 22
22 -
 23
23 -
 24
24 -
 25
25 -
 26
26 -
 27
27 -
 28
28 -
 29
29 -
 30
30 -
 31
31 -
 32
32 -
33
-
34
 |
 |