Dell Precision Tower 7810 Dell Precision Tower 7810 Owners Manual - Page 17
Installing the Slim Line Optical Drive, Removing the Hard Drive
 |
View all Dell Precision Tower 7810 manuals
Add to My Manuals
Save this manual to your list of manuals |
Page 17 highlights
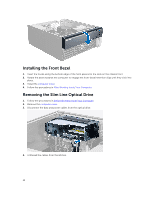
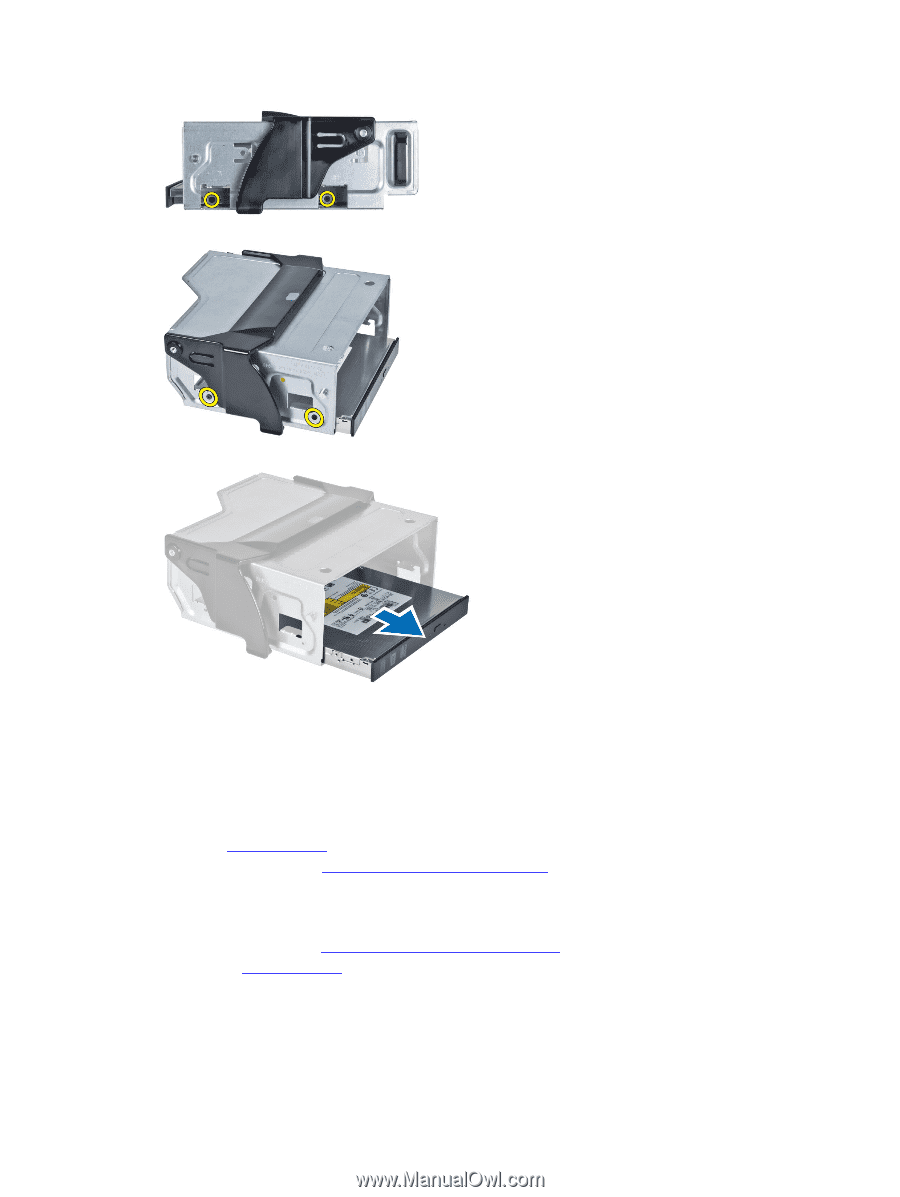
10. Remove the screws that secure the optical drive to the optical-drive cage. 11. Remove the optical drive from the optical-drive cage. Installing the Slim Line Optical Drive 1. Lift the release latch, and slide the optical-drive cage inside the compartment. 2. Press on the clasp to release the latch and thread the cables into the holder. 3. Connect the power cable to the back of the optical drive. 4. Connect the data cable to the back of the optical drive. 5. Install the computer cover. 6. Follow the procedures in After Working Inside Your Computer. Removing the Hard Drive 1. Follow the procedures in Before Working Inside Your Computer. 2. Remove the computer cover. 3. Disconnect the power supply and data cables from the hard drive. 17
-
 1
1 -
2
-
3
-
4
-
5
-
6
-
7
-
8
-
9
-
10
-
11
-
 12
12 -
 13
13 -
 14
14 -
 15
15 -
 16
16 -
 17
17 -
 18
18 -
 19
19 -
 20
20 -
 21
21 -
 22
22 -
23
-
24
-
25
-
26
-
27
-
28
-
29
-
30
-
31
-
32
-
33
-
34
-
35
-
36
-
37
-
38
-
39
-
40
-
41
-
42
-
43
-
44
-
45
-
46
-
47
-
48
-
49
-
50
-
51
-
52
-
53
-
54
-
55
-
56
-
57
-
58
-
59
-
60
-
61
-
62
-
63
-
64
-
65
-
66
-
67
-
68
 |
 |
10.
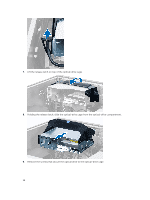
Remove the screws that secure the optical drive to the optical-drive cage.
11.
Remove the optical drive from the optical-drive cage.
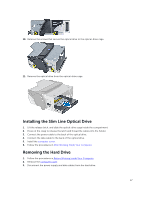
Installing the Slim Line Optical Drive
1.
Lift the release latch, and slide the optical-drive cage inside the compartment.
2.
Press on the clasp to release the latch and thread the cables into the holder.
3.
Connect the power cable to the back of the optical drive.
4.
Connect the data cable to the back of the optical drive.
5.
Install the
computer cover
.
6.
Follow the procedures in
After Working Inside Your Computer
.
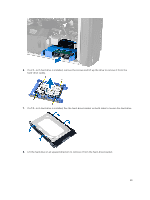
Removing the Hard Drive
1.
Follow the procedures in
Before Working Inside Your Computer
.
2.
Remove the
computer cover
.
3.
Disconnect the power supply and data cables from the hard drive.
17