Dell STUDIO HYBRID Setup Guide - Page 23
Changing the Sleeve
 |
UPC - 672200007013
View all Dell STUDIO HYBRID manuals
Add to My Manuals
Save this manual to your list of manuals |
Page 23 highlights
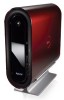
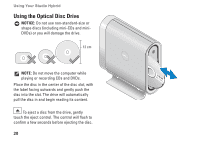
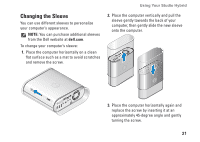
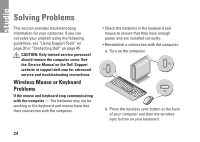
Using Your Studio Hybrid Changing the Sleeve You can use different sleeves to personalize your computer's appearance. NOTE: You can purchase additional sleeves from the Dell website at dell.com. To change your computer's sleeve: 1. Place the computer horizontally on a clean flat surface such as a mat to avoid scratches and remove the screw. 2. Place the computer vertically and pull the sleeve gently towards the back of your computer, then gently slide the new sleeve onto the computer. 3. Place the computer horizontally again and replace the screw by inserting it at an approximately 45-degree angle and gently turning the screw. 21
-
 1
1 -
2
-
3
-
4
-
5
-
6
-
7
-
8
-
9
-
10
-
11
-
12
-
13
-
14
-
15
-
16
-
17
-
 18
18 -
 19
19 -
 20
20 -
 21
21 -
 22
22 -
 23
23 -
 24
24 -
 25
25 -
 26
26 -
 27
27 -
 28
28 -
29
-
30
-
31
-
32
-
33
-
34
-
35
-
36
-
37
-
38
-
39
-
40
-
41
-
42
-
43
-
44
-
45
-
46
-
47
-
48
-
49
-
50
-
51
-
52
-
53
-
54
-
55
-
56
-
57
-
58
-
59
-
60
-
61
-
62
-
63
-
64
 |
 |

21
Using Your Studio Hybrid
Changing the Sleeve
You can use different sleeves to personalize
your computer’s appearance.
NOTE:
You can purchase additional sleeves
from the Dell website at
dell.com
.
To change your computer’s sleeve:
Place the computer horizontally on a clean
1.
flat surface such as a mat to avoid scratches
and remove the screw.
Place the computer vertically and pull the
2.
sleeve gently towards the back of your
computer, then gently slide the new sleeve
onto the computer.
Place the computer horizontally again and
3.
replace the screw by inserting it at an
approximately 45‑degree angle and gently
turning the screw.